
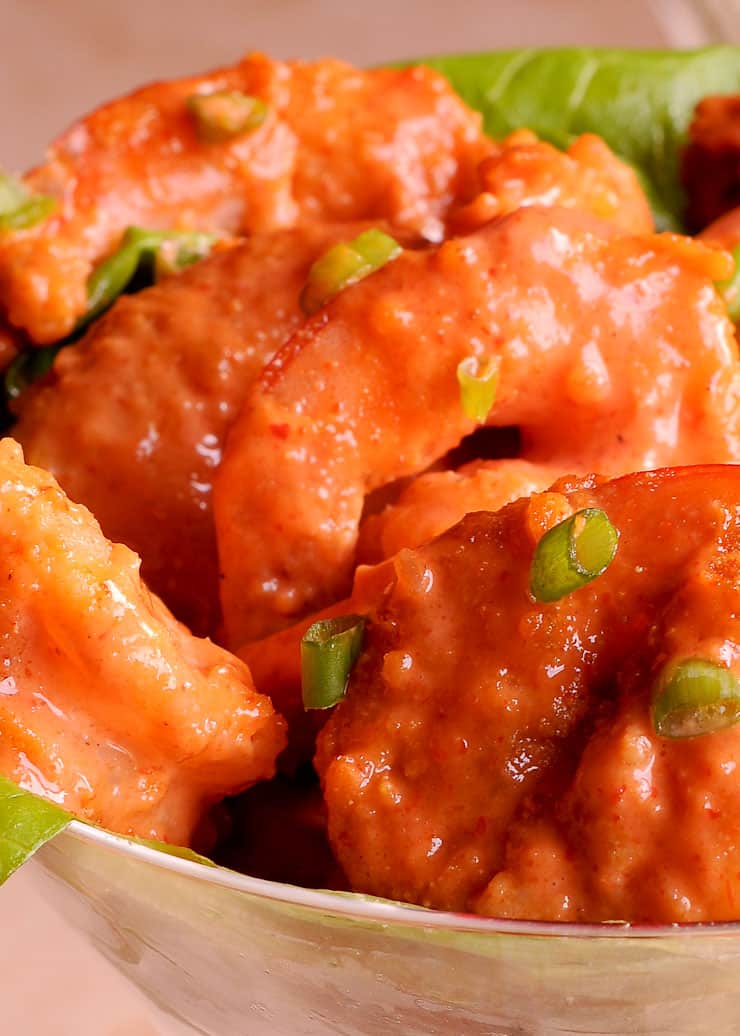
You don't need a deep fryer to make perfect Dynamite Shrimp. These crispy pan-fried shrimp are coated in a bold, restaurant-style spicy mayo sauce - and they come together in just 20 minutes using a simple skillet and avocado oil. This is the no-mess, lighter version of the PF Chang's appetizer everyone loves, with the same addictive crunch and heat.

Dynamite shrimp is that perfectly crispy, saucy appetizer you've seen on the menu at Japanese restaurants and PF Chang's - but almost every recipe online calls for deep frying in a full pot of oil. This version skips the deep fryer entirely.
By shallow pan-frying in a carbon steel skillet with just a few tablespoons of avocado oil at high heat, each shrimp gets a shatteringly crisp corn flour coating without the grease or the mess. Toss them in a quick homemade dynamite sauce made with mayo, sweet chili sauce, sriracha, and honey, and you've got a seriously addictive appetizer that tastes exactly like your favorite restaurant - but better.
The best appetizers are the ones that can be made ahead! If you want to make these for a party or gathering, I wrote a complete guide to make-ahead appetizers you can prep 48 hours in advance, including timing tips for dips, stuffed bites, marinated appetizers, and more.
What Is Dynamite Shrimp?
Dynamite shrimp is crispy fried shrimp tossed in a creamy, spicy-sweet mayo-based sauce spiked with sriracha, chili sauce, and a touch of sweetness. The batter and toss timing both matter more than most recipes admit - get them right and the shrimp stay crisp instead of soggy.
How Is It Different from Bang Bang Shrimp?
Bang Bang Shrimp leans sweet - thinner batter, sauce built on sweet chili sauce. Dynamite shrimp leads with mayo richness first, heat second, using a heartier flour dredge that coats more heavily and tastes unmistakably restaurant-appetizer. If you've made my Bang Bang Cauliflower, you can already see the difference in sauce color and consistency - the pale-gold bang bang glaze versus the creamy, orange-red dynamite sauce.
Why You'll Love This Recipe
- No deep fryer required. This version uses a carbon steel skillet and just three tablespoons of avocado oil - same crispy crust, none of the splatter or the quart of spent oil to deal with afterward.
- On the table in 20 minutes. The sauce comes together in one bowl while the shrimp dredge rests. Genuinely weeknight-fast, not "fast for a fried recipe" fast.
- A sauce that's actually balanced. Mayo, sweet chili sauce, sriracha, and honey - more nuanced than the two-ingredient mayo-sriracha versions most recipes default to, and it tastes like something a restaurant actually worked on.
- Less oil, same crunch. Hot pan, thin oil layer, fast cook. You're not compromising on texture to avoid the deep fryer. You're just using better technique.

Essential Ingredients
- Shrimp: Fresh, peeled, and deveined shrimp are ideal for this recipe. Using raw shrimp ensures the best texture and flavor, as precooked shrimp can become rubbery when fried. If you're not sure what you're actually buying, or you keep ending up with bags that gush water into the pan, I talk about labels, IQF shrimp, and which ones to avoid in Which Shrimp to Buy.
- Cornstarch and Flour: These create a light, crispy coating. Cornstarch is especially important for achieving that signature crunch without excessive oil absorption.
- Egg: Used as a binder to help the batter adhere to the shrimp, ensuring a uniform coating.
- Mayonnaise: The base of the dynamite sauce, providing creaminess and richness.
- Sriracha Sauce: Adds the signature spicy kick. Sriracha is a popular choice, but any hot sauce can be used to suit your taste.
- Sugar: Balances the heat and adds a subtle sweetness to the sauce.
How To Make Dynamite Shrimp
1. Make the Dynamite Sauce
Whisk together mayonnaise, sweet chili sauce, sriracha, and honey in a small bowl until smooth. Adjust the ratio to suit your taste for heat and sweetness.Taste it now - this is your only chance to adjust before the shrimp go in. Want more heat? Add sriracha in small increments. Want it slightly sweeter and milder? A little more honey does the job. Set the bowl aside; the sauce works at room temperature.
The same sauce logic applies to my Spicy Shrimp Tacos - balance first, then adjust to taste.
2. Batter the Shrimp
Pat your shrimp completely dry with paper towels - this is the single most important step. Any surface moisture turns your dredge into a paste and kills the crunch before the shrimp ever hits the pan.
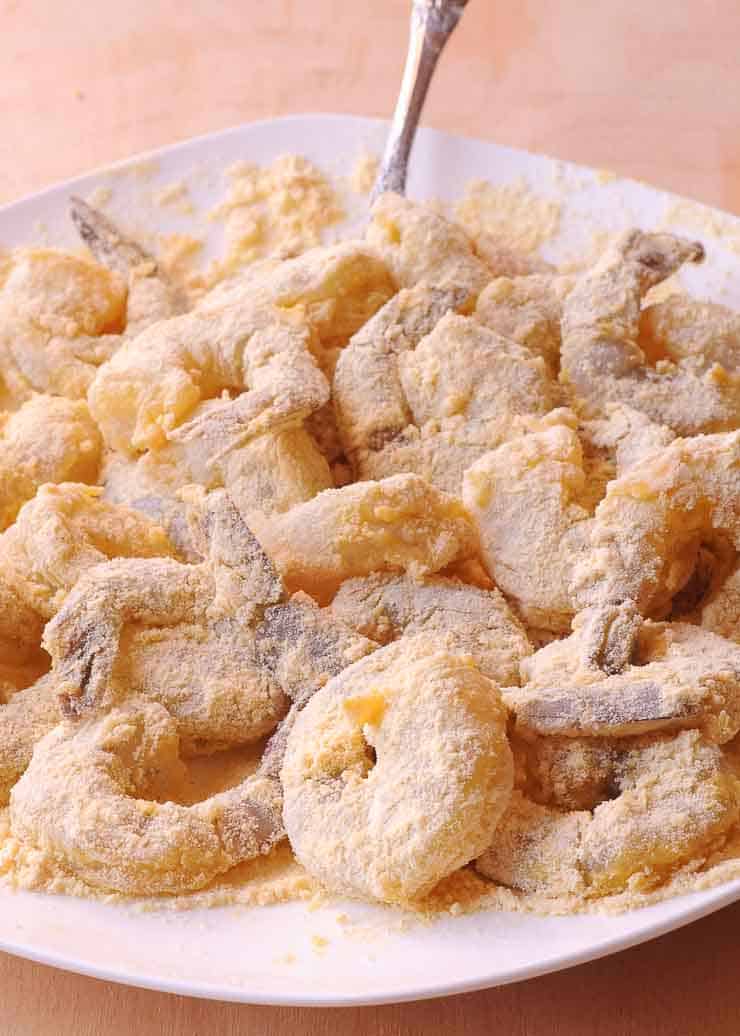
Season the corn flour with salt, pepper, and a pinch of garlic powder, then toss the shrimp until each one is fully coated. Shake off the excess. A thin, even layer is what you're after, not a thick shell.
3. Pan-Fry to Crispy Perfection
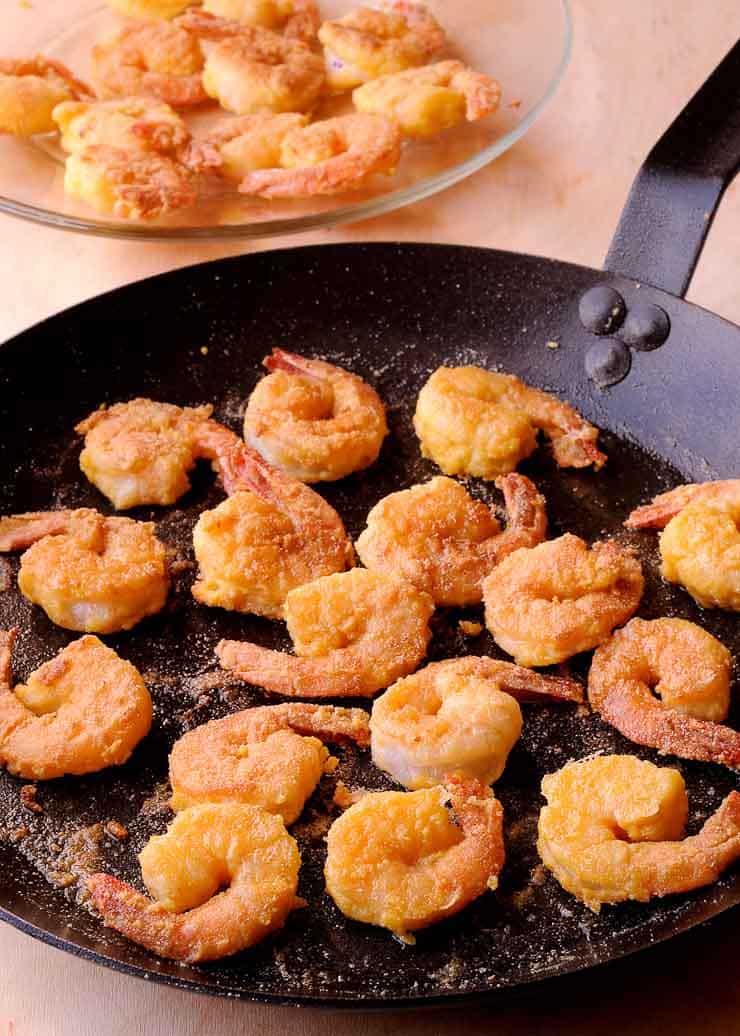
Heat a carbon steel skillet over medium-high heat until hot, then add the avocado oil. You're looking for the oil to shimmer but not smoke before the shrimp go in.
Work in a single layer - crowding the pan drops the temperature and steams instead of fries. Cook 2 minutes per side until the coating is golden and the shrimp are just cooked through. They move from perfect to overdone fast, so don't walk away.
4. Toss and Serve
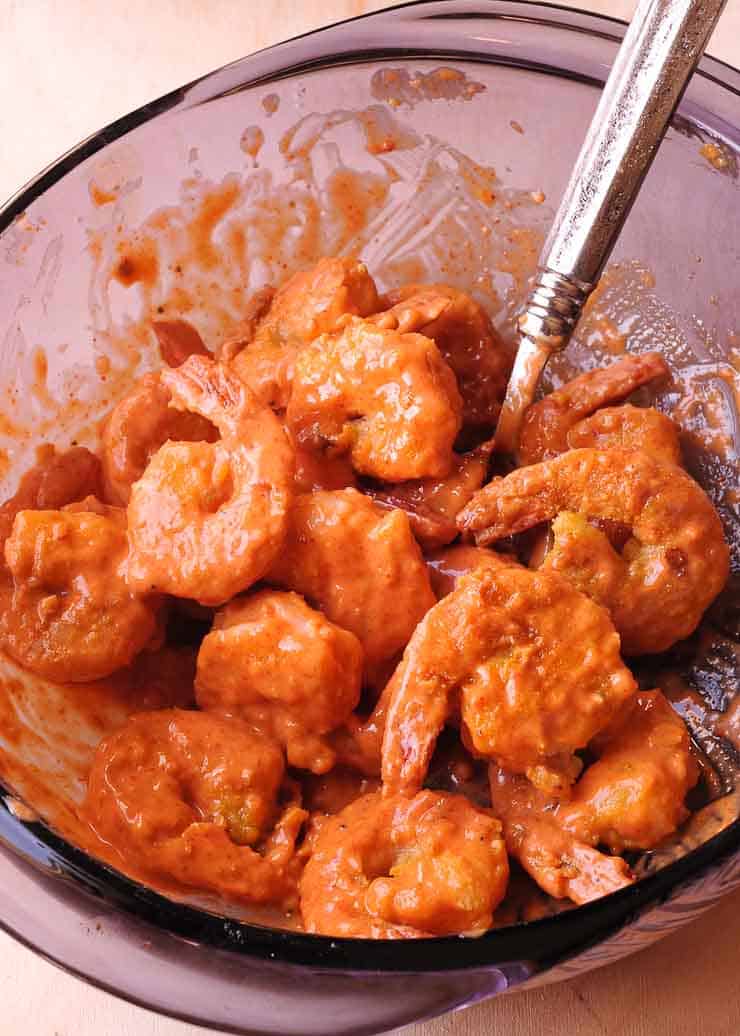
Transfer the shrimp to a bowl and immediately spoon the dynamite sauce over them, tossing gently to coat.
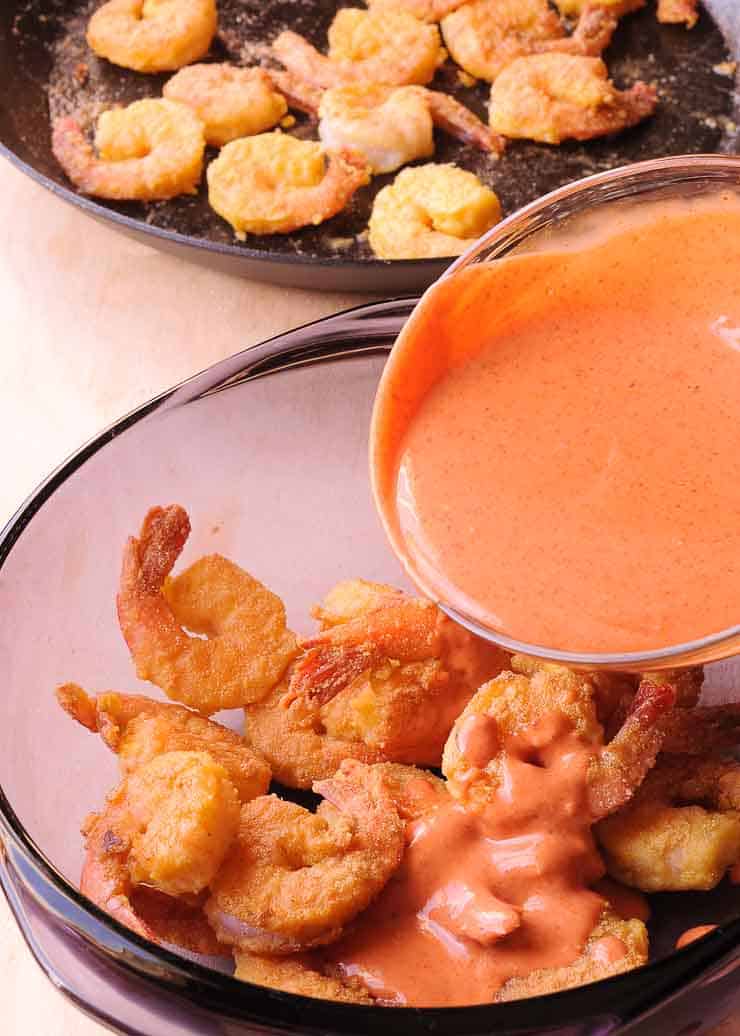
Don't let them sit in the sauce - toss right before serving to keep the crust intact.

Pan-Fried Dynamite Shrimp Appetizer
Ingredients
Sauce:
- ½ Cup Mayo
- ⅓ Cup Sweet Chili Sauce
- 2 tablespoon Sriracha (or any chili sauce)
- 1 teaspoon honey
Shrimp:
- 1 Egg (whisked)
- 1 teaspoon Soy Sauce
- ⅔ Cup corn flour
- ½ teaspoon Sea Salt
- ½ lb. Shrimp (Peeled and deveined, medium in size)
- 1 Scallion (for garnish)
Optional Add-Ons
- Lettuce (whole pieces)
- Scallions (finely chopped)
Instructions
Prepare the Shrimp
- Pat the shrimp dry with paper towels to remove excess moisture. This helps the batter stick better and ensures a crispier result.
Make the Batter
- Mix egg, soy sauce, corn flour and salt in a shallow bowl. The batter should be thick enough to coat the shrimp but not too heavy.
Dredge the Shrimp
- Dip each shrimp into the batter, ensuring it's fully coated. Let excess batter drip off before frying.
Fry the Shrimp
- Heat oil in a frying pan and fry the shrimps on medium heat, about 1 minute per side. For a total of 2 minutes. Don't overcrowd the pan. I cooked my shrimps in 2 batches. Remove from oil immediately and drain on a paper towel.
Make the Dynamite Sauce
- Whisk together mayo, sweet chili sauce, sriracha and honey together until well blended. Adjust the ratio to suit your taste for heat and sweetness.
Toss and Serve
- Toss the cooked shrimp in the dynamite sauce until well coated.
- Serve garnished with spring onions. Transfer the remaining sauce into serving bowl or cocktail glass.
The Secret to Crispy Pan-Fried Shrimp
Four things make or break the crust: a carbon steel skillet (heats evenly and holds temperature when cold shrimp hit the pan), avocado oil (high smoke point means you can cook hot without burning), corn flour (lighter and crispier than all-purpose - don't substitute), and a single layer in the pan. Skip any one of these and you're steaming, not frying.
Can I use frozen shrimp?
Yes - frozen shrimp work well here, and honestly most "fresh" shrimp at the grocery counter has already been frozen and thawed anyway. The key is to thaw them fully in the fridge overnight, then pat them aggressively dry before dredging. Any residual moisture is the enemy of a crispy crust.
What's the difference between corn flour and cornstarch?
They're not the same thing, and the swap matters. Corn flour is finely milled whole corn - it gives the coating body and a subtle flavor. Cornstarch is pure starch with no flavor, and while it fries up slightly crispier, it produces a thinner, more delicate shell. Either works here, but corn flour gives you that heartier, restaurant-style coating that holds up better once the sauce hits.
Can I make the sauce in advance?
Yes, and you should. The dynamite sauce actually improves after a few hours in the fridge as the flavors meld. Make it up to 3 days ahead and store it in a sealed jar. Just give it a quick stir before using - the ingredients can separate slightly as it sits.
Is dynamite shrimp gluten-free?
It can be with one easy swap. Replace the corn flour with a certified gluten-free version (most standard corn flour is processed in facilities that handle wheat) and make sure your sriracha and sweet chili sauce labels are gluten-free certified. Everything else in the recipe is naturally gluten-free.
Dynamite Sauce Variations
- Milder Version: Cut the sriracha by half and add an extra teaspoon of honey. The sauce stays creamy and flavorful without the heat - still dynamite, just with a longer fuse.
- Extra Spicy Version: Add a teaspoon of chili garlic sauce alongside the sriracha. It brings a deeper, more complex heat than sriracha alone and gives the sauce a slightly chunkier texture that clings better to the shrimp.
- Can You Use the Sauce for Anything Else? Absolutely. It works as a dipping sauce for Honey Sriracha Chicken Drumsticks, a drizzle over rice bowls, or a spread for Chipotle Salmon Tacos. Make a double batch - it keeps in the fridge for up to a week and improves after a day when the flavors have had time to settle.
Can You Air Fry Dynamite Shrimp?
Yes, and it works better than you'd expect. Dredge the shrimp exactly as written, then arrange them in a single layer in your air fryer basket - no overlapping. Spray generously with avocado oil, which is what gives you the golden crust the hot air alone can't produce.
Air fry at 400°F for 8-10 minutes, flipping once at the halfway mark. They won't be identical to the pan-fried version - the crust is slightly lighter - but they're genuinely crispy and a solid option if you're making a larger batch and want to keep the stovetop free.
Serving Suggestions
Dynamite shrimp is versatile enough to move well beyond the appetizer plate.
- Lettuce cups - spoon the sauced shrimp into butter lettuce leaves with shredded cabbage and a drizzle of extra dynamite sauce for a low-carb appetizer that looks like you tried harder than you did
- Rice bowls - serve over steamed jasmine rice with sliced avocado, cucumber, and a sprinkle of sesame seeds for a fast weeknight dinner. pairs especially well alongside my Mango Avocado Salad
- Sushi rice - the slight tang of seasoned sushi rice cuts thro.ugh the richness of the sauce better than plain rice; highly recommend this pairing
- Party appetizer platter - serve in a shallow bowl with toothpicks, extra sauce on the side, and scallions scattered over the top: air with my Crispy Air Fryer Chicken Wings for a full appetizer spread
How to Store and Reheat
- Refrigerator: Store leftover shrimp in an airtight container for up to 3-4 days. Note: do not store them already tossed in sauce if you plan to reheat - the coating absorbs the moisture and loses its crunch. Store the sauce separately and toss fresh after reheating.
- Best Way to Reheat: The air fryer is the only reheating method worth using here. Set it to 375°F and reheat for 3-4 minutes until the crust is crisp again. The microwave turns the coating soft and rubbery within seconds - avoid it entirely for anything fried.
- Can You Freeze It? I don't recommend it. The corn flour coating absorbs moisture during the freeze-thaw cycle, turning the crust dense and gummy by the time it reheats. The shrimp themselves also lose their snap in texture after freezing.
- Can I make Dynamite Shrimp ahead? If you want to prep ahead, make the sauce up to 3 days in advance and cook the shrimp fresh - the actual cook time is only 4 minutes, so the effort saved isn't worth the quality lost.
Love shrimp as much as I do? Take a look at How to Cook Shrimp on the Stove, my full Shrimp Guide, and this collection of Healthy Shrimp Recipes for more easy dinners to make next.


Lucille says
I made this recipe and it was delicious! I omitted the honey from the sauce and used part tempura and part panko breadcrumbs instead of corn flour. The shrimp were still crunchy the next day!!! Will definitely be making this again!
Jennifer says
I patted the shrimp super dry as you suggested - great tip and directions! I used corn flour and it was perfect!
Olya Shepard says
Thank you Jennifer. Yes, patting shrimp dry is super important step!
Olya says
Lucille - great to hear that it worked with the substitution of panko/tempura and crunchiness the next day! And thank you so much for the 5-star rating!
Magillacuddy says
Amazing, thank you for sharing! We did tempura, only because we didn’t have corn meal.
Olya says
Amazing! Tempura batter works too!
Sally says
This was AMAZING. The shrimp was crunchy and it was perfect.
Olya says
Crunchy shrimp sounds great right now:). Glad you made it and enjoyed it.
Aloy says
i AM MAKiNG THiS iN 2021 XD
Olya says
Perfect choice for 2021!
Mohamed says
Hi
Can I replace corn flour with something else?
Thank you
Olya says
You can use wholemeal almond flour (not the white blanched version).
Jenna says
THe shrimp was crispy and the sauce so rich and perfect!
kenny says
I'll be making it with sriraracha cilli sauce to make it even spicier.
shrimp fan says
nice looking shrimp there. I will be making it for New Years.