
No Bake Oreo Dessert will amaze you with its decadent layers! They are full of flavor from chocolate pudding and sweetened cream cheese. Quick and easy heavenly dessert that is light and creamy! We also topped it with Cool Whip and crushed Oreos.

I love making fun desserts with Oreos. I made more than enough on them in the last couple of years. But this is truly the ultimate No Bake Oreo dessert there is. Well, maybe with the exception of amazing Instant Pot Oreo Cheesecake and these Oreo Chocolate Chip Cookies.
It’s so delicious with Oreo crust on the bottom and alternating silky layers of sweet goodness.
Who knows – this may be the dessert of your dreams. Well, maybe not yours, but your child’s. Or your husband’s (or wife’s). You might even gain a few more pounds new friends when you serve this at a party. But either way, this is the best tasting No Bake Oreo Dessert you will ever taste!
Chill No Bake Oreo Dessert before serving
For best results, make sure to chill this No bake Oreo dessert for at least 3-4 hours. We want to do this in order for all layers to settle down. Besides, they will become firm enough for you to be able to cut it more easily. I love making it the night before and just chilling it overnight.

Serving it immediately will still deliver a perfectly delicious dessert. But the layers might still be too soft and it will not cut as nicely.
What size baking dish to use
I used 9×9 inch square pan to make No Bake Oreo Dessert. But you can also successfully make this in 9×13 inch dish. However 8×8 will be a little bit too small. It will work, but you will have to reduce quantities slightly.
How to make No Bake Oreo Dessert
- You will need 20 Oreos for the crust. I bought a package of double layered Oreos. And I used 2 rows of Oreos for the crust. By the way, you should have 30 total in the package, 10 in each row.
- Crush Oreos either with a rolling pin or in a food processor. I used a rolling pin and kept hitting the Oreos in the zip lock bag:) until I liked what I saw. You can see pictures further down.
I did not use food processor for this recipe. But if you have one, I highly recommend to do it. I did it for my Instant Pot Oreo Cheesecake Recipe and the result was amazing.
- I added crushed Oreos to 9×9 inch pan. Then I added 1 stick of melted butter. I combined butter and Oreos with a spoon. Then I pressed them into the pan with a measuring cup’s flat surface to form a crust. Actually have your kids do that! They will enjoy it.
When crushing the Oreos my son kept telling me “You are ruining them, stop it!” And he even tried to take away my rolling pin. Not surprisingly he didn’t like when I refused to oblige.
No Bake Oreo Dessert Step by Step in Pictures:
Let’s start! Just follow the picture tutorial below and then read the instructions a couple of times. And you’re an expert of No Bake Oreo Dessert!
- You will crush the Oreos by placing them in the zip lock bag. Then use a rolling pin to crush them. Don’t roll it, but use it as a bat:) and hit those Oreos hard! I suppose you can roll it too, but it’s harder to crush them by just rolling.
- Next, you will make a crust by arranging crushed Oreos on the bottom of 9×9 baking dish. Add melted butter. Using a measuring cup or any other flat surface, flatten the Oreos:

- You will add cream cheese/cool whip mixture on top of the crust. Try to even it out with a spatula to create an smooth layer:

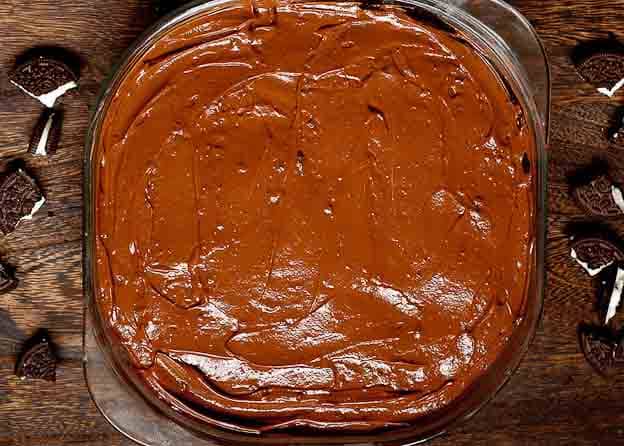
- Add chocolate pudding on top of the cream cheese mixture. Even it out with a spatula, creating a nice even layer:
- Add remaining jar of cool whip on top of the chocolate pudding layer. Keep some of the cool whip’s spikiness on top.
- Crush remaining 10 Oreos right on top of the cool whip layer.
- Break 8 Oreos by hand right over the top of the cake in chunks.
- Then crush 2 Oreos to really fine crumb for the center section.


And this is how you make No Bake Oreo Dessert!
If you are in a mood to make more no bake desserts, how about these amazing recipes:
No Bake Oreo Cheesecake
Strawberry Icebox Cake
Chocolate Pudding Cream Pie

Oreo No Bake Dessert with Cool Whip, Chocolate Pudding and Cream Cheese
Ingredients
- 1 package Double-Stuffed Oreo cookies, (30 cookies or 15.35 oz.)
- 8 tablespoon butter, (1 stick)
- 2 packages Instant Chocolate pudding mix, (3.9 oz. each)
- 3 cups half and half, (half milk/half heavy cream)
- 2 containers Cool Whip, (8 oz. each)
- 1 package cream cheese, (8 oz.)
- ½ cup powdered sugar
Instructions
Crushing Oreos:
- Take a large zip-lock bag and place 20 Oreo cookies inside (2 rows of the box, or ⅔ of the box) . Keep remaining row (10 cookies) untouched – we will use them to decorate the top of the dessert. Seal bag shut, place it on counter and using a rolling pin (or a wooden spoon), crush the cookies until they are in chunky crumbs. Some fine crumbs are OK.
Making Oreo Crust:
- Pour all of the cookie crumbs into a 9×9 baking pan. Melt the butter in a small saucepan over medium heat and then pour it over Oreo crumbs and mix well with a fork to combine. Once combined, press into the pan with a measuring cup’s flat surface (have your kids do that!) to form a resemblance of a crust.
Preparing Chocolate Pudding:
- In a bowl, whisk together the 2 pudding mixes and half and half. We are making it at this point in order for it to have a couple of minutes to set. Place it in the freezer so that the pudding can get set faster.
Making Cream Cheese/Cool Whip Layer:
- Soften cream cheese by microwaving unwrapped cheese block for 20 seconds. Once done, sift in the powdered sugar and whisk together until sugar is well incorporated.
- Next, fold in one container of Cool Whip either with the same whisk or with a spatula.
Adding Cream Cheese/Cool Whip Layer (1st layer)
- Once the mixture is well mixed and uniform, spread this Cream Cheese/Cool Whip mixture over the cookie crust.
Adding Chocolate Layer (2nd layer)
- Take the chocolate pudding out of the freezer and using a rubber spatula, spread it over the cream cheese mixture.
Adding Cool Whip Layer (3rd layer)
- Next, spread the other container of Cool Whip over the chocolate pudding layer.
Oreo Cookies for the topping
- Finally, crumble the remaining 10 Oreo cookies right on top of the Cool Whip layer. Crush 2-3 of them to a fine crumb and sprinkle on top.
Don’t forget to refrigerate before serving!
- Chill at least for 3-4 hours (until firm), or overnight. Chilling is necessary for all the layers to set and it will also be much easier and less messy when cutting it.
Nutritional information is provided as a courtesy only. This information comes from online calculators. Although whatsinthepan.com attempts to provide accurate nutritional information, these figures are only estimates.
Made this for our bible study last night! Everyone loved it!
So great!
Yeah so first of all there is no way all of this would have fit in a 9×9 pan thankfully I ignored this part and uses a 13×9 which its filled to the brim. Second of all this was the most aggaravating recipe I have ever follow. The Cool Whip and cream cheese mixture was unbelievably difficult to spread on the crust I followed every step to the T.. also I would not freeze the pudding as the recipe says by the time I was ready for it it was completely Frozen.. again as I said I followed step by step. So after the pudding was thawed it was really sticky so it was also very very difficult to spread on top of the cream cheese and Cool Whip mixture and it also started to pull up the cream cheese and Cool Whip mixture as I spread it on so by the time I finally got it all flattening laid out it was somewhat mixed together. So that would explain my rating. It was just a very difficult recipe and the size of the pan kind of made me mad because if I would have started with a 9×9 pan I would have been very angry to find out later on in the recipe that it was too small after pressing down the crust and mixing everything that was completely sticky together.
9 by 9 pan? This seems like an awful lot of ingredients to fit in a 9 by 9 pan. Just wanted to double-check before I started making this in a 9 by 9 pan and it not fit
I just measured it – it’s 9×9 Ikea pan, and it’s 2.5 inches tall. Yours might not be as high as mine, and in that case it will overflow.
I made this delicious oreo cake and my kids just devoured it. Thank you!
Do you think this can be frozen?
Yes, you can freeze it.
I made this for my family this weekend, but I left off butter fro the crust! Just thought it had enough fats in the whites of the Oreos and it was heavenly crunchy!.
How long should I keep the pudding in the fridge until it sets? Can I leave it out on the counter?
It should be refrigerated for 3 to 4 hours or frozen for 1 hour before serving to allow it to firm up.
Made it for the kids and used regular Oreos instead of double stuffed ones. I also doubled the cream cheese and sugar for the layers!!! We ate it all the same day- no leftovers.
Omg looks amazing 😝😝😝😝
Looks so decadent and delicious!