
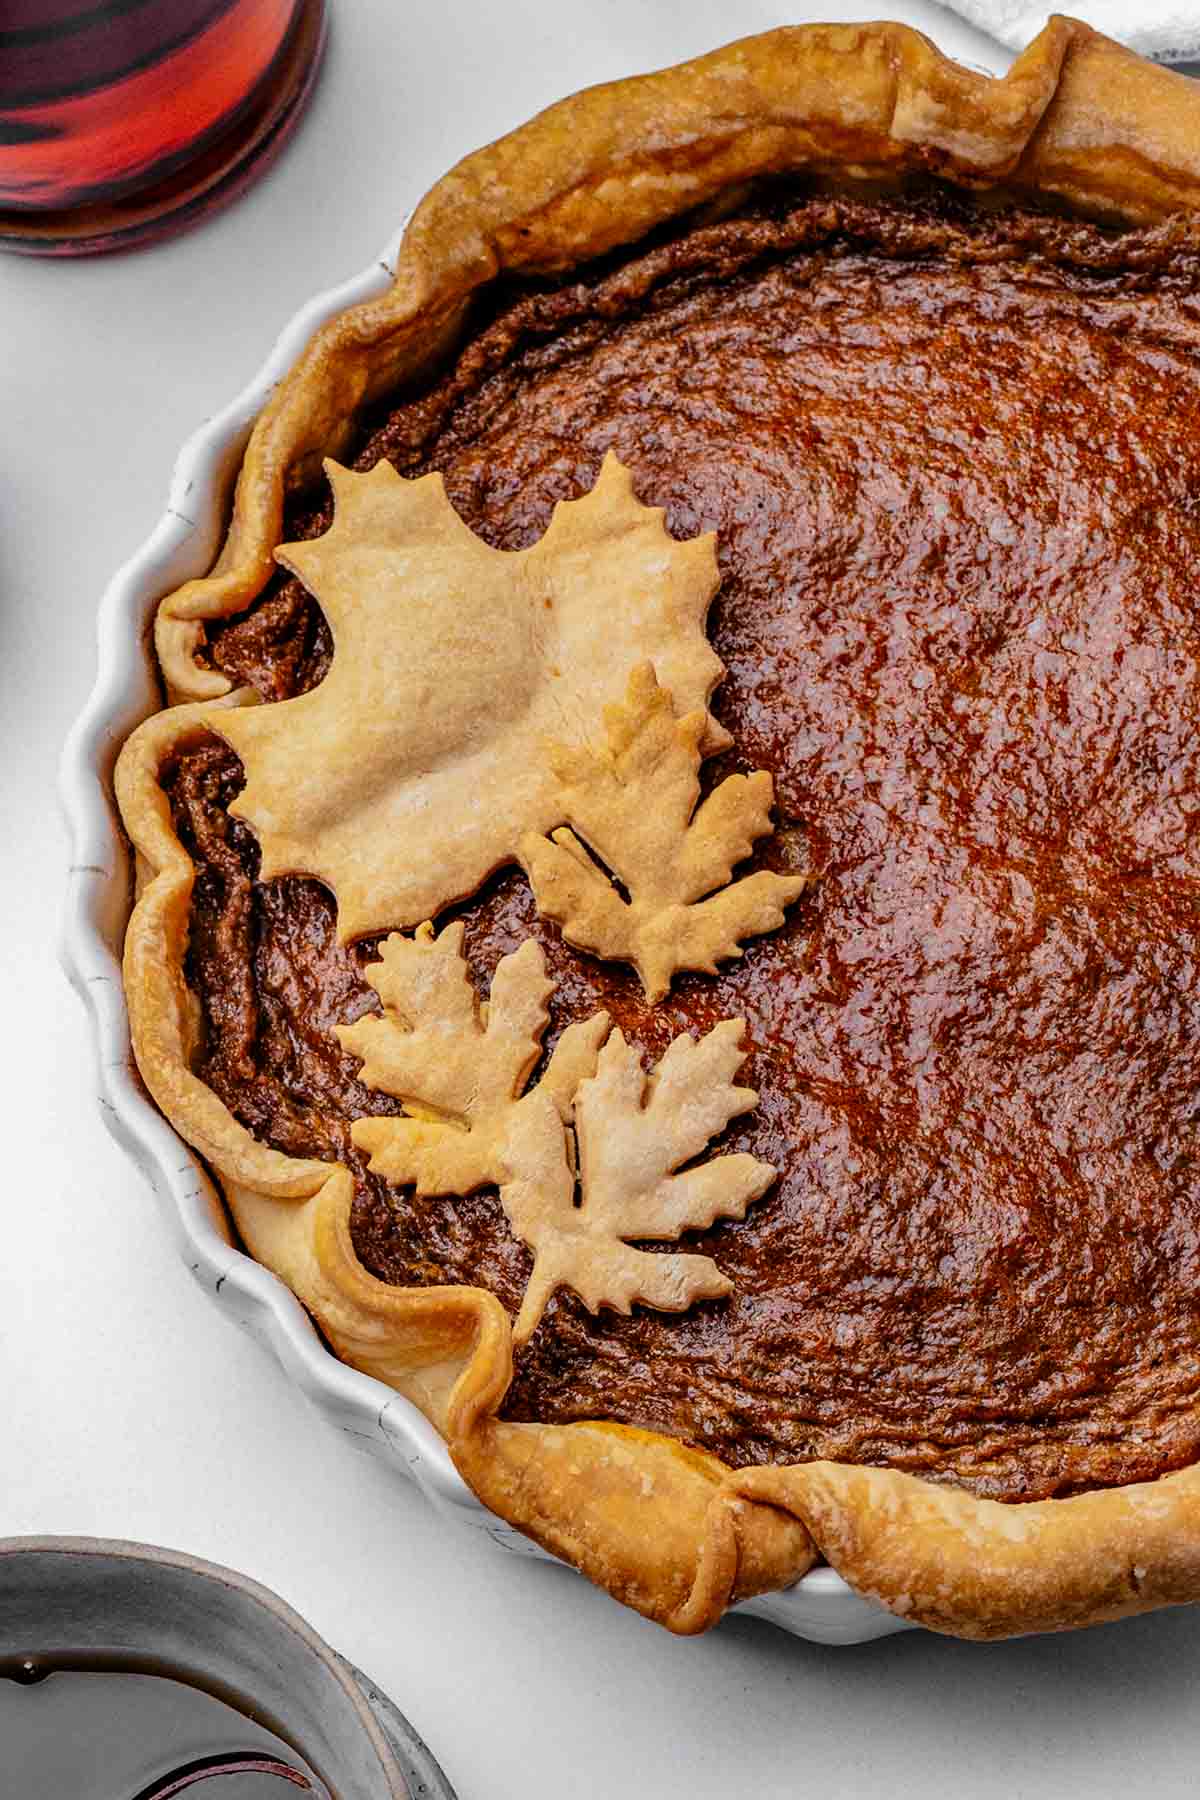
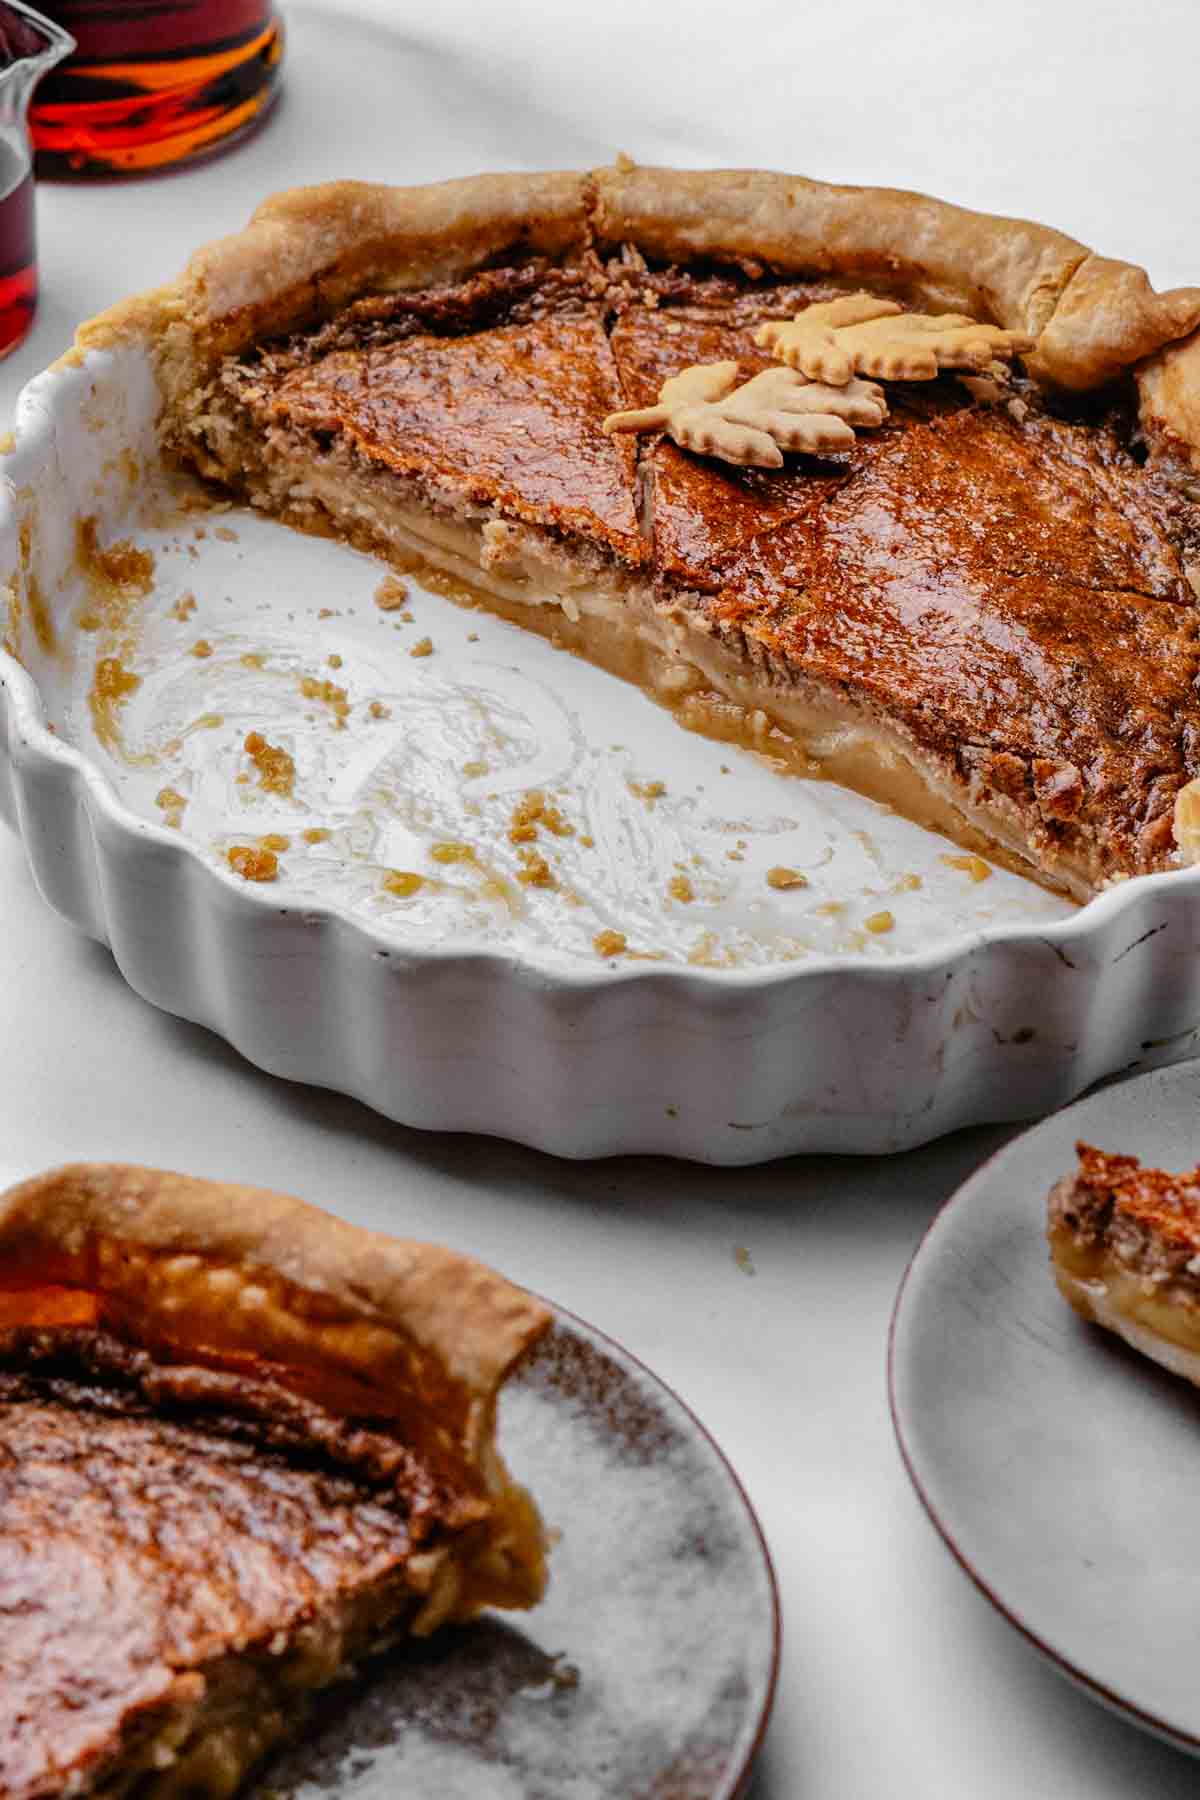
This Maple Syrup Pie is my go-to alternative to pumpkin pie. Real maple syrup, brown sugar, eggs, heavy cream, and a little nutmeg go into one bowl, get poured into a store-bought crust, and come out golden and soft with a custardy center. No fake maple flavor here - this is how they make maple pies in Vermont.

I got this recipe from a friend in Vermont. We were stuck inside for two days during a rainstorm and decided to make maple syrup pie with real maple syrup she'd brought from the farm near her home. The pie turned out buttery, sweet, and just a touch salty, with maple flavor that hit strong, straight from real syrup out of Burlington. It tasted like fall instead of just tasting sweet. I'd call it wicked good.
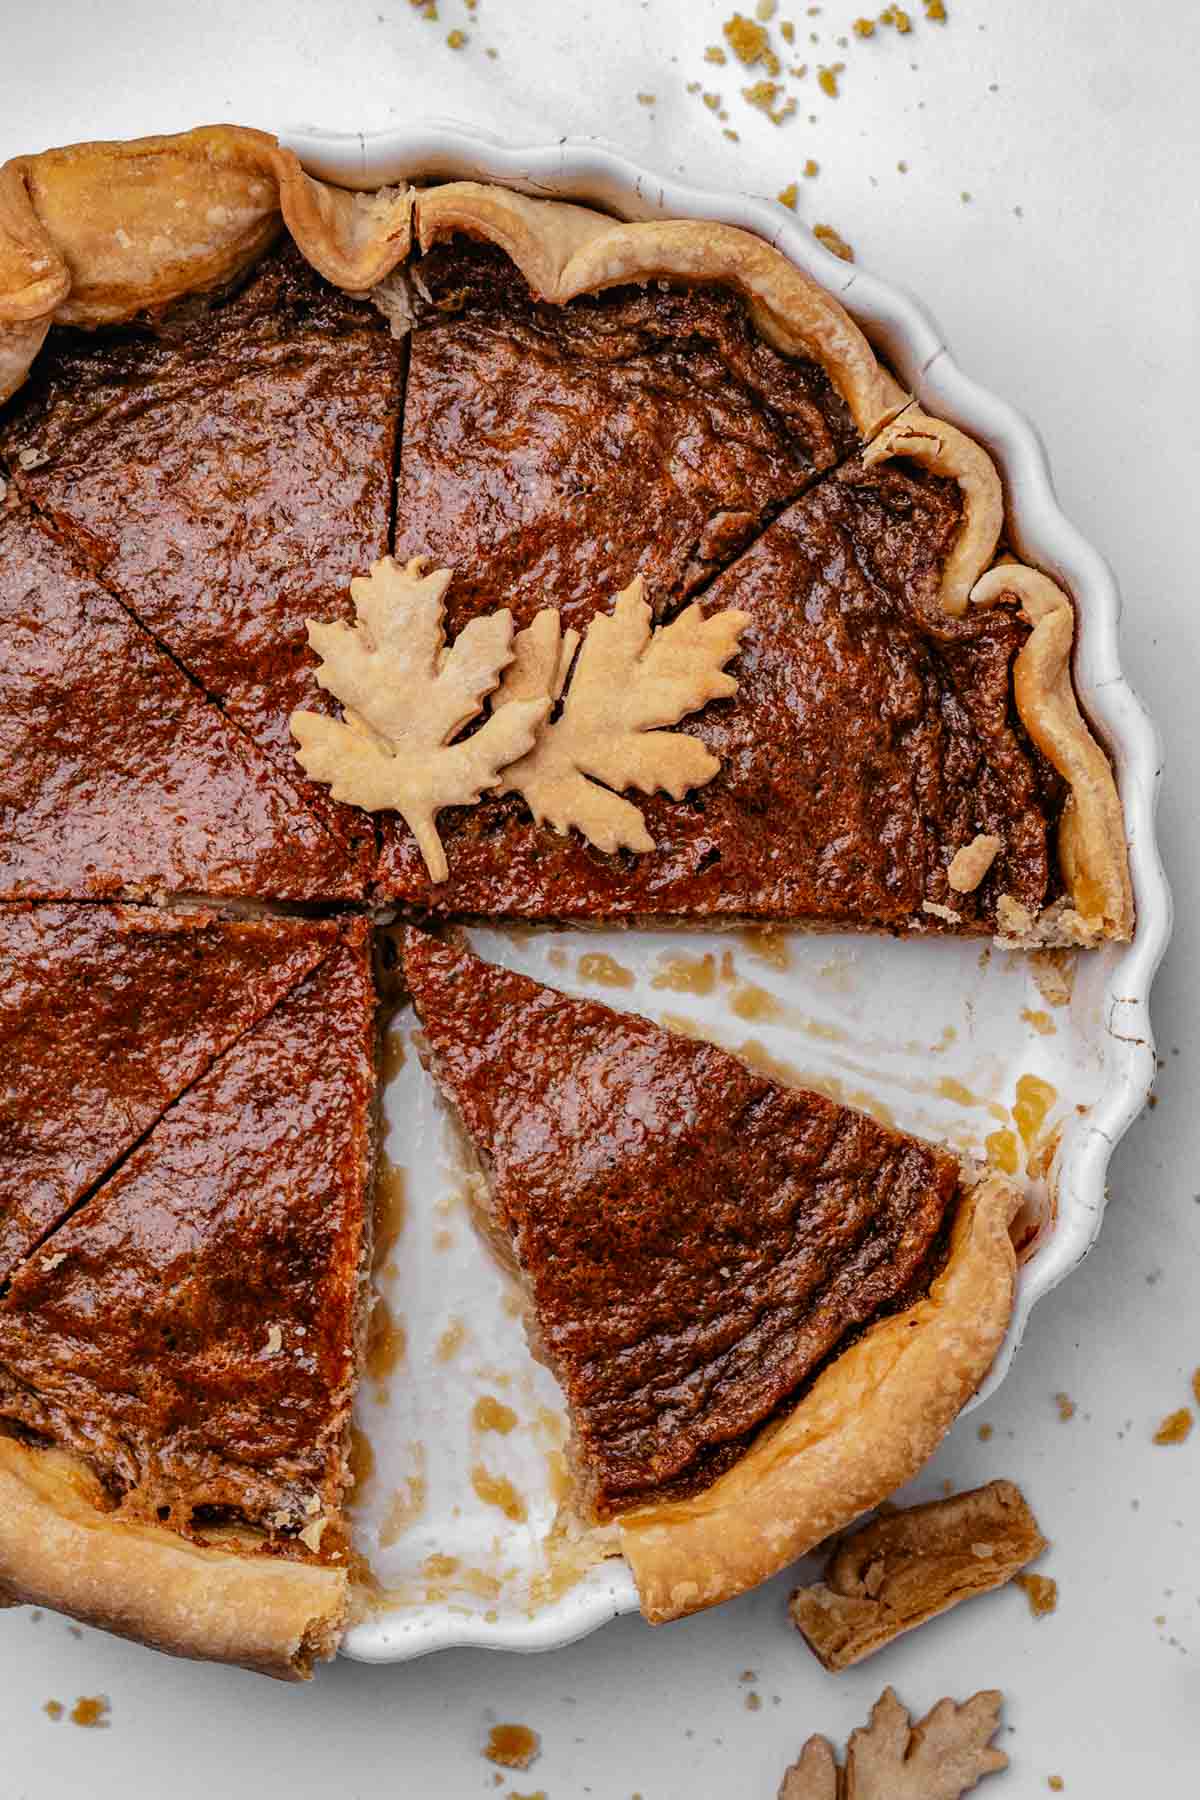
I then brought it to a family dinner without telling anyone what was in it. The reaction was more than positive - "what's in it?", "so good," "can I have another slice?" It's deeply maple-forward, with a soft, custardy center, baked right in a store-bought crust. One bowl, one whisk, zero fuss.
Why I Skip Pancake (Corn) Syrup
Pancake syrup (also known as high fructose corn syrup) sets up glossy and predictable, and that's fine - it works. I build mine around real maple syrup instead, never the pancake-syrup bottle in the fridge door. That's corn syrup with food coloring, and it'll leave this pie tasting like nothing.
Corn syrup barely tastes like anything on its own, so a corn-syrup pie gets its personality from brown sugar and vanilla. Swap in real maple syrup and the whole filling changes character - it goes from generically sweet to something that actually tastes like where it came from.
The tradeoff is texture, and eggs fix it. Maple syrup carries more water than corn syrup, so the filling needs enough egg structure to set properly, or it never gets past "sauce." Three eggs gets me a clean slice without turning it cakey. Heavy cream does the rest, keeping the center soft and almost cheesecake-like instead of dense.
Grade matters less than purity. Given a choice, I use Grade A Dark Color Robust Taste Maple syrup from anywhere in Vermont.
Maple for flavor. Eggs for structure. Cream for softness. That's the whole formula.
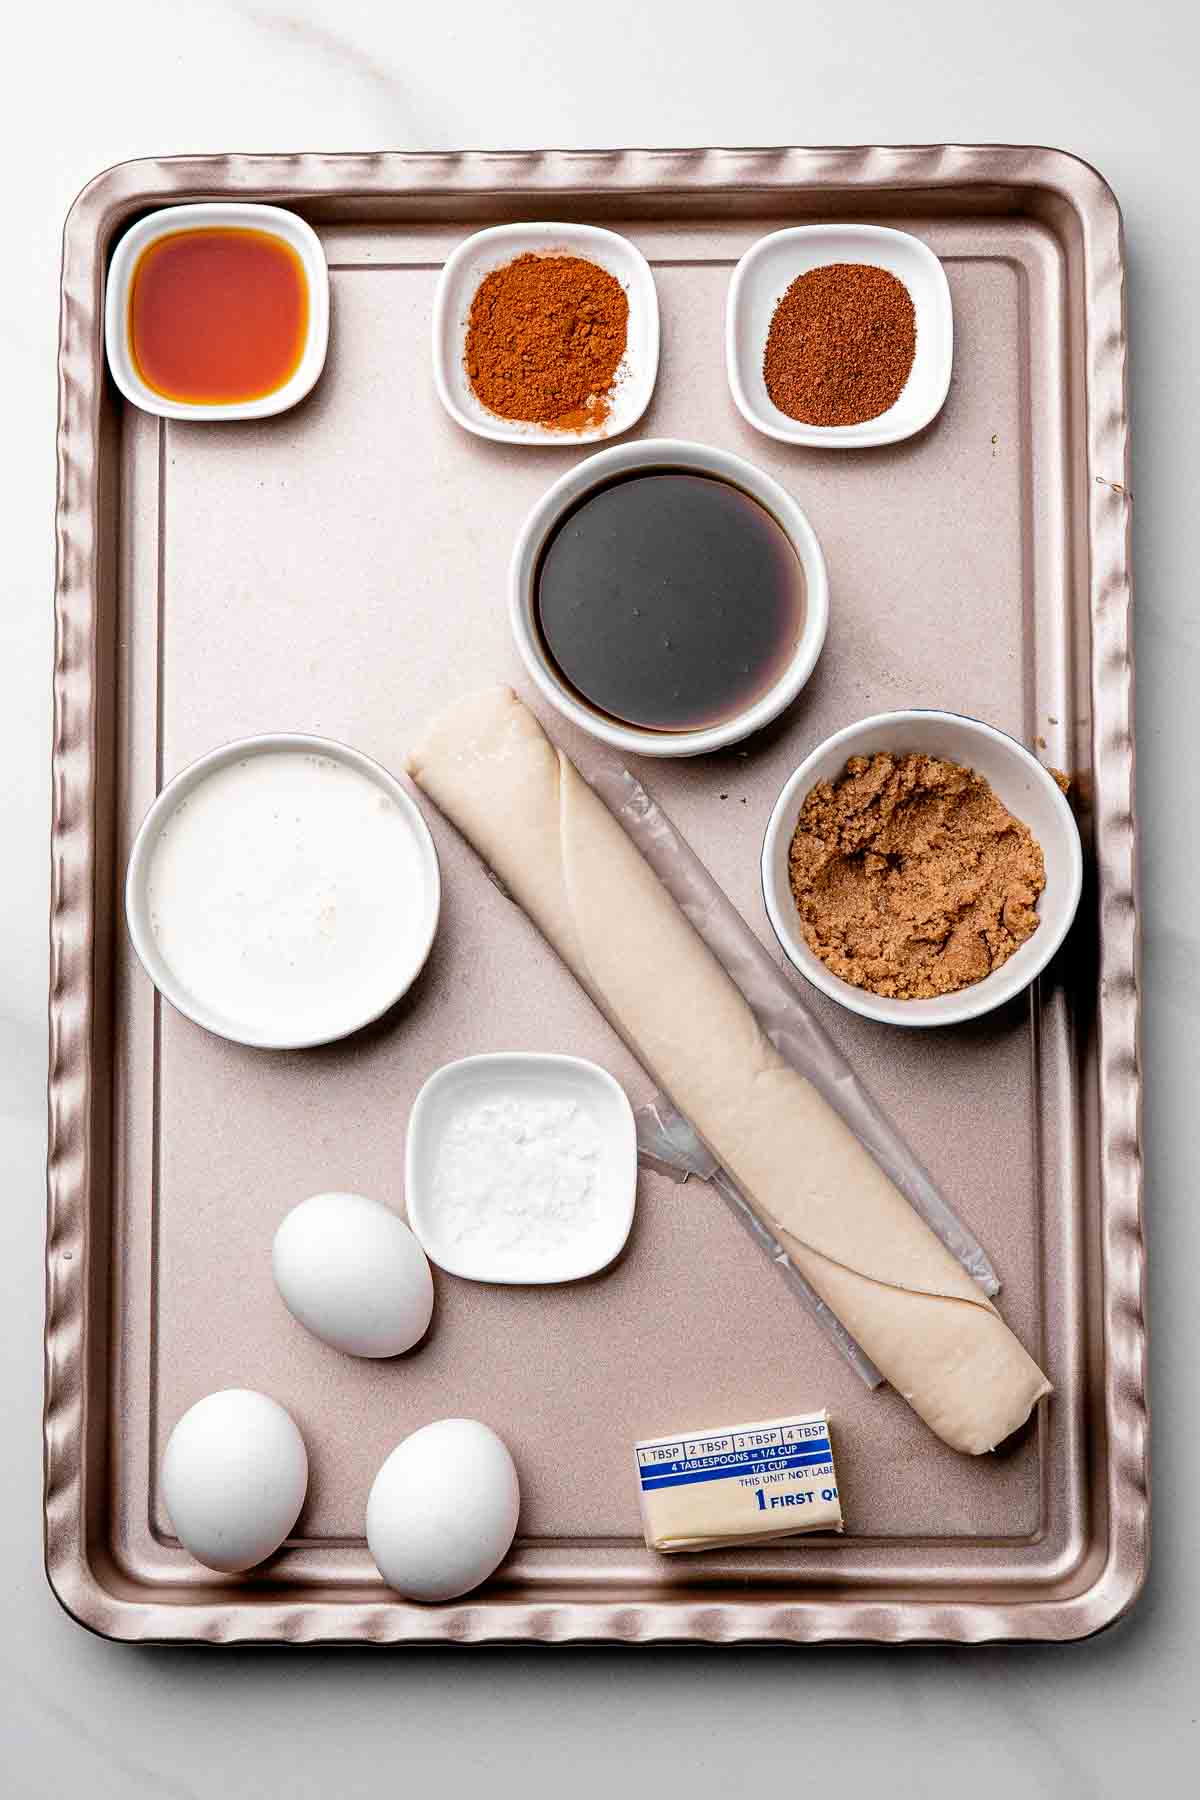
What I Put Into Maple Syrup Pie
Full amounts are in the recipe card below.
- Pie crust. I use store-bought, refrigerated or frozen. It's not about the crust for me. The filling is the showstopper here, and I'm not dirtying a food processor for a crust nobody's going to be thinking about.
- Pure maple syrup. This is the entire point of the pie for me, so I skip the pancake-syrup bottle in the fridge door. That's corn syrup with food coloring and imitation flavor, and it'll leave this pie tasting like nothing.
- Light brown sugar. I sometimes use dark brown sugar instead if that's what's open in my pantry - I just get a slightly bolder, more caramel-forward pie.
- Butter, melted and cooled slightly. I always let it cool. Hot butter added straight to the eggs starts cooking them before the pie ever sees the oven.
- Eggs, at room temperature. These give my filling its structure and its soft, custardy set.
- Heavy cream. This is what keeps my center silky instead of dense. I've used half-and-half in a pinch, but I lose a little richness.
- Vanilla extract, salt, cinnamon, and nutmeg. I go light on the spices on purpose. This isn't a pumpkin pie for me. I just want to balance the maple flavor with nutmeg and the maple sweetness with salt.
How to Make Maple Syrup Pie
The full recipe card, with exact measurements, is below.
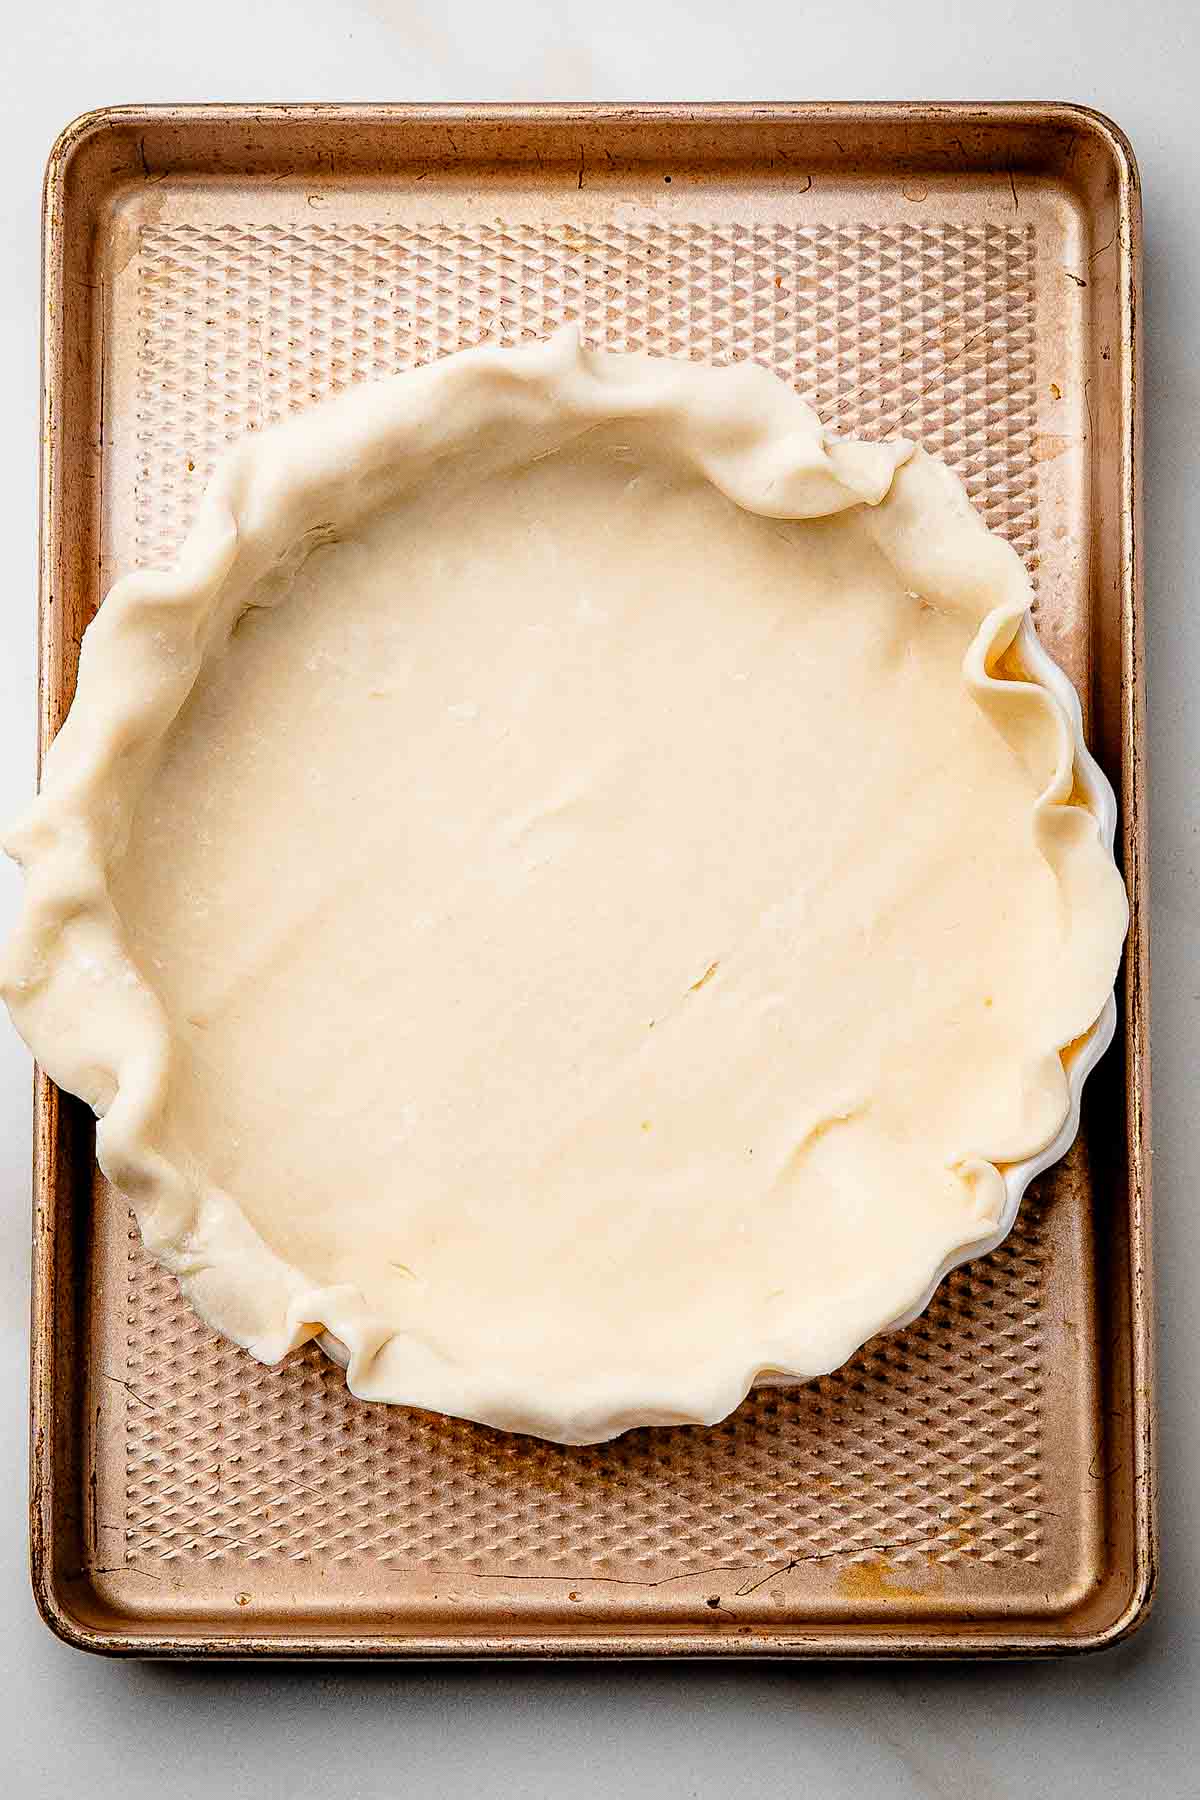
1. Get the crust ready.
I heat my oven to 350°F first. If I'm using a refrigerated pie crust, I ease it into a 9-inch pie plate and press it gently into the bottom and sides. I don't worry about making it perfect - a few rustic edges are part of the charm. Then I set the crust aside while I make the filling.
2. Mix up the maple filling.
In a large bowl, I whisk together the maple syrup, brown sugar, melted butter, eggs, heavy cream, vanilla, salt, cinnamon, and nutmeg. I whisk until everything looks smooth and the brown sugar has fully worked in.


3. Fill the pie.
I pour the maple filling into the prepared crust, then set the whole pie on a baking sheet before it goes into the oven. I never skip this step - it makes the pie so much easier to move, and it catches any drips that decide to escape.

4. Bake.
I bake it for 45 to 55 minutes, until the edges are set and the center still has a slight jiggle when I nudge the pan. If the crust starts browning too fast, I loosely tent the edges with foil. I don't wait for the center to look completely firm in the oven - it keeps setting as the pie cools.

5. Let it cool.
I move the pie to a cooling rack and let it sit for at least 2 hours before slicing. The waiting is always the hardest part for me. For the cleanest slices, I let it cool to room temperature, then refrigerate it and cut once it's fully chilled.

Maple Syrup Pie
Equipment
- 9 inch pie plate
- large mixing bowl
- Whisk
- measuring cups and spoons
- baking sheet
- Aluminum foil
- Cooling rack
Ingredients
For the Crust
- 1 refrigerated 9-inch pie crust you can also use frozen if that's what you have
For the Maple Filling
- 1 cup pure maple syrup the real stuff!
- ½ cup packed light brown sugar
- 4 tablespoons unsalted butter melted and slightly cooled
- 3 large eggs
- ½ cup heavy cream
- 1 teaspoon vanilla extract
- ½ teaspoon salt
- ¼ teaspoon ground cinnamon
- ⅛ teaspoon ground nutmeg
Instructions
Get the Crust Ready
- Heat your oven to 350°F.
- If you're using a refrigerated pie crust, ease it into a 9-inch pie plate and gently press it into the bottom and the sides.
- Don't worry about making it perfect. A few little rustic edges are completely fine.
- Set the crust aside while you make your filling.
Mix Up That Maple Goodness
- In a large bowl, whisk together the maple syrup, brown sugar, melted butter, eggs, heavy cream, vanilla, salt, cinnamon, and nutmeg.
- Give everything a really good whisk until the mixture looks smooth and the brown sugar is nicely worked in.
Fill the Pie
- Pour the maple filling into the prepared pie crust.
- Set the pie on a baking sheet before it goes into the oven.
- Trust me on this one. It's much easier to move the pie around while it's sitting on a baking sheet, and the sheet also catches any little drips that might decide to escape.
Bake
- Bake for 45-55 minutes or until the edges are set and the center still has a slight jiggle when you move the pie.
- If the crust starts getting too brown before the filling is finished, loosely cover the edges with foil.
- Don't wait for the center to become completely firm in the oven. It will continue setting as the pie cools.
Let It Cool
- Move the pie to a cooling rack and let it cool for at least 2 hours before slicing.
- I know, waiting is the hard part.
- For the cleanest slices, refrigerate the pie after it has cooled to room temperature and slice it once it's completely chilled.
Tips for the Best Maple Syrup Pie
- Use real maple syrup. It's carrying the entire flavor of this pie, so this is not the place to substitute.
- Don't overbake it. A gentle wobble in the center when it comes out of the oven is exactly right. It firms up as it cools.
- Let it cool fully before slicing. Cutting in while it's warm gives you a soft, messy slice instead of a clean one.
- Watch the crust edges. If they're browning faster than the center is setting, tent them loosely with foil.
- Bake it on a sheet pan. It makes the pie easier to move and saves you from cleaning drips off the oven floor.
- Chill before cutting for picture-perfect slices. Wipe the knife clean between cuts.

Frequently Asked Questions
Why is my pie still jiggly in the middle?
That's exactly what I look for. The filling keeps cooking and setting as it cools on my counter. If the whole center looks liquid instead of a gentle wobble, I give it more time in the oven.
Does this need to be refrigerated?
Yes. Since the filling has eggs and cream in it, once my pie has cooled, I cover it and refrigerate it. I'll let it sit out for a few hours at a holiday gathering, but I don't leave it at room temperature all day.
Why did my pie puff up in the oven and then sink as it cooled?
I've seen this happen, and it's normal. The eggs expand while baking, which puffs the center slightly, then it settles as the filling finishes setting while it cools. As long as the center isn't wet underneath, I don't worry about a little sinking.
Why are there cracks on top?
For me, this usually means I baked it a touch longer than I needed to. Once the eggs fully set, the surface can tighten and crack. It doesn't affect the flavor, and I usually just cover it with a scoop of vanilla ice cream anyway.
What kind of pie plate should I use?
I've used glass, ceramic, and metal, and they all bake a little differently. Glass or ceramic gives me a slower, gentler bake, while metal browns the crust faster. Either way, I keep an eye on the crust near the end.
How do I know if the center is done versus underbaked?
I give it a gentle jiggle. A properly baked pie wobbles softly in the middle, similar to a cheesecake. If it ripples or looks liquid underneath the surface, I know it needs more time.
Recipe Variations
When I want a maple pecan version, I stir ¾ cup chopped toasted pecans into the filling before baking.
When I want something deeper and warmer, I add a tablespoon of bourbon to the filling.
When apples are in season, I dice and peel about a cup and layer them in the bottom of the crust before pouring the filling over them.
When I have extra time, I brown the butter instead of just melting it - I cook it in a saucepan until it smells nutty and turns golden, then let it cool slightly before adding it to the filling.
When I want a bolder, more caramel-forward pie, I use dark brown sugar instead of light.
When I want a more traditional fall spice pie flavor, I swap the cinnamon and nutmeg for pumpkin pie spice.
Make Ahead, Storing, and Freezing
- Make ahead: Bake the pie up to 2 days in advance, cool it completely, then cover loosely with plastic wrap or foil and refrigerate until you're ready to serve.
- To store: Cover the cooled pie and refrigerate for up to 4 days. Because the filling has eggs and dairy, keep it chilled rather than leaving it out for long stretches.
- To serve slightly warm: Warm individual slices in the microwave for a few seconds instead of reheating the whole pie.
- To freeze: Cool completely, wrap well, and freeze for up to 2 months. Thaw overnight in the fridge before serving.


Comments
No Comments