
A slow-braised chuck roast with red wine, beef broth, onions, carrots, garlic, and fresh herbs, finished with a rich homemade gravy made right from the braising liquid. Made in the dutch oven from start to finish.

Dutch Oven Pot Roast Summary
Full written recipe and measurements are in the recipe card below.
- 🥩 Sear a whole chuck roast hard on all sides for a deep, browned crust
- 🍷 Braise low and slow in red wine, beef broth, onions, carrots, garlic and fresh herbs
- 🥕 Vegetables cook right alongside the roast, soaking up the braising liquid
- 🥣 Strain and reduce the braising liquid into a rich, homemade gravy
- 🍲 For a different plate entirely, shred it instead and work tomatoes into the sauce
- 🗓️ Make-ahead friendly - flavor improves after a day in the fridge
- 🥔 Serve over mashed potatoes with gravy spooned generously on top
Jump to:
- Dutch Oven Pot Roast Summary
- 🥩 The Dutch Oven vs. Wide Skillet For Pot Roast
- 🥕What's Actually Going Into the Pot
- 🍲 Two Ways to Make This Pot Roast
- ✅ Quick Chooser
- 🥩 How To Make It
- Dutch Oven Pot Roast
- 🔥 The Two Mistakes That Ruin an Otherwise Good Roast
- Storage Tips
- 🥣 Recipe Questions
- Explore More Pot Roast Recipes
- Reviews
🥩 The Dutch Oven vs. Wide Skillet For Pot Roast
It feels like just yesterday I first shared my shredded red wine braised beef, the version done in a wide ceramic skillet with tomatoes worked into the sauce and everything falling apart into shreds by the time it hit the plate. That post did exactly what I wanted it to do, and I figured that was the version of red wine pot roast I'd be making from here on out.
Then I actually tried it the other way - a whole roast, kept in big chunks instead of shredded, no tomatoes anywhere near the pot, cooked low and slow in a proper tall Dutch oven instead of a skillet.
The results, I'm pleased to report, were good. Not merely acceptable - good. Turns out after all that skillet experimentation, the most conventional pot roast method on record is conventional for a reason. Boring, predictable, exactly what your grandmother would have used, and it still delivers precisely what a pot roast is supposed to deliver. Sometimes the obvious answer really is the right one.

🥕What's Actually Going Into the Pot
Exact measurements listed in the full recipe below.
Chuck roast. 🥩 The marbling in this cut is what breaks down into that fork-tender texture over a long braise - a leaner cut would just dry out.
Red wine. 🍷 Cooked down alongside the beef broth, it becomes the backbone of the gravy, not just a splash for flavor.
Onions, carrots and garlic. 🥕 These braise directly in the pot with the roast, soaking up the wine and broth as everything softens together.
Fresh herbs. 🌿 Added early, they infuse the braising liquid slowly instead of sitting on top as a garnish.
Beef broth. 🥣 This rounds out the wine's sharpness and gives the braising liquid enough volume to fully submerge the vegetables.

🍲 Two Ways to Make This Pot Roast
Here's the snapshot: start with the same core method - sear, then braise low and slow - then choose your finish. Keep the roast whole in big chunks for a classic Dutch oven pot roast, or shred it and work tomatoes into the sauce for a completely different plate. Both start with the same cut of beef and land in very different places.
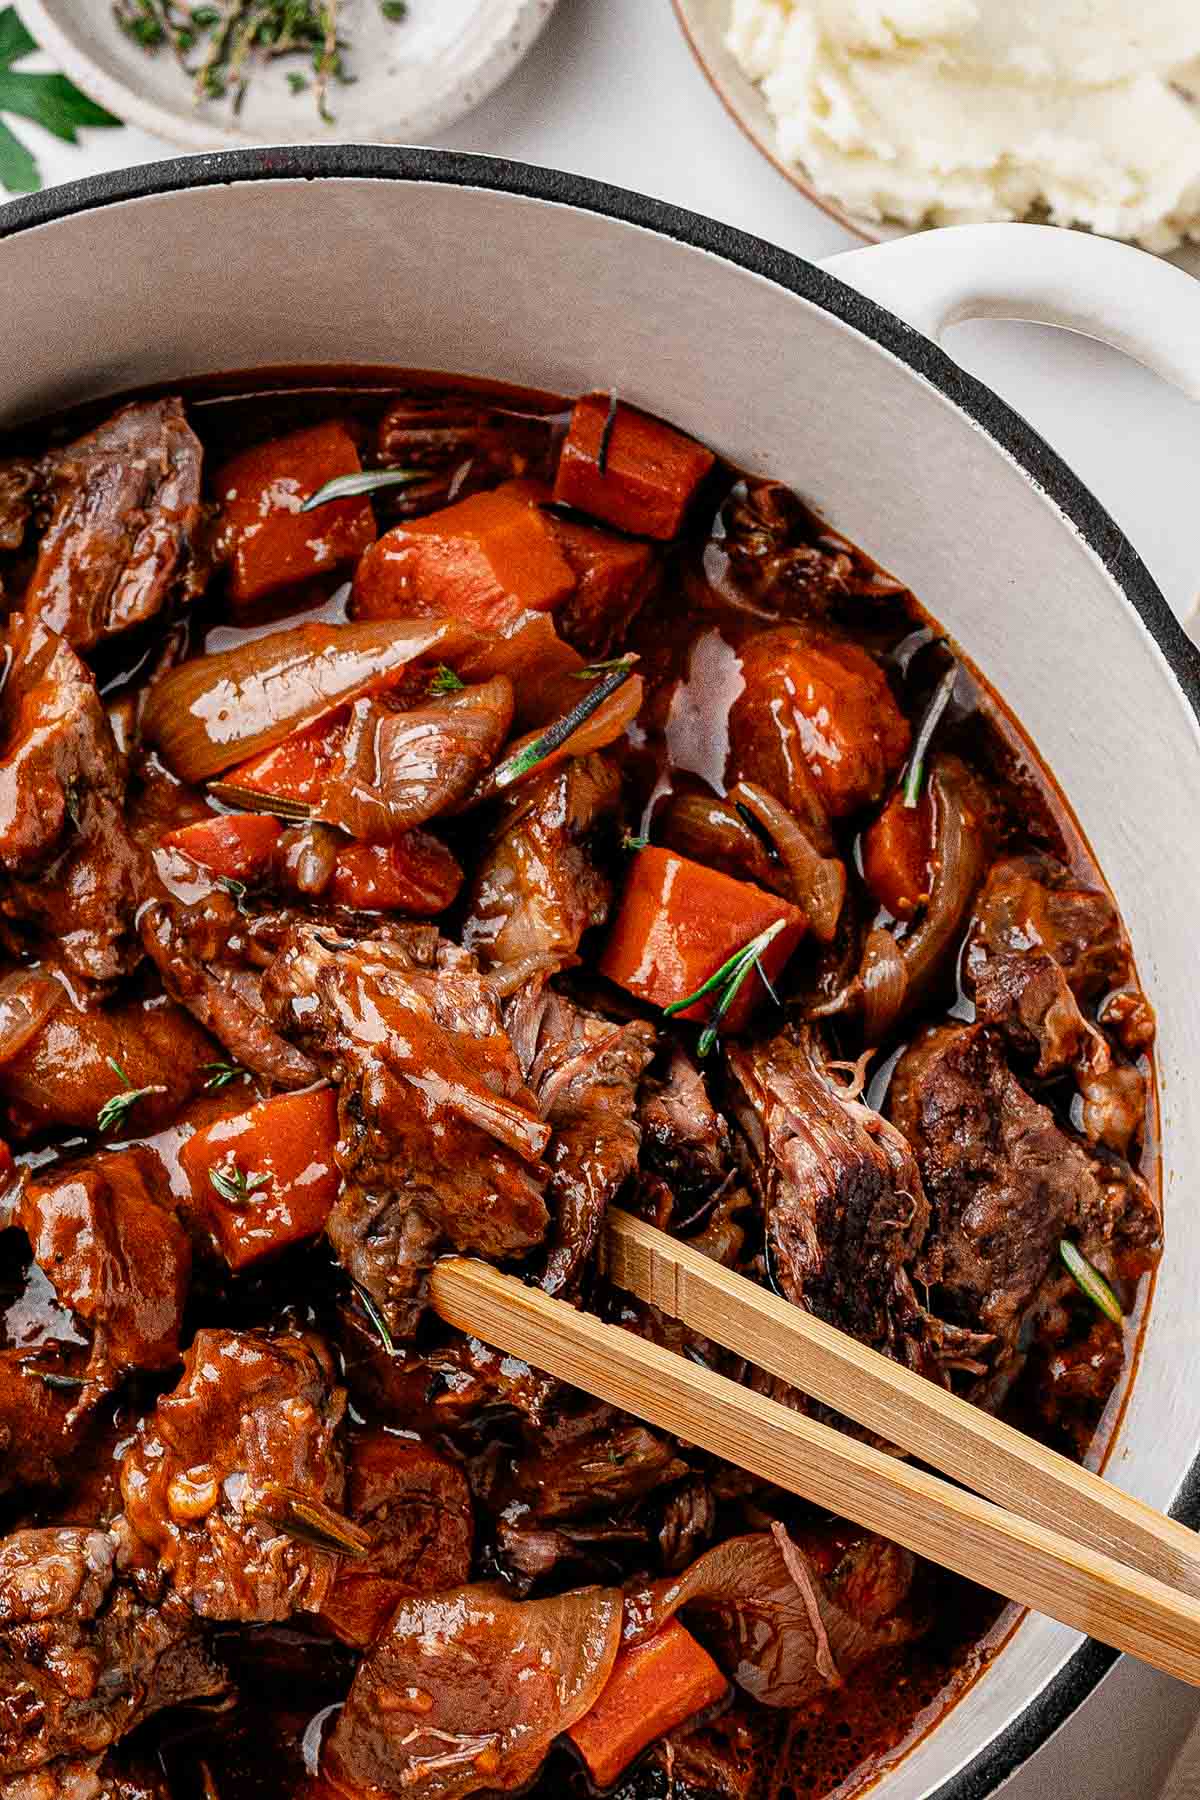
- Whole roast, big chunks, Dutch oven. This is the version below - a full chuck roast seared hard, then braised low and slow with the vegetables right in the pot. The meat holds its shape in thick slices instead of falling into shreds, and the vegetables come out fork-tender alongside it.
- Shredded, skillet, tomatoes in the sauce. My original red wine braised beef takes the same cut in a different direction - a wide ceramic skillet, tomatoes worked into the sauce, and the beef shredded until it's barely holding together. Same base flavors, completely different plate.
✅ Quick Chooser
- Want a classic Sunday roast with thick slices and gravy? Go whole roast, Dutch oven.
- Want something saucier for tacos or sandwiches? Go shredded, skillet, with tomatoes.
Serve it all together with the gravy spooned generously over the beef and mashed potatoes underneath. Such a good one for a cold Sunday, whether it's just family or a full table.
🥩 How To Make It
Complete recipe and measurements follow below.
1. The Sear That Builds Every Bit of Flavor Later
Pat the chuck roast completely dry before it touches the pot - any surface moisture steams instead of browns, and browning is the whole point of this step. Heat the Dutch oven over medium-high heat until it's properly hot, then sear the roast on all sides until you've got a deep, dark crust, about 4-5 minutes per side. Don't rush this or skip a side to save time; every browned patch you get here becomes flavor in the gravy later. Remove the roast and set it aside.


2. Building the Braising Liquid Around the Vegetables
Add the onions, carrots and garlic to the same pot and cook for a few minutes, scraping up the browned bits stuck to the bottom as the vegetables soften - that fond is concentrated flavor, not something to rinse away. Pour in the red wine and let it bubble for a minute or two to cook off the sharp alcohol edge, then add the beef broth and fresh herbs.

3. The Long, Low Braise That Does the Actual Work
Nestle the seared roast back into the pot, spooning some of the liquid over the top. Cover with the lid and transfer to a low oven, letting it braise for several hours until the meat is fork-tender and pulls apart with almost no resistance. This is the stage where the collagen in the chuck roast slowly breaks down into gelatin - there's no shortcut that gets you the same texture faster.

3. Turning the Braising Liquid Into Real Gravy
Once the roast is tender, lift it out onto a cutting board to rest. Strain the braising liquid to separate out the softened vegetables and herb stems, then return the liquid to the pot and simmer until it reduces and thickens slightly. Taste before serving - after hours of braising, the seasoning often needs a small adjustment right at the end.

Dutch Oven Pot Roast
Equipment
- Large Dutch oven with lid
- Sharp chef's knife
- cutting board
- Wooden spoon or heat-safe spatula
- Tongs
- measuring cups and spoons
- Small bowl for mixing seasonings
- Ladle or large spoon, for serving
Ingredients
For the pot roast
- chuck roast 4 pounds, boneless
- 2 teaspoons kosher salt
- 1 ½ teaspoons freshly ground black pepper
- 2 tablespoons olive oil
- yellow onion cut into thick wedges, 1 large
- 4 large peeled carrots cut into 2-inch pieces
- 4 garlic cloves smashed
- tomato paste 2 tablespoons
- 2 cups beef broth
- 1 cup dry red wine
- Worcestershire sauce 2 tablespoons
- 2 teaspoons fresh thyme leaves
- fresh rosemary just 2 sprigs
- 2 bay leaves
- 1 tablespoon balsamic vinegar
For the gravy
- 2 tablespoons unsalted butter
- 2 tablespoons all-purpose flour
- 2 ½ cups strained braising liquid
Optional garnish
- Fresh parsley chopped
- Fresh thyme
- Flaky salt
Instructions
- Let the roast have a minute to lose the chill: take the chuck roast out of the fridge for about 30 minutes before you're ready to cook. Pat it really well with paper towels. This is not a time for a damp roast. We want a nice dry surface, so we can get that gorgeous brown crust. Give the roast a good, even coating of salt and pepper on all sides.
- Get that Dutch oven nice & hot: place a large Dutch oven on the burner over high heat, and add your two tablespoons of oil. Once the oil is hot and glistening, carefully lay the roast in. Now comes the part where you have to resist the urge to move it around. Brown each side of the roast for about 5 minutes per side, getting a deep golden crust all over. Don't rush this step. Those browned bits on the bottom of the pot are basically the beginning of your gravy. Move the roast to a plate for a minute.
- Let the veggies cook: lower the heat to medium and add the onions and carrots right into the same pot. Cook for about 5-7 minutes, stirring occasionally; let them cook until they lose their crispiness and pick up some of those browned bits from the bottom. Add the garlic and tomato paste. Mix everything together and give it another minute or two on the heat. The tomato paste should darken slightly; that's exactly what we are looking for.
- Build the braising liquid: go ahead and add the red wine, and use a wooden spoon to scrape up all those stubborn little brown pieces stuck to the bottom. Let the wine bubble for 3-4 minutes. Add bay leaves, thyme, beef broth, Worcestershire sauce, rosemary, and balsamic vinegar. Give it a stir, then nestle the roast back into the pot. Pour enough liquid to come partway up the sides of the roast. You don't want to completely drown it-the oven is going to take care of the rest.
- Into the oven: once everything is tucked into the pot, cover it with a lid and let hte oven take over at 325*F.. Let the roast braise for about 3 ½ hours, checking around the 3-hour mark. You're not really looking for a specific clock time here. You're looking for fork-tender beef. If you poke the meat with a fork and it still feels like it's putting up a fight, put the lid back on and give it another 30 minutes. A good pot roast should practically fall apart.
- Make the gravy: once the roast is beautifully tender, carefully transfer it to a cutting board and loosely tent it with foil. Remove the carrots and onions and set them aside. Strain the braising liquid into a measuring cup or bowl, discarding the herbs and solids. Let it sit for a couple of minutes and skim some of the excess fat from the surface. Now grab a saucepan. Melt the butter over medium heat, sprinkle in the flour, and whisk for about 1 minute. Slowly pour in the strained braising liquid while whisking. Let the gravy simmer for 5-8 minutes, stirring occasionally, until it's thick enough to coat the back of a spoon. Taste it and see if it needs any salt and pepper.
- Slice: let the roast rest for about 15-20 minutes before serving. You can slice it, but honestly, if your roast is properly tender, I love pulling it into big, rustic pieces. Arrange the beef with carrots and onions, pour that gorgeous gravy over everything, and finish with fresh parsley and thyme.
- And then immediately put some mashed potatoes underneath it. Because. Obviously.
Notes
🔥 The Two Mistakes That Ruin an Otherwise Good Roast
- Skipping the sear. Going straight to braising without browning the meat first skips the Maillard reaction entirely, and the gravy ends up tasting flat no matter how long it simmers.
- Braising too hot. A braise that's bubbling hard instead of barely simmering will make the outside of the meat stringy before the inside ever gets tender - low and slow isn't a suggestion here, it's the mechanism.
Storage Tips
- Refrigerate leftovers in a covered container for 3 to 4 days.
- Freeze the beef and gravy together for up to 3 months; thaw in the fridge before reheating.
- Reheat gently on the stovetop or in a low oven with a splash of extra broth so the meat doesn't dry out.
🥣 Recipe Questions
- Can I make this in a slow cooker instead?
Yes - sear the roast first for the best flavor, then transfer everything to a slow cooker and cook on low for 8 hours or until fork-tender. Here's the Easy Slow Cooker Pot Roast if you want to go this route. - What if I don't have red wine?
Substitute more beef broth, though you'll lose some of the acidity that helps tenderize the meat. A splash of balsamic vinegar can help replace that missing brightness. - Can I add potatoes to the pot?
Yes - add halved baby potatoes in the last hour of braising so they don't turn mushy over the full cook time.

Comments
No Comments