

One 4-to-6 pound chuck roast, a simple Tex-Mex rub with real ancho and chipotle, and a slow braise with lime and beef broth turns 20 minutes of prep into shredded beef so good it's the only pulled taco filling you'll want all summer.
I make this when I want pulled beef that tastes like it was built for Tex-Mex Pulled Beef Tacos - not just seasoned after the fact. It starts with a chuck under blade roast, a scratch rub of ancho, chipotle, cumin, and Mexican oregano pressed over a Cholula binder, and an overnight dry brine so the seasoning goes deeper than just the surface. From there it goes on the pellet smoker at 225°F - either overnight while you sleep or during the day with a light spritzing schedule - until it hits 165°F internal. Then it moves into a covered braise with sliced onion, smashed garlic, beef broth, and lime juice at 250°F until the probe slides through with no resistance.
Now let's talk about the braise finish. Instead of wrapping in butcher paper, I finish the beef in a liquid that becomes THE flavor. The onion and garlic soften completely into the pan juices, the lime rounds out the smokiness, and when I shred the beef and ladle those juices back over it, every piece is coated in that amazing smokiness. Fresh lime zest goes in after shredding - the residual heat of the just-pulled beef blooms the citrus oils without cooking them off. In other words, this braise finish changes the whole thing.
If you love this style of cook, you'll probably love the rest of my smoker recipes too - from prime rib to pig shots and smoked top sirloin. You can find them all in my smoker recipe roundup.
How This Tex-Mex Chuck Roast Is Different From Regular Smoked Chuck Roast
If you're deciding between traditional Smoked Chuck Roast and this Tex-Mex Smoked Chuck Roast, think of them as two different ways to use the same cut of beef.
The Poor Man's Brisket version is for classic barbecue-style slices. You're aiming for a deep smoky flavor, a good bark, and tender slices you can pile onto a plate with all your favorite sides.
This Tex-Mex smoked chuck roast takes the same low-and-slow start, but finishes as juicy, shredded beef for tacos, burritos, and bowls. It's rubbed with ancho and chipotle, then braised with lime and onions so it becomes fall-apart tender and full of Tex-Mex flavor.
Which one should you make?
- Choose Smoked Chuck Roast (Poor Man's Brisket) if you want a brisket-style main to slice and serve.
- Choose Tex-Mex Smoked Chuck Roast if you're planning a taco bar, feeding a crowd, or want make-ahead shredded beef for easy meals.
Wonder what's happening inside the meat while smoking it (collagen breakdown, internal temperatures, and how probe feel should actually feel), check out my dedicated guide How to Smoke Chuck Roast for Shredding (Not Slicing).

Why I Like Chuck Under Blade (Not Just Any Chuck Roast)
"Chuck roast" is really just a general name. Stores use it for a few different muscles from the shoulder, and what you get can change depending on the butcher and the day. Most of them work for low-and-slow cooking, but they don't all behave exactly the same - and for a 12-15 hour cook that finishes in a braise, the cut you start with really matters.
Chuck under blade sits right under the blade bone and has more fat marbled through it than a standard boneless chuck roast. That extra fat isn't just about flavor; it protects the meat during the long cook. It slowly melts into the meat, keeps everything moist during the smoking phase, and adds richness to the pan juices. With a recipe this long, you can actually taste and see the difference in how tender and juicy the shreds are at the end.

How To Shop For This Cut
Chuck under blade can show up under a few different names, depending on the store. You might see it labeled as chuck underblade pot roast, California roast, or bottom chuck roast. Warehouse and wholesale clubs often sell it in the 4 to 6 pound range, which is perfect for this recipe - big enough to build a good bark, but not so large that the cook time becomes unpredictable.
If you don't see "chuck under blade" on the label, just ask at the meat counter. Most butchers know exactly what you mean and can grab one from the back if it's not already out. I don't recommend swapping in a chuck eye roast or an arm roast here. Chuck eye is more uniform and a bit leaner, and arm roast comes from a different part of the shoulder with less marbling. Both will work, but you'll end up with beef that's a little drier and not quite as rich, and with a long cook like this, that difference really shows.

The Tex-Mex Rub = The Taco Seasoning?
Yes, I use Tex-Mex seasoning as a taco seasoning. The two blends are highly interchangeable, as they rely on the exact same core ingredients to deliver that signature bold, south-of-the-border flavor.
Here's the details. This rub layers two chile powders that are doing different jobs. Ancho is a dried poblano - mild, earthy, slightly sweet, with a deep red color that contributes to the bark and smoke ring appearance. Chipotle is a dried smoked jalapeño that adds a second layer of smokiness on top of the wood smoke and a building heat that arrives later in the bite. Using both is an absolute game changer.
Why Mexican Oregano
Mexican oregano. Just use it. Using regular oregano makes the rub tastes more like pot roast seasoning than a taco filling. It is in the Latin foods aisle at most grocery stores, inexpensive, and keeps well. If you cannot find it, marjoram is the closest substitute.
Why I Use Cholula as the Binder
A binder helps the rub adhere and stay put through the first hours on the smoker. I use Cholula because it is a vinegar-based hot sauce whose flavor actually aligns with the rub - the background heat sits in the same register as the chipotle, so it adds to the layering rather than introducing something foreign. Any vinegar-based hot sauce works. Yellow mustard is a clean neutral option if you want no flavor contribution at all.

Overnight vs. Daytime - How to Choose Your Cook Method
Both methods produce the same finished beef. The overnight method trades active involvement for convenience - you set it up before bed and wake up to a roast approaching braise temperature. The daytime method keeps you closer to the cook with more control over bark development. Neither is better. Choose based on your schedule.
The Water Pan Method (Overnight) - Why It Runs Dry on Purpose
A water pan over the fire pot creates a humid environment that slows moisture loss during the long smoke phase - important when you are not spritzing overnight. What I do not do is refill it when it runs dry, and it will run dry in the second half. That is deliberate. By then the bark is fully set and no longer needs the humidity. A drier smoker in the final hours actually helps the roast push through the stall faster because there is less surface moisture for evaporative cooling to work with. The braise that follows restores all the moisture the finished beef needs.
The Daytime Method - Spritzing Schedule and What to Watch For
For a daytime cook, spritzing replaces the water pan. I start after the first 2 hours - that initial hands-off window lets the bark begin setting before any moisture is introduced. After that, a light spritz of beef broth or water every 60 to 90 minutes is enough. What you are looking for between spritz intervals is a surface that looks darkening and slightly tacky, not wet. If liquid is running down the sides, you are applying too much.
How to Smoke a Chuck Roast Step by Step
1. The Dry Brine - Why It Happens the Night Before
Applying the rub the night before is not just about convenience. Salt draws a small amount of moisture to the surface of the meat within the first hour, and then the beef reabsorbs that moisture back over the following hours - pulling the dissolved seasoning deeper into the muscle in the process. By morning, the surface looks dry and the rub has bonded to the meat rather than sitting on top of it. That dry surface is also what gives you a better bark on the smoker. A rub applied right before cooking sits on wet meat and takes much longer to set.


2. Getting the Roast to Room Temperature Before It Goes On
A cold roast placed directly on a hot smoker takes significantly longer to cook evenly from edge to center. The exterior starts building bark and losing moisture while the interior is still working to close a large temperature gap, which can affect both the smoke ring depth and the final texture. I pull the roast from the refrigerator 45 minutes to 1 hour before it goes on and let it sit uncovered at room temperature. It will not reach room temperature all the way through in that time - a roast this size never does - but it closes the gap enough that the cook runs more evenly from the start.
3. Smoker Setup and Wood Selection for Tex-Mex Flavor
I like to keep the wood choice really simple here. For this chuck roast, I use either mesquite or a mesquite-oak blend because they give that bold, classic Tex-Mex flavor that loves the ancho and chipotle in the rub. If mesquite feels a little strong for you, plain oak is a great backup - it's softer, still plays nicely with beef, and doesn't cover up all the spice work you already did.
If you want to dig deeper into which woods to use for different meats, I have a full smoking wood guide you can bookmark for later.

What I avoid for this recipe is fruit wood. Apple and cherry are excellent for chicken, but against a rub this savory and spicy, the mild sweetness of fruit wood gets lost entirely - you pay for the pellets and get nothing back in flavor. Hickory works in small amounts but can turn sharp and bitter over a cook this long, which is why I am partial toward mesquite-oak at all times.
4. The Stall - What It Is and Why You Don't Touch the Temperature
I call this part of the cook the "don't panic" stage. Somewhere between 150°F and 165°F, your roast will hit a point where the temperature just…stops moving. It may sit flat for an hour. It may sit flat for three. Totally normal!
This pause is called the stall. As the surface of the meat releases moisture, that evaporation actually cools the roast and soaks up the heat from the smoker, so the internal temperature hangs out in place for a while. I don't touch the smoker temperature here - once the surface dries out a bit and the evaporation slows, the roast will start climbing again all on its own.

The instinct is to raise the smoker temperature to push through it. I do not do this. Increasing the temperature disrupts the steady low-heat environment the collagen needs to convert to gelatin, and it can dry out the exterior before the braise has a chance to restore moisture. The stall resolves on its own every time. The water pan running dry in the second half of an overnight cook naturally accelerates it, and the braise at the end makes the wait irrelevant - you are not serving the beef off the open smoker, so an extra hour in the stall changes the serving time, not the quality of the finished beef.

Tex-Mex Smoked Chuck Roast (Overnight Pellet Smoker)
Equipment
- Pellet smoker (recipe tested on Pit Boss 700FB2)
- Leave-in dual probe meat thermometer (one probe for meat, one for smoker ambient temperature)
- Full-size 9x13 disposable aluminum lasagna pan, 2 (one for water pan, one for braise)
- Wire rack set over sheet pan (for dry brine)
- Sharp trimming or boning knife
- Two forks or heat-safe gloves (for shredding)
Ingredients
Tex-Mex Rub
- 1 tablespoon kosher salt or 2 teaspoons table salt
- 1 tablespoon coarsely ground black pepper
- 1 tablespoon ancho chile powder
- 2 teaspoons chipotle chile powder
- 2 teaspoons ground cumin
- 1 teaspoon dried Mexican oregano
- 1 teaspoon garlic powder
- 1 teaspoon onion powder
- 1 teaspoon smoked paprika
Roast and Braise
- 4 lbs boneless chuck under blade roast
- 2 tablespoons Cholula or other vinegar-based hot sauce binder
- 1 medium white onion halved and sliced into half-rings
- 4 cloves garlic smashed and peeled
- 1 cup beef broth
- 2 tablespoons lime juice zest limes before juicing
Finishing
- Zest of 4 limes added to shredded beef just before serving
Optional for Serving
- Warm corn tortillas street taco size
- Pickled red onions
- Fresh cilantro
- Lime wedges
- Crumbled cotija cheese
- Thinly sliced radishes
- Sliced avocado
Instructions
- Combine all Tex-Mex rub ingredients in a small bowl and stir until evenly mixed.
- Pat the chuck roast dry on all sides with paper towels. Spread a thin, even layer of hot sauce over the entire surface. Apply the rub generously to all sides, pressing it firmly so it coats the surface evenly. Place the seasoned roast uncovered on a wire rack set over a sheet pan and refrigerate for at least 8 hours or overnight.
- Remove the roast from the refrigerator and allow it to sit at room temperature for 45 minutes to 1 hour before cooking. Do not rush this step.
- Start your pellet smoker with the lid open until there are flames in the fire box, then close and preheat to 225°F. Allow the smoker to fully stabilize with the lid closed for 10 to 15 minutes before placing the meat inside. For this Tex-Mex profile, mesquite or a mesquite-oak blend is the most authentic choice. Oak alone is a good option for a milder smoke.
- Fill a full-size 9x13 disposable aluminum pan with water to within 1 inch of the top and place it on one side of the smoker grate over the fire pot. Place the roast on the opposite side of the grate. Insert a leave-in meat thermometer probe into the thickest part of the roast, making sure the tip is not resting in a fat pocket. Close the lid and do not open it until morning.
- Place the roast directly on the smoker grates opposite the fire box. Insert a leave-in meat thermometer probe into the thickest part of the roast. Close the lid. After the first 2 hours, spritz the surface lightly with beef broth or water every 60 to 90 minutes.
- Smoke the roast at 225°F until the internal temperature reaches 165°F, approximately 6 to 9 hours depending on roast size and smoker. Expect a stall between 150°F and 165°F lasting 1 to 3 hours. Do not increase the smoker temperature to push through it - the stall will resolve on its own.
- Remove and discard the water pan if used. Place the sliced onion and smashed garlic in the bottom of a fresh full-size 9x13 disposable aluminum pan. Set the roast on top. Pour the beef broth and lime juice around the sides of the roast, not over the top, to protect the bark. Cover the pan tightly with two layers of aluminum foil, crimping the edges firmly. It is fine to leave the probe in - crimp the foil tightly around the cable.
- Return the covered pan to the smoker and increase the temperature to 250°F. Cook until the internal temperature reaches 200°F to 205°F and the probe slides into the thickest part with little to no resistance. This braising phase takes approximately 3 to 4 additional hours. Begin checking at 200°F and check every 30 minutes. Some larger roasts need to reach 210°F before fully letting go. Do not pull based on temperature alone if the probe still meets resistance.
- Remove the pan from the smoker and allow it to rest, still tightly covered with foil, for at least 1 hour before shredding. Up to 90 minutes for a larger roast.
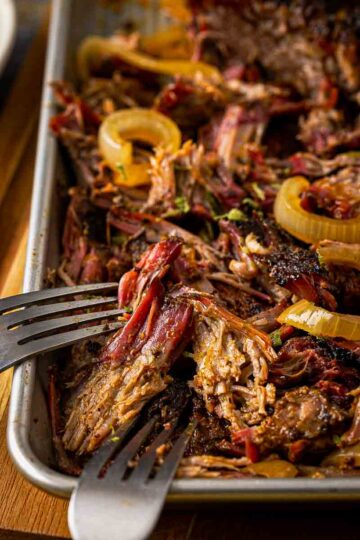
- Remove the foil and transfer the roast to a cutting board. Use two forks or heat-safe gloves to pull the beef into large, meaty shreds - resist the urge to shred it fine. Ladle several generous spoonfuls of pan juices over the shredded beef, including the softened onions, and toss to coat. Add the zest of 4 limes and toss again. Taste and adjust salt if needed.
- Pile shredded beef into warm corn tortillas and top with pickled red onions and a squeeze of fresh lime.
The Braise - Why This Recipe Doesn't Wrap
Wrapping in butcher paper or foil at 165°F is the standard move for smoked beef, and it works. But wrapping traps the drippings that have fallen away during the smoke phase and gives you limited control over what the beef is finishing in. A covered braise pan gives you the same accelerated finishing environment with one significant difference - you control the liquid. Beef broth, lime juice, sliced onion, and smashed garlic go into the pan with the roast, and over the next 3 to 4 hours at 250°F those ingredients cook down into something that is genuinely part of the flavor of the finished beef rather than just carryover smoke drippings. That distinction matters when you are making taco filling, where the braising liquid becomes the sauce you toss the shredded beef in.
Setting Up the Braise Pan at 165°F
A few details here make a difference. I use a fresh pan for the braise rather than the pan the water sat in - clean pan, clean braising liquid. The sliced onion and smashed garlic go on the bottom so the roast sits on top of them rather than directly on the pan surface, which keeps the bottom of the roast from sitting in pooled liquid the entire time. The beef broth and lime juice go in around the sides of the roast, not over the top, to protect the bark from getting washed out before the foil goes on. Two tight layers of foil crimped firmly at the edges - the probe cable is fine to leave in, just crimp the foil around it. That seal matters. Steam escaping means moisture the beef is not finishing in.

Probe Tenderness vs. Temperature - The 210°F Rule for Larger Roasts
Everyone says pull it at 200-205°F and yeah, that's mostly right. But temperature is just a rough guide - what you're actually waiting for is the collagen to fully break down into gelatin, and some bigger roasts need more time to get there.
Start checking at 200°F. Stick your probe into the thickest part. If it glides in like you're poking warm butter, you're done. If it meets any resistance, put it back on for another 30 minutes and check again. Some roasts don't fully give up until 210°F.
Pull based on temp alone and you'll end up with beef that technically shreds but fights you the whole way. Wait for the butter-probe feeling and it falls apart when you look at it wrong. That's what you want.
How to Shred and Finish with Lime Zest
The shredding and finishing step takes about 10 minutes and it is where the taco flavor fully comes together. Everything up to this point has been building toward a well-smoked, well-braised piece of beef - this step is where you turn that beef into something that is specifically built for a tortilla.
Why Lime Zest Goes In After Shredding (Not During the Cook)
Throwing lime zest into the braising liquid feels like a no-brainer - it's already a lime-heavy recipe. Don't do it. All those bright, fresh citrus oils just evaporate over a long braise and what's left is a dull, slightly bitter nothing that doesn't even taste like lime anymore.
The move is adding the zest after you shred the beef. The meat is still hot enough to wake up the citrus oils, but not so hot that it cooks them off. I tested both versions back to back and it's not a close call - the post-shred version tastes fresh and punchy, the braised version just... doesn't.
Four limes worth of zest tossed into the hot shredded beef and the whole pan immediately smells so good. Just do it last.
Toppings That Work and Why
- Pickled red onions - I put these on pretty much every taco I make, and this one needs them more than most. The beef is rich and smoky and the acidity of the onions cuts right through that. If you don't have any made, make them now. They take 20 minutes and keep in the fridge for weeks.
- Fresh cilantro - I know, I know. But if you're a cilantro person, don't hold back here. It adds a fresh herbal note that lifts the whole thing and just fits with the Tex-Mex flavors.
- Lime wedges - I always put lime wedges on the table even when lime is already in the recipe. A fresh squeeze right before you eat wakes everything up in a way that cooked lime just can't replicate.
- Crumbled cotija - this is my go-to over shredded cheese for tacos like this. It's salty and dry and adds a little texture without making an already hearty taco feel even heavier.
- Thinly sliced radishes - I started adding these a few years ago and now I can't stop. The crunch and mild peppery bite against the soft shredded beef is just really, really good.
- Sliced avocado - completely optional, but if you're serving anyone who's nervous about the chipotle heat, put these out. They tone it down without changing anything for the rest of the table.

Storage, Reheating, and Make-Ahead Tips
Store the shredded beef with all the pan juices in an airtight container in the fridge for up to 4 days. And I really do mean with the juices - don't drain them off before storing. Beef that goes in dry tightens up overnight and loses that loose, fall-apart texture you worked 12 hours to get. Keep everything together and it stays just as good as day one.
For make-ahead purposes, this recipe is genuinely better the next day. The beef has time to settle into the braising juices overnight, and the flavors tighten up in a way that tastes more cohesive than it does straight off the smoker.
Why This Beef Reheats Better Than Almost Anything Else
Most leftover meat dries out when you reheat it. This one doesn't, because all that low-and-slow cooking turned the tough connective tissue into gelatin, which keeps the beef moist even the second time around.
To reheat, add the beef to a covered skillet over medium-low heat with a small splash of beef broth. Stir occasionally for 5 to 7 minutes and it loosens right back up. For a big batch, a covered oven at 300°F for 20 to 25 minutes works just as well.
Just don't use high heat with no liquid. That's the only way to ruin this, and it happens quickly.
Recipe Variations
- Chile Colorado Style - Replace the braise liquid with a sauce made from 2 rehydrated ancho chiles, 2 rehydrated guajillo chiles, beef broth, and garlic blended smooth. Skip the lime juice. The result is darker, earthier, and more intensely chile-forward - the beef takes on a deep red color and a flavor that reads more like a traditional red chile stew than a taco filling. Outstanding over rice or in a burrito.
- Extra Smoky and Spicy - Add 1 teaspoon of additional chipotle powder to the rub and nestle 2 to 3 dried chiles de arbol into the braising pan with the onion and garlic. The arbol chiles build a sharp heat that works through the entire batch rather than sitting only on the surface. This is the version I make when I know the crowd wants more edge.
- Sliced Brisket Style (No Braise) - Skip the braise entirely. Smoke to 185°F, wrap in butcher paper, and continue to 200°F. Rest for 1 hour and slice thinly against the grain instead of shredding. The texture is firmer and more brisket-adjacent, and the smoke flavor is more pronounced without the braise liquid softening it. Serve on buttered Texas toast.
- Green Chile New Mexico Style - Swap the ancho and chipotle for 1 tablespoon of New Mexico red chile powder, add 2 to 3 roasted Hatch green chiles to the braising pan, and replace the lime juice with a splash of apple cider vinegar. This pulls the profile away from Tex-Mex and into New Mexican territory - earthier, more chile-forward, with brightness from vinegar instead of citrus. Outstanding over mashed potatoes or stuffed into a flour tortilla. If slicing rather than shredding is more your speed, my BBQ Ranch Chicken Legs and Grilled BBQ Ribs use the same two-stage indirect heat logic and are good back-pocket options for the same grill session if you are cooking for a crowd that wants variety.

Frequently Asked Questions
Can I Make This on a Charcoal or Offset Smoker Instead of a Pellet Grill?
Yes, absolutely.
The steps stay the same; you're just controlling the heat with vents and charcoal instead of turning a knob. Build your fire on one side and place the roast on the other so it cooks over indirect heat. I recommend using an oven thermometer on the grate because the built-in lid thermometers on most charcoal and offset smokers can be pretty unreliable.
Keep a water pan in the smoker, just like you would with a pellet grill, to help with moisture and temperature stability. From there, nothing else changes - the braising step and finished internal temperature are exactly the same no matter which smoker you use.
What If My Chuck Roast Is Smaller Than 4 Pounds or Larger Than 6 Pounds?
The method doesn't change - just your timing. A 3 pound roast will hit 165°F faster, so the smoke time is more like 5 to 6 hours. A roast over 6 pounds will take longer and might need to go past 205°F before the probe slides in cleanly. The timeline in this recipe is written for 4 to 6 pound roasts, so use it as a rough guide, not a strict schedule, if your roast is smaller or bigger.
Can I Skip the Overnight Dry Brine and Season It the Day Of?
You can, but you will notice the difference. The overnight dry brine seasons the beef deeper than the surface and dries the exterior enough that the bark sets faster on the smoker. If you are short on time, at minimum give it 2 to 3 hours uncovered in the refrigerator after applying the rub. Not the same as overnight, but meaningfully better than going straight onto the smoker.
The probe is at 205°F but still feels tight - should I pull it?
No. Temperature is just a guideline - the probe feel is what actually matters. If it meets any resistance going in, the beef isn't ready yet. It'll still shred, but it won't fall apart the way it should.
Put it back on at 250°F and check every 30 minutes until the probe slides in with no resistance. Some larger roasts need to hit 210°F before they get there. Trust the feel over the number.
More Smoker Recipes You'll Love
- Smoked Beer Can Chicken - Chicken smoked in vertical position for perfectly crispy skin.
- Poor Man's Burnt Ends (Better Than Brisket - And I'll Prove It) - Chuck roast cubed, double-smoked, and tossed in a sticky glaze until the edges caramelize into the same bark-heavy, melt-in-your-mouth bites you get from a brisket point.
- Smoked Pork Butt (Boston Butt) - A bone-in pork shoulder smoked at 225°F until the bone pulls clean and the fat has rendered completely into the meat, built for pulled pork that feeds a crowd without last-minute work.
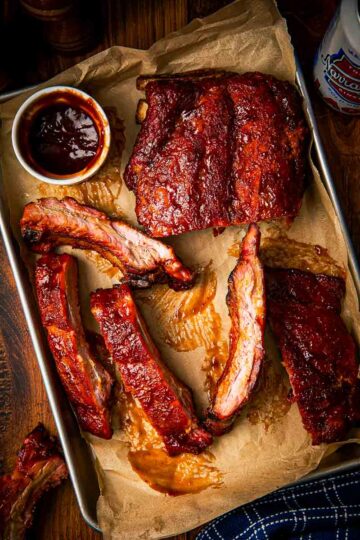
- Insanely Tender Grilled BBQ Ribs Using a Simple 2-Step Foil Method - Baby back ribs grilled low and slow then wrapped in foil with butter and brown sugar to steam tender before going back over direct heat for a caramelized, lacquered finish.
- The Best Smoker Recipes: Pork Butt, Brisket, Chuck Roast & More


Jj says
Md