A 7 to 8 pound brisket flat serves 8 to 10 people and finishes in 7 to 9 hours. This is the recipe for anyone who wants real Texas-style smoked brisket on a weeknight timeline - one flat, one pellet smoker - same bark, same smoke ring, same pull-apart texture as a whole packer, done in a fraction of the time. I start it cold from the fridge on purpose - a cold surface stays in the smoke absorption window longer, and that is what builds the deep pink smoke ring under the bark. I wrap it when the fat cap squishes under my finger, not just when the thermometer hits 160°F, and that one test is what separates a flat that's actually done from one that's just cooked to temperature.
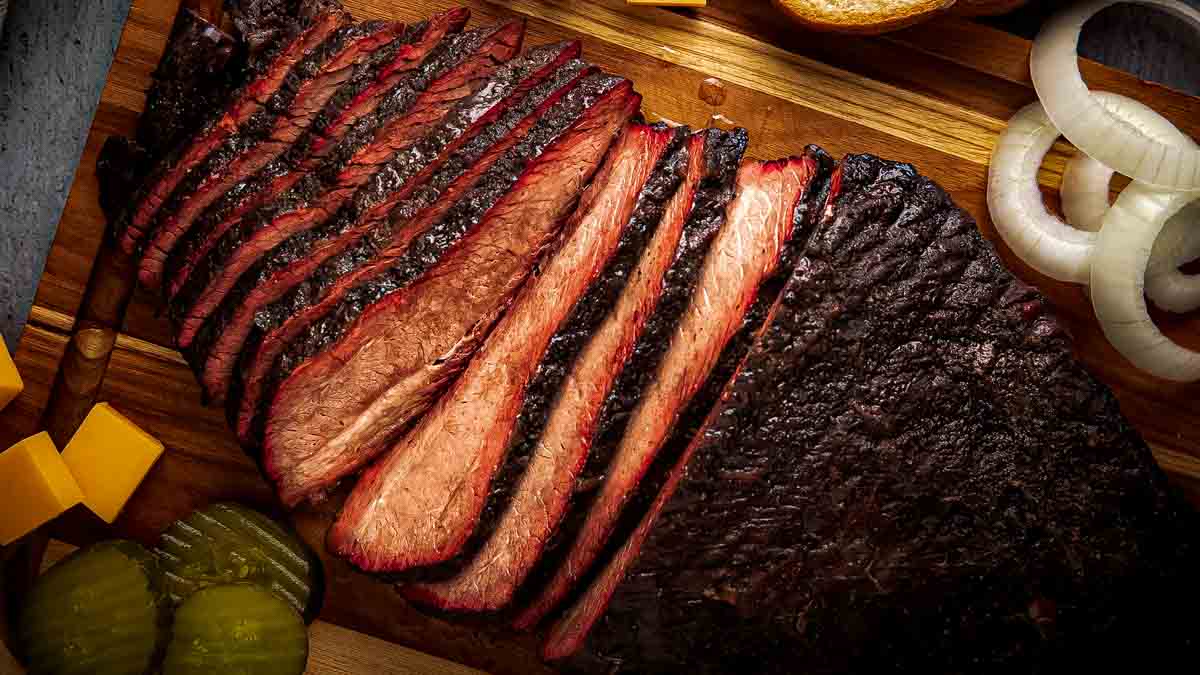
A brisket flat is the cut to smoke when you want real Texas-style brisket but you are not feeding twenty people. It is leaner than a whole packer, which makes it more susceptible to drying out - but that is a condition you manage, not a flaw in the cut. Hardcore Carnivore Black goes on right before it hits the smoker, doing the job of your rub and your salt in one step and turning that surface into something that looks almost burnt and absolutely isn't.
Wrapping is where most brisket flats either get right or go sideways. I don't wrap at a temperature - I wrap when the fat cap renders, which you can feel with your finger. Press into the fatty area and if it gives and oozes, it's ready. If it feels firm, give it more time. Once it's wrapped, the butcher paper has already been coated with melted beef tallow so the flat is basting itself as it finishes at 250°F. Then it rests - minimum two hours, longer if you can manage it - and by the time you slice it against the grain, you have juicy, glossy slices that hold together just long enough to pick up before they fall apart.

Why a Brisket Flat and Not a Whole Packer
A whole packer brisket is two muscles in one - the flat and the point - and it runs 12 to 16 pounds with a thick fat layer between them that bastes the leaner flat throughout a 12 to 14 hour cook. That fat is doing real work. A brisket flat is just the flat, trimmed, and typically weighing 7 to 8 pounds, which means it finishes faster, fits on a standard pellet smoker grate without any maneuvering, and serves 8 to 10 people rather than a neighborhood. For a weeknight-adjacent cook or a smaller household, it is the more practical cut by a wide margin.
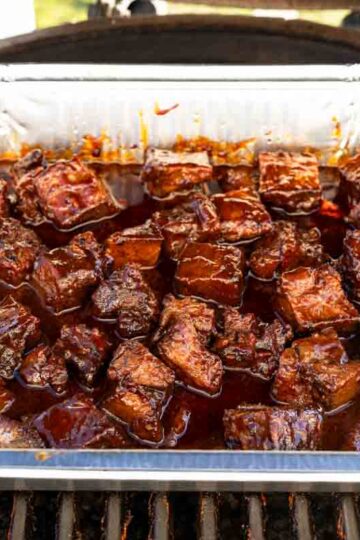
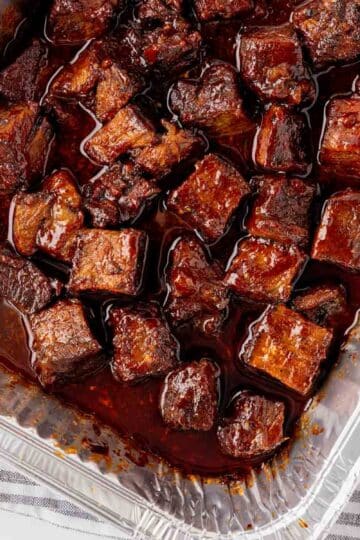
The tradeoff is that a flat is more susceptible to drying out, particularly toward the thin end, because it does not have the point's fat reserves feeding it from underneath. That is not a flaw in the cut - it is a condition you manage. This recipe manages it in two specific ways: beef tallow applied directly to the butcher paper wrap, which bastes the exterior as the flat finishes, and a mandatory long rest that gives the muscle fibers time to reabsorb the moisture that tightens during the smoke. Handled correctly, a brisket flat produces slices that are just as juicy as anything off a whole packer. If you want all the rendered fat and bark of a full packer experience without the commitment, my Poor Man's Burnt Ends uses chuck roast to get there - same low-and-slow method, different cut, and finished in a sticky glaze that delivers a result most people find hard to argue with.
What You Lose (and How This Recipe Compensates for It)
The point on a whole packer brisket is heavily marbled and nearly impossible to overcook - its fat content gives it a wide window of forgiveness. A flat has no such buffer. What you lose in fat you compensate for with technique: the cold start keeps the meat in the smoke absorption window longer so you build a deeper crust before moisture starts escaping, the tallow wrap replaces the missing intramuscular fat during the finishing phase, and probe tenderness rather than temperature alone tells you when the collagen has actually converted. None of these steps are complicated, but skipping any one of them shows up in the finished slice.

Why I Use Hardcore Carnivore Black on This Brisket
Most brisket rubs are some version of salt, pepper, and garlic. That combination works, and the Dalmatian rub variation in this recipe uses exactly that. But Hardcore Carnivore Black is doing something different - it contains activated charcoal, which pushes the bark color from dark mahogany into near-black territory and adds a subtle mineral depth to the crust that a standard rub does not produce. Sea salt is the first ingredient, which means it is functioning as your salt layer and your rub simultaneously. I do not add additional salt and I do not dry brine before applying it, because the seasoning is already calibrated to handle both jobs.
The other reason I reach for it on a brisket flat specifically is bark protection. Because this cut is leaner and more exposed than the point on a whole packer, a well-developed crust does real work - it shields the exterior during the long smoke. Hardcore Carnivore Black builds a firm, cohesive bark that holds up through the wrap and the rest and slices cleanly without crumbling. The color is dramatic the first time you see it and completely normal once you understand what activated charcoal does.
What the Activated Charcoal Actually Does to the Bark
Activated charcoal is a fine, porous carbon material that absorbs moisture on contact, which accelerates crust formation on the surface of the meat. In practical terms, the outer layer of the brisket dries and sets faster in the early smoke phase, giving the bark more time to develop depth and texture before the internal temperature starts climbing. The near-black color is not burning - it is the charcoal combined with the Maillard reaction happening at the surface over hours of low heat. Slice through it and the interior is pink and moist. The bark is doing exactly what a bark is supposed to do.
How to Apply It Without Making a Mess
Hardcore Carnivore Black has a reputation for being messy, and the activated charcoal will absolutely stain your hands, your counters, and your clothes if you are not deliberate about it. I apply it by shaking directly from the container, holding the bottle about 12 inches above the meat, which gives you even distribution without dumping it in one spot. Aim for 75 to 80 percent coverage - you should still be able to see meat through the rub in places. Then press it gently into the surface with your hands rather than rubbing it in, which keeps the particles from going airborne.
If shaking from the bottle feels unwieldy, pour the amount you need into a small bowl first and apply by hand from there. It keeps the seasoning off your counters and out of the air. Either way, wear an apron and wash your hands thoroughly before touching anything else. The black color transfers easily and does not come off countertops as quickly as it comes off your hands.

How to Smoke a Brisket Flat Step by Step
1. Trimming the Fat Cap the Night Before
The fat cap on a brisket flat is thicker and less even than it looks at the butcher counter. The goal at trim time is to get it down to a consistent quarter inch across the entire surface - thin enough that it renders during the cook and bastes the meat underneath, thick enough that it still provides a layer of protection against the direct heat radiating up from the grate. Anything thicker than a quarter inch will not fully render, and you end up with a waxy, chewy layer on top of your slices rather than a clean, glossy finish.


I trim the night before for two reasons. First, it gives the cut surface time to dry out in the refrigerator overnight, which contributes to better bark formation the next day - a dry surface sets faster than a wet one. Second, it means the morning of the cook is straightforward: pull the brisket, season it, put it on the smoker. No prep scrambling while the smoker is preheating. Use a sharp boning or flexible trimming knife for this. A dull knife drags and tears rather than slices, and on a cold flat that resistance makes it harder to control how much you're removing.
2. Setting Up Your Pellet Smoker at 225°F
Target 225°F and give the smoker a full 15 to 20 minutes to stabilize before the brisket goes on. A pellet smoker that has just reached temperature is still cycling - the fire pot is finding its rhythm and the internal temperature can swing 15 to 20 degrees in either direction during the first few minutes. Putting the brisket on a smoker that is still stabilizing means the first critical hour of smoke exposure happens under inconsistent conditions.

For wood, oak is the most traditional choice for Texas style brisket and produces a clean, medium-bodied smoke that does not compete with the beef. Hickory is slightly stronger and works well on a flat because the leaner cut can handle a more assertive smoke flavor without the fat to mellow it. A competition beef blend sits between the two and is a reliable default if you are not sure which direction you want to go. Fruit woods - apple, cherry - are too mild for this application and will not produce the smoke ring depth this recipe is after.
3. Placing the Brisket and the First Two Hours
Fat cap side up, thin end away from the fire pot. The fat cap facing up allows the rendering fat to run down over the sides of the flat as it cooks rather than dripping straight down and away from the meat. The thin end positioned away from the fire pot is about protecting the most vulnerable part of the flat - the thin end dries out first, and putting it on the cooler side of the grate gives it a slightly more forgiving environment during the longest phase of the cook.

The first two hours are strictly hands-off. Every time you open the smoker lid you release heat and smoke, and the early stage of a brisket flat cook is when the surface is doing the most important work - drying out, taking on smoke, and beginning to form the bark. Opening the lid disrupts all three of those processes simultaneously. Set your probe thermometer, close the lid, and leave it alone until either the two-hour mark arrives or the internal temperature hits 110°F, whichever comes first. If you are deciding between oak, hickory, pecan, and mesquite for this cook, my Post Oak vs. Hickory vs. Mesquite vs. Pecan guide breaks down exactly how each wood behaves on beef and which one produces the smoke ring depth this recipe is after.
4. How and When to Spritz (And Where Not to Spritz)
Spritzing serves two purposes: it keeps the surface of the flat from drying out too aggressively in the early smoke phase, and it adds a thin layer of moisture that smoke particles adhere to, which contributes to bark color and depth. It does not add significant flavor on its own, and more is not better - oversaturation washes away the seasoning that has been building on the surface and delays bark formation rather than helping it.


Once spritzing begins, every 30 to 45 minutes is the right interval. Hold the bottle about 12 inches above the surface and apply 8 to 10 pumps in a single even pass across the length of the flat. What you are looking for after spritzing is a light glisten - the surface looks refreshed but not wet. If liquid is pooling or running off the sides, you are applying too much. The other thing I pay attention to is where the spritz lands. The meat areas benefit from it. The fat areas do not - fat does not absorb moisture the way exposed muscle does, and spritzing the fat cap directly just creates runoff without contributing anything to the surface you are trying to develop. Work the spray across the meat-exposed areas and let the fat take care of itself.

Texas Style Smoked Brisket Flat (Pellet Smoker)
CLICK on STARS to REVIEW the RECIPE, then CLICK OK
Equipment
- Pellet smoker (recipe tested on Pit Boss 700FB2)
- Leave-in probe thermometer
- Sharp boning or trimming knife
- Uncoated pink butcher paper (do not substitute regular butcher paper or parchment, which are coated)
- Spray bottle
- Small cooler (for extended rest, optional)
Ingredients
Brisket
- 7 lbs brisket flat
- 3 tablespoons Hardcore Carnivore Black Activated Charcoal Meat Seasoning Rub
For Smoking
- Water or low-sodium beef broth in a spray bottle for spritzing
For the Wrap
- ¼ cup beef tallow melted
Instructions
- Trim the fat cap on the brisket flat down to about ¼ inch thick using a sharp knife. Remove any large hard pieces of fat and any tough silver skin from the meat side. Pat the entire brisket dry with paper towels, then return it to the refrigerator uncovered until you are ready to season and smoke it. Do not season the night before.
- On the day of the cook, preheat your pellet smoker to 225°F using oak, hickory, or a competition beef blend pellet. While the smoker preheats, remove the brisket straight from the refrigerator and set it on a clean work surface. Sprinkle the Hardcore Carnivore Black seasoning directly from the bottle, holding it about 12 inches above the meat for even coverage. Aim for 75 to 80 percent coverage where you can still see meat through the rub, then press gently into the surface with your hands.
- Set the brisket fat cap side up on the smoker grate with the thin end away from the fire pot. Insert a leave-in probe thermometer into the thickest part of the flat, making sure the probe tip is centered in the meat and not resting near the fat cap or the surface. Do not open the smoker until the meat reaches 110°F or the 2-hour mark, whichever comes first.
- After 2 hours or once the brisket reaches 110°F internally, begin spritzing every 30 to 45 minutes. Hold the spray bottle about 12 inches above the surface and apply 8 to 10 pumps in an even pass across the full length of the flat, targeting the meat areas and avoiding the fatty areas when possible. The surface should look lightly glistened, not dripping.
- Continue smoking and spritzing until the internal temperature reaches 160°F and the bark is dark mahogany in color and firm to the touch. This takes approximately 5 to 7 hours from the start of the cook.
- When the internal temperature reaches 160°F, press a finger into the fatty areas. If the fat squishes and oozes, the brisket is ready to wrap. If not, increase smoker temperature to 250°F and continue cooking until the fat renders. If the internal temperature reaches 180°F before the fat renders, wrap it anyway.
- Remove the brisket from the smoker and place it on a clean work surface. Lay a sheet of uncoated pink butcher paper on the surface, long enough to wrap the brisket on all sides with enough extra to tuck underneath. Pour all of the melted beef tallow onto the paper, spreading it across the area where the brisket will rest and the adjacent area where the paper will fold up over the top. Set the brisket meat side down into the tallow. Fold the near edge up and over by an inch or two, fold both side edges in snugly, then roll the package forward onto the remaining paper to cover the top. Roll forward once more to tighten and secure the ends. If using a leave-in probe, press it straight through the paper into the thickest part of the meat.
- Return the wrapped brisket to the smoker fold side down. Cook at 250°F until the internal temperature reaches 200°F to 203°F and a probe slides into the thickest part of the flat with no resistance, about 2 to 3 more hours.
- When the brisket is probe tender, remove it from the smoker. Leave it fully wrapped in the butcher paper and rest for a minimum of 2 full hours before slicing. For an extended rest, allow the internal temperature to drop to about 180°F on the counter, then place in a small cooler with a towel directly on top of the wrapped brisket. Close the cooler and allow the internal temperature to drop to 140 to 145°F, which can take 6 to 12 hours.
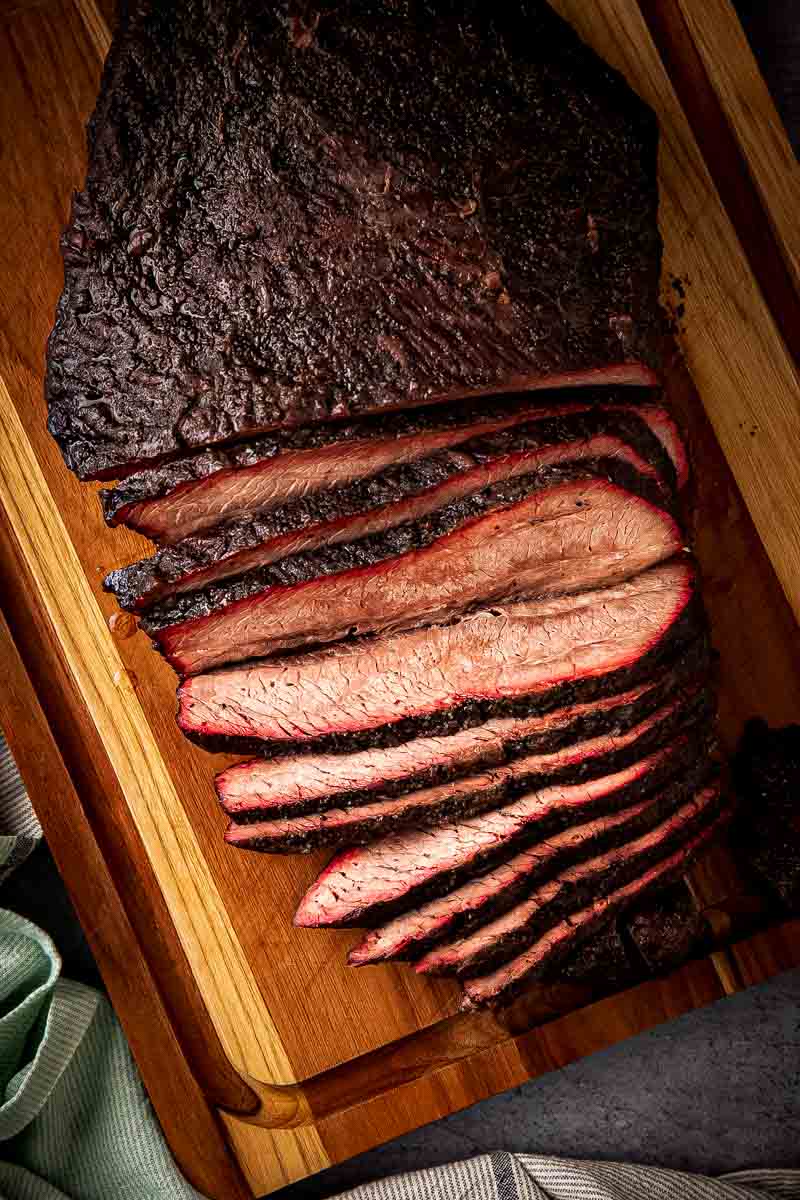
- Unwrap the brisket and place it on a cutting board. Identify the direction of the grain - the long muscle fibers running through the flat - and slice against the grain in slices about ¼ inch thick. Slices should hold together but bend slightly when lifted. Serve immediately.
The Wrap Decision - The Fat-Render Touch Test
At some point between 155°F and 165°F, every brisket hits the stall - the internal temperature plateaus while surface moisture evaporates and cools the meat at the same rate the smoker is heating it. Wrapping pushes through the stall by trapping heat and eliminating that evaporative cooling. The question is not whether to wrap but when, and the answer is not a fixed temperature. It is a physical condition you feel with your hand.
When the internal temperature approaches 160°F, I press a finger firmly into the fattiest area on the outside of the flat. Fat that has not rendered feels firm and pushes back. Fat that is ready gives under your finger and oozes slightly rather than holding its shape. That texture tells me something the thermometer cannot - that the fat has loosened enough to actually baste the meat as the wrap tightens around it. The same wrapping logic applies when I make Smoked Chuck Roast - the semi-permeable paper keeps the bark intact through the finishing phase in a way that foil simply does not, and once you've compared the two side by side it's hard to go back to foil.


Why I Don't Rely on 160°F Alone
A flat can read 160°F with fat that has barely softened, and wrapping it at that point means the exterior finishes waxy rather than clean. When I hit 160°F and the fat still feels firm, I bump the smoker to 250°F and check every 15 to 20 minutes until it yields. If the internal temperature reaches 180°F before the fat fully renders, I wrap it anyway - at that point the open smoker is not going to do what the wrap and rest can finish. Temperature is the boundary. The touch test is the actual decision.
How to Wrap in Pink Butcher Paper with Beef Tallow
Uncoated pink butcher paper is semi-permeable - it holds heat and retains moisture while letting a small amount of steam escape, which is what keeps the bark from going completely soft the way it does under foil. Standard white butcher paper and parchment are both coated and behave too close to foil to substitute here.
Before the brisket touches the paper, I spread all of the melted beef tallow across the resting area and the section that will fold up over the top. Setting the flat meat side down into the tallow means every surface ends up coated as the paper wraps around it. The wrap needs to be snug - fold the near edge up and over, bring the sides in tight, roll forward to cover the top, then roll once more to lock the ends. Any open seam lets steam out. If the paper runs short, overlap a second sheet underneath before you start, because a gap at the bottom is where the tallow drains out first.
How to Know When a Smoked Brisket Flat Is Done
Temperature gives you a window to start paying attention. It does not tell you when to pull. A brisket flat can read 200°F and still feel firm when you probe it, which means the collagen inside has not yet converted to gelatin - and that conversion is what produces the texture you spent nine hours working toward. The thermometer and the probe are doing two different jobs, and you need both.
Probe Tenderness vs. Temperature - What Each One Tells You
The target internal temperature is 200°F to 203°F, and when you are in that range you push the probe into the thickest part of the flat and pay attention to how it feels going in and coming out. What you are looking for is no resistance - it slides through cleanly, the way a skewer moves through softened butter. If it meets any springiness or drag, the collagen is still working and the brisket needs more time. I give it another 30 minutes and test again.
If the flat reaches 205°F and still has not fully yielded, I pull it anyway. Residual heat inside a tightly wrapped package continues breaking down collagen after the flat leaves the smoker, and a long rest will finish what the smoker started. Pushing past 205°F chasing probe tenderness risks drying out the thinner end before the thicker part catches up.

The Rest Is Not Optional - Here's Why
During the long smoke, muscle fibers contract and push moisture toward the center of the flat. The rest period is when those fibers relax and reabsorb that moisture. Cut into the brisket too soon and the juices run onto the cutting board instead of staying in the meat. The butcher paper wrap holds heat well enough that the flat stays at a comfortable serving temperature for the full two hours without any help, so there is no practical cost to waiting.
The Counter Rest vs. the Cooler Hold Method
A two-hour rest on the counter is the minimum. The internal temperature will drop from around 200°F to somewhere in the 150°F range during that window, which is plenty hot to serve and enough time for the fibers to relax fully.
For a longer hold, I wait until the internal temperature drops to around 180°F on the counter, then place the wrapped flat in a small cooler with a towel laid directly on top and close the lid. The insulation slows the temperature drop significantly - the brisket will hold between 140°F and 145°F for six to twelve hours depending on the cooler. This is the method I use when the flat finishes earlier than expected, which happens more often than not since timing on a brisket flat is genuinely variable. A flat that finishes two hours ahead of schedule is not a problem when you have a cooler ready.
How to Slice a Brisket Flat Against the Grain
The grain on a brisket flat runs lengthwise from one end to the other - the long parallel muscle fibers are usually visible on the surface if you look before you cut. Slicing parallel to those fibers leaves them long and intact, which makes every bite noticeably chewier than it should be. Slicing perpendicular to them shortens every fiber to the width of the slice, and that is what gives you the tender bite a well-smoked flat is supposed to have.
Quarter-inch slices are the target thickness. At that width, a properly rested and probe-tender flat will hold together when you lift it but bend slightly under its own weight - firm enough to pick up, tender enough to pull apart without effort. Thicker slices emphasize chew. Thinner ones can fall apart before they reach the plate. If you are not certain which direction the grain runs before your first cut, make a small test cut at the end of the flat and look at the cross-section - the fiber direction will be immediately clear.

What to Do with Leftovers
- Storage: Let slices cool to room temperature, then transfer to an airtight container or wrap tightly in foil. Refrigerate for up to four days.
- Reheating: A skillet over medium-low heat with a splash of beef broth - about two tablespoons per four to six slices - covered with a lid for three to four minutes, flipping once halfway through, is the method that preserves the most moisture and keeps the bark from going completely soft. For a larger portion, wrap loosely in foil with a small splash of broth and warm in a 275°F oven for 15 to 20 minutes. The microwave works in an emergency but accelerates moisture loss and softens the bark faster than any other method.
- Freezing: Slice before freezing and portion into meal-sized batches. Lay flat in a single layer in a zip-top freezer bag, press out as much air as possible, and freeze for up to three months. Thaw overnight in the refrigerator and reheat using the stovetop or oven method above with a splash of broth added.
Recipe Variations and Substitutions
Dalmatian Rub Version (Salt and Pepper Only)
Equal parts coarse kosher salt and coarse black pepper, applied the same way as the Hardcore Carnivore Black - right before the brisket goes on the smoker, pressed gently into the surface. I prefer this version when I want the beef and the smoke to do all the talking, usually when I'm cooking for someone who I know pays attention to what brisket actually tastes like underneath the bark. The crust will be dark brown rather than near-black, and it will be slightly more textured since coarse black pepper creates more surface variation than a fine rub. If you want to understand what the flat itself tastes like without any seasoning competing with it, this is the version to make first.
Spicy Texas Version
Apply the Hardcore Carnivore Black as written, then follow immediately with a light, even dusting of cayenne across the entire surface before the brisket goes on the smoker. The amount is a judgment call based on your heat tolerance - a light dusting adds a background warmth that builds as you eat without announcing itself in the first bite, while a heavier hand produces genuine heat in the bark. The cayenne does not significantly alter the color or the bark texture, and it does not disrupt the seasoning balance since Hardcore Carnivore Black is already calibrated for salt.
Coffee-Rubbed Version
Mix one part finely ground dark roast coffee with two parts Hardcore Carnivore Black before applying. The coffee deepens the bark color further - past near-black into something that looks almost lacquered - and adds a roasted, slightly bitter edge to the crust that balances well against the richness of the beef fat. Use finely ground coffee rather than coarse ground; coarse grounds do not adhere as evenly and can create an uneven bark texture. The coffee flavor in the finished bark is subtle and more of a background note than a dominant flavor, which is the right proportion for this application. I use the same coffee-in-the-rub approach on my Smoked Pork Butt - the way coffee interacts with a long low-and-slow smoke on a fatty cut is worth understanding before you commit it to a brisket flat, and that recipe is a lower-stakes place to test the combination first.
Frequently Asked Questions
Can I smoke a brisket flat the day before and reheat it?
Yes, and it works well. Let the flat rest fully, then refrigerate it whole and wrapped in foil - slicing the next day rather than the night before keeps more moisture in the meat. To reheat, place the foil-wrapped flat in a 300°F oven for 45 minutes to an hour, or slice and warm in a covered skillet over medium-low heat with a splash of beef broth. The bark softens slightly compared to day-of, but the flavor and tenderness hold up well enough that for a gathering where you want to avoid cooking on the day itself, it is a completely reasonable approach.
Why did my brisket flat come out dry?
The two most common causes are wrapping too late and slicing too soon. A flat that goes into the butcher paper after the surface has already dried out has missed the window where the tallow wrap does its best work, and a flat sliced before the full rest sends its juices onto the cutting board instead of staying in the meat. If the thin end is consistently drier than the thick end, that is a placement issue - position it away from the fire pot on the next cook and the result will even out.
Do I need a water pan in my pellet smoker when cooking brisket flat?
I don't use one for this recipe. The spritzing schedule handles surface moisture through the smoke phase, and the tallow wrap compensates for any dryness during the finish. If your smoker runs particularly hot or dry, or if the thin end has dried out on you before, a small water pan positioned away from the direct heat is a reasonable adjustment - but it is not a default requirement here.
How do I know if my brisket flat stalled and how long does it last?
The stall appears as a plateau on your leave-in probe - the internal temperature stops climbing and holds somewhere between 150°F and 170°F for one to three hours. It is not a problem. It happens because evaporating surface moisture is cooling the meat at roughly the same rate the smoker is heating it. Wrapping when the fat renders pushes through it by eliminating that evaporative cooling. If the temperature has been flat for more than 90 minutes and the fat is yielding on the touch test, wrap it - the open smoker has nothing left to add at that point.
What to Do with Leftover Brisket
- Brisket tacos - This is what I make the morning after, without exception. Rough chop the leftover slices, hit them in a hot skillet for two minutes so the edges crisp back up, and pile them into warm corn tortillas with white onion, fresh cilantro, and a squeeze of lime. It's better than the dinner was and I'm not joking.
- Brisket breakfast hash - Dice the flat into small cubes and cook in a hot skillet with cubed potatoes, diced onion, and bell pepper until everything picks up some color and crunch. Top with a fried egg; the yolk running into the smoky beef is the reason I always slice more than I need the first night.
- Brisket grilled cheese - Layer thin slices on thick sourdough with sharp cheddar or pepper jack, butter the outside, and cook low and slow in a skillet until the cheese is fully melted through. The bark on the brisket turns into the best thing that has ever happened to a grilled cheese.
- Brisket loaded baked potato - Pile chopped flat onto a baked potato with shredded cheddar, sour cream, and pickled jalapeños. I make this specifically when the thin end slices are a little more done than I wanted - it's the best use for them.
More Smoker Recipes You'll Love
- Poor Man's Burnt Ends (Better Than Brisket - And I'll Prove It) - Chuck roast cut into cubes, smoked low and slow, and finished in a sticky glaze that gives you all the bark and richness of brisket burnt ends at a fraction of the cost.
- Smoked Chuck Roast (Poor Man's Brisket Done Right) - A well-marbled chuck roast smoked on a pellet grill until probe tender, with the deep smoke ring and pull-apart texture that makes it the most practical alternative to a whole packer brisket.
- Smoked Pork Butt (Boston Butt) - A bone-in pork butt smoked low and slow until the bone pulls clean, with a bark-covered exterior and enough rendered fat running through the meat to keep every pulled strand juicy.
- Santa Maria-Style Tri-Tip, Smoked or Roasted, with Reverse-Sear Instructions - Tri-tip seasoned California-style and finished with a reverse sear that builds a crust on the outside while keeping the center a consistent medium-rare from edge to edge.

Comments
No Comments