
If you've ever stared at that Vitamix dial and thought, "Do I really need all these speeds?", you're not alone-I was right there with you. Over time, I learned that knowing when to stop at 4 and when to go all the way to 10 is the difference between a rustic, scoopable dip and a runny sauce. In this guide, I'll walk you through how I use each setting in my own kitchen so you can get the textures you're chasing, every single time.

The variable speed dial on a Vitamix is not decorative. Every number between 1 and 10 corresponds to a specific blade speed - and using the right speed at the right moment is the difference between a perfectly chunky salsa and an unintentional purée. Here is exactly what each speed does, how to ramp through them correctly, and whether the preset programs on newer models are worth using.
Understanding your speed settings is one of the most important skills for getting the most out of your machine. If you're still getting familiar with the basics, our Ultimate Beginner's Guide to Using a Vitamix Blender is the perfect starting point before diving in here.
How the Variable Speed Dial Actually Works
On every Vitamix with a manual dial, the Variable Speed Control runs from 1 (slowest) to 10 (fastest), with continuous, analog control at every point in between. This is not like a household blender with three buttons - it's more like a gas pedal than a gear shift. You can move the dial slowly or quickly, pause it at 6.5, or sweep smoothly from 1 to 10 in two seconds depending on what the blend requires.
The higher the speed, the faster the blades spin, and the finer and smoother the final texture becomes. At full speed (10), the blades on a standard Vitamix rotate at approximately 37,000 RPM - fast enough to generate frictional heat that brings cold soup ingredients up to serving temperature in five to six minutes without any external heat source.
One important nuance: under load, the motor behaves differently than in an empty container. When blending something thick, the pitch of the motor stops changing noticeably somewhere around speed 7-8, because the microprocessor is managing the motor under resistance. This is normal and not a malfunction - the machine is protecting itself. In empty-container tests, you'll hear the full pitch range through all 10 speeds; in real blending, the effective range compresses slightly at the top end.
Once you've nailed the right speed for your smoothie, the next step is keeping it fresh. Check out our guide on how to store smoothies so your batch-blended drinks stay just as good on day two.
The Complete Speed Reference Guide
Speeds 1-3: Coarse Texture and Controlled Chops
At the lowest end of the dial, the blades move slowly enough to break down ingredients without puréeing them. These speeds are for tasks where you want to retain visible texture and some structural integrity.
- Speed 1: The mandatory starting point for every blend - always begin here before ramping up. Also useful for gently folding flavors into gravies, syrups, and sauces where you just want light agitation
- Speed 2-3: Ideal for chunky salsa, rough-chopped nut mixtures, and coarse pestos where you want discernible pieces rather than a paste
The key rule at low speeds: never run a thick, resistant blend at speeds 1-3 for longer than 10 seconds. The motor has to work harder to turn blades slowly through dense material than it does at high speed, where centrifugal force and blade geometry work in its favor. Long low-speed runs on thick ingredients are harder on the motor than running full tilt.
Speeds 4-6: Mid-Range Blending and Hearty Textures
The middle of the dial is where soups with body, chunky dips, and textured batters live.
- Speed 4: Chopping heartier vegetables for chunky blended soups; combining ingredients that need to hold some texture
- Speed 5: The Pulse mode default speed - when you flip the Pulse switch, the machine runs at whatever speed the dial is set to, but Speed 5 is the sweet spot for controlled chopping. Pulse on Speed 5 is the move for refreshing a drink, loosening a thick blend, or dicing onions with surgical precision
- Speed 6: Thicker batters (pancakes, waffles), gravies, and coarser hummus if you prefer a rustic texture
Speeds 7-9: Fine Purées and Intermediate Blending
At this range, the blades are moving fast enough to break down fibrous and dense ingredients into uniformly smooth results.
- Speed 7-8: Nut milks, finely puréed soups, smooth hummus, and protein shakes where you want complete integration without necessarily running full throttle
- Speed 9: Most dressings and sauces that need emulsification; achieves near-identical results to Speed 10 for most liquid blends
Speed 10: Everything That Needs to Be Silky Smooth
Speed 10 is the workhorse setting and the destination for the vast majority of Vitamix recipes. At full speed, the machine achieves:
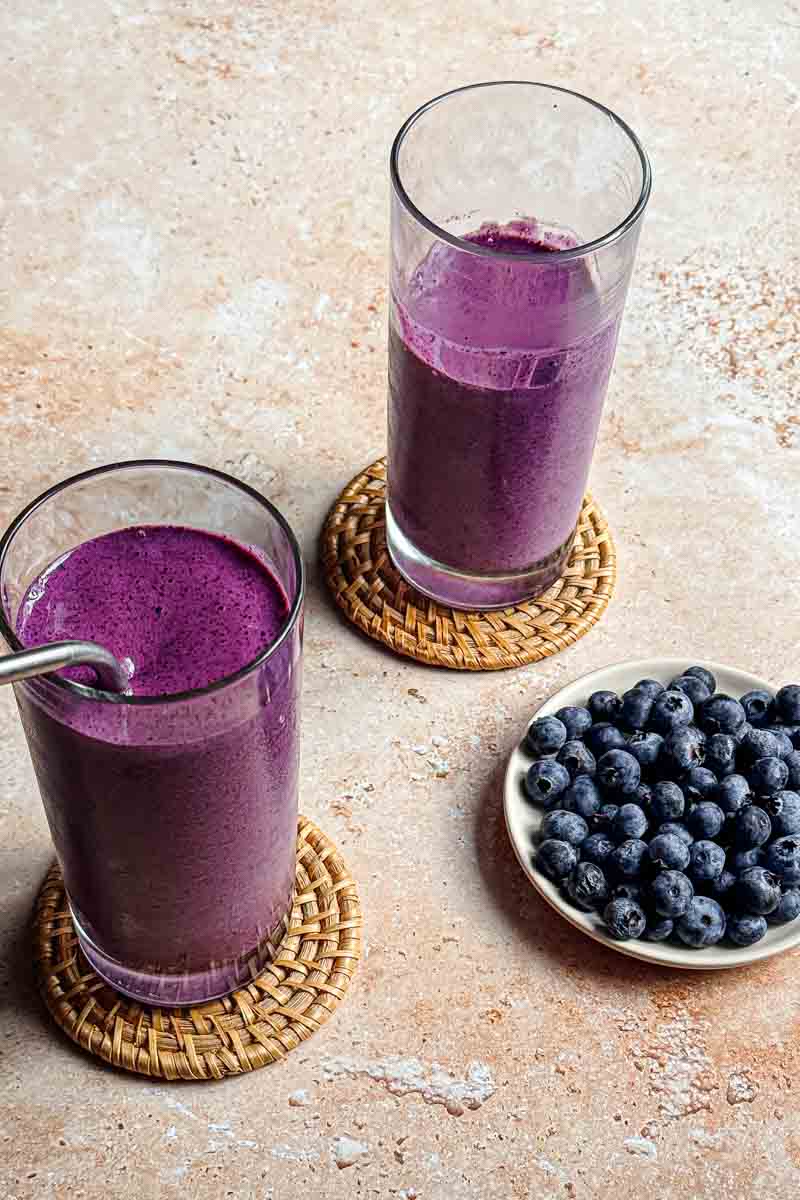
- Silky smoothies - fibrous kale, frozen mango, and chia seeds fully disappear into the liquid. This is my favorite setting for Blueberry Protein Smoothie.
- Hot blended soups - blade friction generates enough heat over 5-6 minutes to bring cold ingredients to serving temperature
- Nut butters - roasted nuts transition from crumble → paste → creamy spread in 60-90 seconds
- Frozen desserts and sorbets - dense frozen fruit breaks down into a soft-serve texture
- Nut milks - raw nuts and water fully integrate in under 60 seconds
Running at Speed 10 is also better for the motor's long-term health than prolonged mid-range use, because high-speed operation draws in more air to cool the motor internally.
How to Ramp Speed Correctly
Starting a Vitamix on Speed 10 is not just jarring - it's the fastest way to splash ingredients onto the container lid and create uneven blending. The correct technique for nearly every recipe is the same:
- Start at Speed 1 - always, without exception
- Hold for 3-5 seconds to let the blades grab the ingredients and begin the vortex
- Ramp smoothly to your target speed - move the dial in one fluid sweep, not in jumps
- Blend at target speed for the time required by the recipe
- Ramp back down to 1 before turning the machine off - this prevents hydraulic shock in the motor and reduces wear over time
For most smoothies and soups, the full ramp-up takes about 5-7 seconds and should feel deliberate but not slow. For chunky applications (salsa, rough chops), you may stay at low-to-mid speeds the entire time and never reach 10.
Variable Speed vs. Presets: Which Should You Use?
This is the most debated question among Vitamix owners, and the answer depends on how you think about cooking. Here is the honest breakdown:
| Feature | Variable Speed (Manual) | Preset Programs |
|---|---|---|
| Control | Full, granular, real-time | Automated, fixed ramp profiles |
| Learning curve | Moderate — requires attention | Low — press and walk away |
| Available on | All Vitamix models | Ascent, Propel, and Explorian series only |
| Best for | Experienced users, texture-sensitive recipes | Beginners, consistent repeatable results |
| Flexibility | Unlimited — adapt mid-blend | Fixed — can't adjust once running |
| Motor efficiency | Depends on technique | Optimized by Vitamix engineers |
What Presets Actually Do
A preset program is essentially a pre-recorded speed ramp sequence - a recipe of speed changes and hold times that Vitamix engineers tested for a specific outcome. Select the Smoothie preset, and the machine starts slow, accelerates to full speed, holds there for the optimal blend time, then stops automatically. The program does what an experienced user would do manually, but without requiring you to watch the clock.
On the Ascent X4, you get five programs: Smoothie, Hot Soup, Frozen Dessert, Dips & Spreads, and Self-Clean. The Ascent X5 adds five more niche programs for things like batters and nut milks. Older and budget models like the Explorian E310 have no presets - variable speed only.
The Case for Manual Control
The presets are not magic. Every preset program is simply replicating a speed ramp that you can do yourself manually. Experienced Vitamix users almost universally default to manual variable speed for one reason: real-time feedback. You can hear and feel when a blend is done - the motor pitch changes when everything is fully processed, the vortex steadies, and the sound becomes uniform. A preset doesn't know any of that; it just runs its timer and stops regardless of whether your frozen mango was extra dense that morning.
The practical approach most experienced users land on: use presets to learn the correct ramp profile, then replicate it manually once you've internalized the rhythm. Presets are an excellent teaching tool. Manual control is the long-term destination.
When Presets Win
- You're a beginner who hasn't yet internalized the ramp-and-listen approach
- You're making hot soup - the 6-minute full-speed run required for friction heating is tedious to time manually
- You want perfect repeatability - the same smoothie, the same texture, every morning, with no decisions required
- You're distracted - presets auto-stop, which means no over-blended, overheated results if you step away
The Pulse Feature: A Third Option
The Pulse switch sits between variable and preset - it's manual control with a built-in brake. When you hold Pulse down, the machine runs at the currently selected speed for as long as you hold it, then stops the instant you release. This makes it ideal for:
- Controlled chopping - short 1-second pulses on Speed 3-4 for salsa, relish, or rough chops
- Unsticking a thick blend - pulse at Speed 8-10 to break an air pocket before running full speed
- Refreshing a drink - one or two quick pulses on Speed 5 to reintegrate a separated smoothie before pouring
Think of Pulse as a burst mode - all the power of whatever speed you're dialed into, with surgical on/off precision.
Speed Selection Quick Reference
| Task | Speed | Notes |
|---|---|---|
| Starting every blend | 1 | Always begin here |
| Chunky salsa | 2–3 + Pulse | Short bursts only |
| Coarse pesto | 3–4 | Stop before it becomes smooth |
| Gravies and sauces | 4–6 | Adjust for desired body |
| Pancake/waffle batter | 5–6 | No more than 25 seconds total |
| Hummus (smooth) | 8–10 | Use tamper for thick blends |
| Protein shakes | 10 | Full speed, 30–45 seconds |
| Green smoothies | 10 | Full speed, 45–60 seconds |
| Nut butter | 10 + tamper | 60–90 seconds; pause if motor strains |
| Hot blended soup | 10 | 5–6 minutes for full friction heat |
| Frozen sorbet | 10 + tamper | Partially thaw fruit first |
| Nut milk | 10 | 60 seconds; strain if desired |
| Salad dressing (emulsified) | 10 | Drizzle oil through lid plug while running |
Speed Settings FAQ
What speed is "high" on a Vitamix?
Speed 10 is high. For most blends - smoothies, nut butters, frozen desserts, soups - Speed 10 is the correct destination. Intermediate speeds (7-9) work for specific textured applications but Speed 10 is the default finish point for anything requiring a smooth result.
Do you have to use all 10 speeds, or can you skip?
You can move the dial as fast or slow as you like. For thin liquids, a quick sweep from 1 to 10 in three seconds is fine. For very thick, dense blends, a slower, more deliberate ramp gives the ingredients time to start moving before the speed surges.
Is manual speed better than presets on a Vitamix?
Manual gives you more control and adaptability; presets give you hands-free consistency. Neither is objectively better - presets are ideal for beginners and routine morning smoothies, while manual variable speed is better for texture-sensitive cooking and experienced users who read the blend by sound.
Why does my Vitamix motor pitch stop changing above speed 7 or 8?
This is normal under load. The microprocessor managing the motor under resistance compresses the effective speed range when blending dense ingredients. In an empty container you'd hear the full pitch change all the way to 10.
What does the Pulse switch do on a Vitamix?
Pulse runs the machine at the currently selected speed on the variable dial for as long as you hold the switch down, then stops instantly when released. It operates effectively at Speed 5 as a default and is ideal for controlled chopping, breaking up air pockets, and short bursts without committing to a full blend cycle.
Speed settings are just one piece of mastering your blender. If you're newer to the machine, start with our Ultimate Guide to Using a Vitamix Blender, then go deeper with Vitamix Smoothie Setting Explained: What It Does and When to Use It.
And once you're blending in batches, our guide on how to store smoothies will make sure nothing goes to waste.
Comments
No Comments