
The difference between perfectly cooked pan seared shrimp and a rubbery disappointment is about 30 seconds - and it comes down to three things: dry shrimp, a hot pan, and knowing exactly when to pull them.
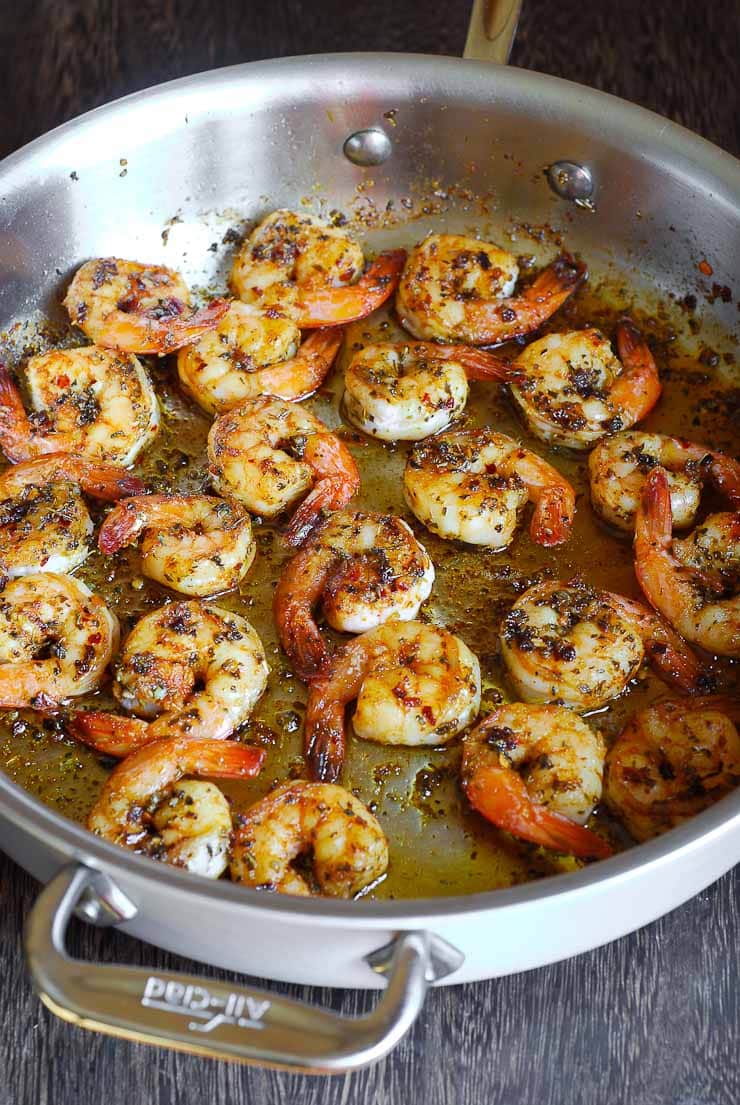
If your shrimp keeps coming out rubbery, pale, or swimming in liquid, the recipe isn't the problem - the technique is. Pan seared shrimp on the stove is a 5-minute cook, but those 5 minutes are unforgiving: wrong pan temperature, wet shrimp, or 30 extra seconds on the heat and the texture is gone.
Recipe Overview
🦐 Dry shrimp thoroughly with paper towels - wet shrimp steam instead of sear, no matter what else you do right
🧂 Toss with salt and seasonings, plus a tiny pinch of sugar for deeper browning
🔥 Heat oil in the skillet over medium-high until it shimmers but doesn't smoke
🍤 Lay shrimp in a single layer and don't crowd the pan - they should sizzle on contact
⏱️ Sear 2-3 minutes per side, flipping only once, and resist the urge to move them around
🧈 Add butter in the final 60 seconds to baste and add richness without burning the milk solids
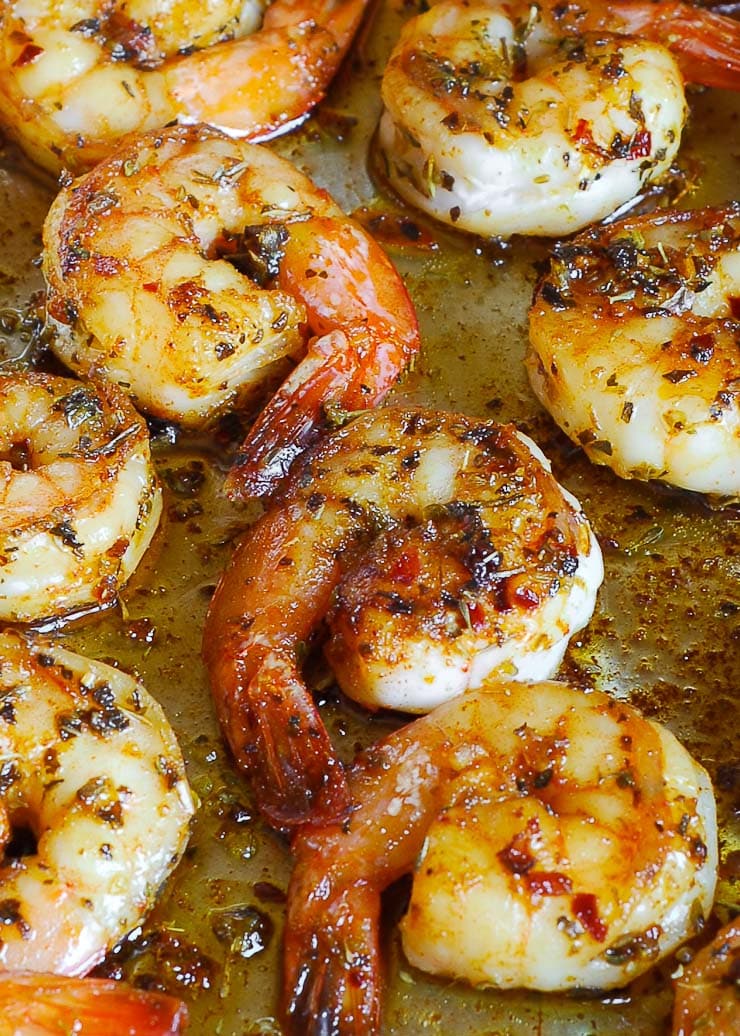
👀 Watch for the C-shape, not the clock - pink, opaque, and curled into a loose "C" means done
🚫 Pull them the moment they're firm; a tight "O" shape means they've gone rubbery
If you want to get really comfortable with shrimp beyond the stovetop-how to buy it, thaw it, and use it in all kinds of recipes-start with my full Shrimp Guide.
Recipe Highlights
Key ingredients at a glance
- Shrimp (fresh or frozen, peeled and deveined) - large or extra-large sizes are easiest to sear without overcooking
- Oil (avocado, canola, or refined olive oil) - handles high heat without burning, building the golden sear
- Butter - added only in the final 60 seconds, once the pan has cooled slightly, so it bastes instead of scorches
- Salt - draws out surface moisture for better browning and amplifies natural sweetness
- Paprika and black pepper - deepen color and add flavor with almost no effort
- A pinch of sugar (optional) - a quarter teaspoon per pound accelerates browning without adding sweetness
🍳 Two Ways to Build Flavor: Oil vs. Butter
| Type of Fat | Oil Alone | Butter Added at the End |
|---|---|---|
| Best for | Clean, golden sear at high heat | Richness and nutty, browned-butter finish |
| How | Handles heat without burning or smoking | Added in the last 60 seconds once pan cools |
| Downside/upside | Contributes zero flavor on its own | Milk solids brown for flavor without scorching |
| Result | Good color, flat taste if used alone | The finish behind dishes like garlic butter shrimp |
✅ Quick chooser
- Want a clean sear with zero risk of burning? Oil only, all the way through.
- Want restaurant-style richness? Oil to sear, butter in the last 60 seconds - never butter alone from the start.
🔥 The 3 things that actually matter
- Dry shrimp - surface moisture is the enemy of a sear
- A hot pan - oil should shimmer, not smoke; shrimp should sizzle on contact
- Timing by sight, not the clock - perfect vs. rubbery is about 30 seconds
🦐 The C vs. O rule
- Undercooked: loose "U" shape, slightly translucent
- Perfect: pink, opaque, curled into a soft "C"
- Overcooked: tight "O" shape, rubbery, bounces back like an eraser
Recipe Tip: Let shrimp come to room temperature before they hit the pan. Cold shrimp dropped into a hot skillet lowers the surface temperature immediately, throwing off timing and increasing the odds of steaming instead of searing.
How to Cook Shrimp so They are Juicy, Not Rubbery
This is an overview with step-by-step photos. Full ingredients, measurements & instructions are in the recipe card below.
1. Season the Shrimp
Dry shrimp thoroughly with paper towels before they hit the pan. Surface moisture is the enemy of a sear. Wet shrimp steam instead of brown, and no amount of technique will fix that.
Place thawed, dried shrimp into a mixing bowl. Add salt and seasonings, tossing well to evenly coat all pieces. Shrimp's mild flavor makes it an ideal canvas for bold or subtle flavor profiles.
Pro Tip Worth Knowing: Add a pinch of sugar for deeper browning. A tiny pinch of granulated sugar mixed into your dry seasoning before searing accelerates browning on the shrimp's surface, giving you noticeably deeper caramelization and color without making the shrimp taste sweet. Use sparingly - a quarter teaspoon for a full pound of shrimp is enough.
2. Heat The Pan Properly
Add olive oil and butter to your skillet. Tilt gently to coat the bottom, heating over medium-high. A properly heated pan is crucial for quick cooking and optimal browning. Allow oil to shimmer but not smoke before proceeding.
3. Sear the Shrimp (Don't Touch It!)
Add shrimp in a single layer to the hot pan. If they don't sizzle on contact, the pan needs more preheat. Avoid overcrowding to ensure even cooking. Cook for 2-3 minutes on one side, flip, then cook for another 2-3 minutes. Turn only once.
Pro Tip: Add butter in the final 60 seconds of cooking!
4. Check for Doneness: The C vs. 0 Rule
- Perfect shrimp are pink, opaque, and curl into a "C" shape
- Remove immediately once pink and firm
If you're ever unsure about timing, don't just trust the clock-use visual cues. I walk through the color, shape, and texture signs I look for in How to Tell When Shrimp Is Done.
5. Serve Immediately
Transfer cooked shrimp to a serving dish. Serve seared shrimp immediately with Garlic Butter Spaghetti or Creamy Garlic Potatoes for maximum freshness.

How to Cook Shrimp on the Stove (Pan Seared, Juicy Every Time)
Ingredients
- 1 tablespoon olive oil (or butter)
- 1 tablespoon butter
- 1 lb. shrimp (defrosted and deveined)
Seasoning Mixture:
- 1 teaspoon Italian seasoning
- ½ teaspoon paprika
- 1 teaspoon garlic powder
- ½ teaspoon salt
- ½ teaspoon black pepper
- ½ teaspoon red pepper flakes
Instructions
Season Shrimp
- Put shrimp in a mixing bowl and rub in seasoning mixture. Mix well to make sure shrimp is coated well.
Pan Sear Shrimp in Oil
- Heat olive oil in a large skillet over medium heat.
- Add shrimp to the hot pan and cook for about 2-3 minutes on each side, turning once midway, until shrimp is pink and cooked through.
Add Butter at the End of Cooking Shrimp
- Add butter in the final 60 seconds of cooking!
- Remove shrimp from the skillet.
- Serve immediately.
Once you've nailed this stovetop method, it's easy to take shrimp in a healthier direction too. I put my favorite lighter dinners-low‑carb, high‑protein, and veggie‑heavy-into one place in this Healthy Shrimp Recipes roundup.
How Long Does It Take to Cook Shrimp?
Faster than you think, and that's exactly where most people go wrong.
- Large shrimp (31/35 count): 1½ to 2 minutes per side over medium-high heat - about 3 to 4 minutes total.
- Jumbo shrimp (16/20 count): 2 to 2½ minutes per side - about 4 to 5 minutes total.
- Extra-large shrimp (26/30 count): splits the difference at roughly 2 minutes per side.
Those times assume a properly preheated pan, shrimp that have been dried thoroughly, and shrimp that go in at room temperature - not straight from the fridge.
Cold shrimp added to a hot pan drops the surface temperature immediately and throws off every timing estimate.
The more important principle: cook by visual cues, not the clock. Shrimp size varies by brand, your burner output varies from mine, and your pan material changes heat retention entirely.
Frequently Asked Questions
Can you cook frozen shrimp without thawing? Technically you can, but you shouldn't for pan searing. Adding frozen shrimp straight to a hot pan floods the skillet with water, drops the temperature, and guarantees steamed, rubbery shrimp with no color. For best results, thaw under cold running water for 5-7 minutes, tossing occasionally, then dry very thoroughly with paper towels before seasoning and searing.
Do you need to peel and devein shrimp before cooking? For pan‑seared shrimp on the stove, yes. Shell‑on shrimp do have slightly better flavor, but you'll get a much better golden crust when the flesh is in direct contact with the hot pan. Peeling and deveining also removes grit and the vein that can taste muddy, and it only takes a few seconds per shrimp.
What is the best pan for cooking shrimp on the stove? A cast iron skillet or stainless steel pan gives you the best sear and deepest browning because they hold high heat well. A nonstick pan is more forgiving and works for beginners, but it usually won't deliver the same caramelized crust because the coating limits surface temperature. Whichever pan you use, preheat it for at least 2 minutes over medium‑high heat before adding oil and shrimp.
How long does it take to cook shrimp in a pan? On a properly preheated skillet, large shrimp (31/35) need about 1½-2 minutes per side, while jumbo shrimp (16/20) are closer to 2-2½ minutes per side. Use time as a guideline only; always confirm doneness with visual cues (pink and opaque, loose C‑shape) and texture (firm but not bouncy).
How can you tell when shrimp is done? Look for three cues at once: color, shape, and texture. Cooked shrimp are pink and opaque, curl into a loose C‑shape, and feel firm with a slight spring when pressed with tongs. If they tighten into an O‑shape and feel bouncy like a rubber eraser, they're overcooked.
Can you reheat cooked shrimp? Yes, but reheat very quickly to avoid turning them rubbery. The best method is a 30-60 second toss in a hot pan with a little oil or butter-just until warmed through. Avoid microwaving, which makes shrimp weep water and ruins both texture and sauce; for pasta dishes, add leftover shrimp off the heat and let the hot sauce warm them gently.
Can I use pre‑seasoned or marinated shrimp for pan searing? You can, but be careful with marinades that contain sugar, honey, citrus, or soy, because they burn fast in a hot pan. For a high‑heat sear, season shrimp with dry spices and salt first, then build a sauce in the pan after the shrimp come out and toss them back in at the end.
Variations to Try
- Garlic butter shrimp, Spicy Cajun shrimp, chili-lime shrimp, or honey garlic shrimp
Serve it with
- Garlic butter spaghetti, creamy garlic potatoes, orzo, rice, tortillas for tacos, or a simple green salad
- Shrimp pairs beautifully with pasta, rice, or salads for complete meals. Try tossing with pesto and fettuccine, serve atop orzo or risotto, pile into shrimp tacos, or toss with roasted carrots.
Other Ways to Cook Shrimp
The stove is just one option. If you're firing up the grill, I have a full step‑by‑step on timing, skewers, and marinades in my How to Grill Shrimp guide, and my Shrimp Guide pulls everything together in one place-from buying and thawing to every way to cook shrimp.
Storage and Leftovers
Shrimp are best eaten right after cooking, but careful storage keeps them usable for quick meals.
- Cooling: Let shrimp cool to room temperature briefly, but avoid leaving them out for extended periods for food safety.
- Refrigeration: Store cooked shrimp in an airtight container in the refrigerator and use within a couple of days for best texture and flavor.
- Reheating: Reheat very gently over low heat or briefly in a hot pan just until warmed through to avoid turning them rubbery; or serve chilled on salads or in shrimp cocktails instead of reheating.
- Freezing leftovers: Cooked shrimp can be frozen but may lose some ideal texture; raw shrimp generally freeze better and keep quality longer.


Mila says
Made this shrimp last night with my organic salad, cherry tomatoes and avocado - all drizzled with the olive oil and sea salt. Thank you for such a great recipe- makes my friday nights easier.
Vika says
How do I adjust this for shrimp still in its casing?