Want steakhouse‑quality steak at home without stressing over timing? In this guide, I'll show you exactly how I reverse sear any cut-ribeye, strip, filet, or tomahawk-for a perfectly rosy middle and ultra‑crisp crust every single time.

If a steak is at least 1.5 inches thick, I'm almost always reverse searing it. I get the steak slowly up to just below my target temperature in a low oven, and only then do I hit it with a screaming‑hot cast iron skillet. That flipped order gives me a steak that's evenly rosy from edge to edge, with no big gray band and a deep, crunchy crust on the outside.
Because the oven phase is gentle and slow, the heat creeps into the center without overcooking the outer layers. By the time the steak hits the pan, it already reads just 10-15°F below my final target temperature, so the sear can be brutally hot and very fast. All of the "doneness work" is already done. The pan is purely for flavor and crust.
Want to zoom out? This How to Cook Steak: Complete Guide to Cuts, Doneness, and Methods covers everything you need to know about the steak.
Which Steak Cuts I Reverse Sear
On Whatsinthepan, I treat reverse sear as my default method for thick steaks. Here's how I think about the major cuts and whether this method makes sense:
- Ribeye or cowboy ribeye (1.5-2.5 inches): This is a dream cut for reverse sear. It has plenty of intramuscular fat that renders in the oven and in the pan, so I get big beef flavor and a gorgeous crust.
- New York strip (1-2 inches): Another great candidate. The strip has a thick fat cap on one side that loves slow rendering. I give that fat cap extra time on its side in the pan.
- Sirloin steak (1.5-2 inches): My budget-friendly friend. It's leaner than ribeye but still takes beautifully to a reverse sear if it's thick enough; with a good dry brine, a hot pan, and a generous butter baste, sirloin turns into a surprisingly steakhouse‑worthy cut.
- Filet mignon (1.5-2 inches): Filet is very lean, which means it really benefits from both the gentle oven heat and a generous butter baste in the pan. Reverse sear helps keep it tender and juicy instead of dry and bland.
- Porterhouse or T‑bone (1.5-2 inches): I treat these like ribeyes with a caveat. There are two different muscles (strip and tenderloin) attached to the bone, and the tenderloin side cooks faster, so I pay more attention to that side when I'm checking temps.
- Tomahawk (2-3+ inches): This is where reverse sear really shines. Tomahawks are thick and dramatic; the oven gives me control over that thick interior, and the final sear adds all the drama and flavor.
- Tri‑tip or other small roasts: I treat these like mini roasts with a reverse sear finish. The structure is different, but the logic is the same: slow oven, hot finish.
Steaks under about 1.5 inches thick I usually cook with a classic hot‑and‑fast sear instead. They just don't spend enough time in the oven to reap the benefits, and you risk overcooking them during the final sear.
Learn more about Best Cuts of Steak for Pan Searing as well as Steak Doneness Temperatures.
Why Reverse Sear Is Perfect for Lean Sirloin
Sirloin is one of the few steaks where I treat "lean" as both a blessing and a warning label. Because it doesn't have the lush marbling of a ribeye, there's less built‑in insurance against dryness, which means every step of the reverse sear matters a little more.
I'm extra intentional about dry‑brining (a generous layer of kosher salt, plenty of time on a rack in the fridge), and I never skip a high‑smoke‑point oil in the pan plus a real butter baste. That extra fat on the outside is what gives sirloin the steakhouse crust and rich flavor it doesn't naturally have on the inside.

The good news is that sirloin absolutely rewards that attention. In a low oven, it comes up to temperature gently instead of tightening and drying out, and the final hard sear is all about building flavor, not "finishing" the cook.
I aim for medium‑rare to medium with sirloin and watch my temps closely-there's a smaller sweet spot than with fattier cuts. When I treat it this way, a thick sirloin goes from "budget cut" to "how is this not ribeye?" and nobody misses the extra marbling.
How Long Should the Steak Be in the Oven?
For a 2-inch thick steak at 250°F, plan on 45-55 minutes in the oven - but the exact time matters less than hitting the right internal temperature.
But for 1-inch or even 1½-inch sirloin steak at 250°F, the oven time is only 20 minutes, so thread carefully.
Target Internal Temp, Not Time
The golden rule of reverse searing is to pull the steak when it's about 15°F below your desired final doneness, then let the sear finish it off. Here are the pull temperatures for each doneness level.
| Doneness | Pull from Oven At | Final Temp After Sear |
|---|---|---|
| Rare | 100–105°F | 115–120°F |
| Medium-Rare | 110–115°F | 125–130°F |
| Medium | 120–125°F | 135–140°F |
| Medium-Well | 130–135°F | 145–150°F |
Time Estimates in the Oven by Thickness
Oven time varies significantly with steak thickness
- 1-inch to 1½-inch steak - roughly 20-30 minutes
- 2-inch steak - roughly 45-55 minutes
- 3-inch steak - roughly 60-75 minutes
After the Oven
Once you pull the steak, rest it for 5-10 minutes, then sear it on a screaming hot cast iron skillet for about 45-60 seconds per side. Finish with a final 10-minute rest before slicing. The resting period before the sear also allows the surface to dry out, which gives you a much better crust.jesspryles+1
Always use an instant-read thermometer - ovens at 250°F can be inconsistent, and steak thickness varies, making time alone an unreliable guide.
How I Season for Reverse Sear
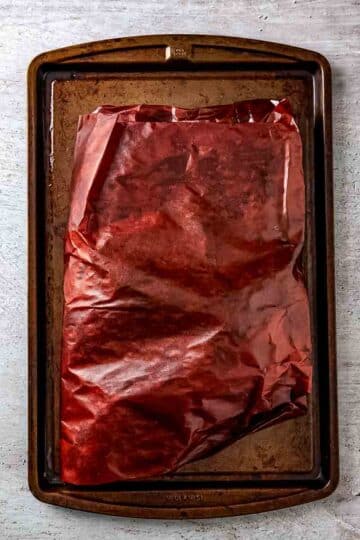
For reverse sear, I treat salting as a dry brine. I season generously with kosher salt and freshly ground black pepper on all sides, then place the steak on a wire rack set over a baking sheet and leave it uncovered in the fridge.
If I have time, I like to salt at least 45 minutes ahead. Overnight is even better. That time lets the salt first pull some moisture to the surface, then dissolve and move back into the meat. The uncovered rack also dries the surface, which is exactly what I want for a better sear later.
Here's how I tweak seasoning by cut:
- Ribeye and tomahawk: I usually stick to just kosher salt and black pepper. These cuts already have so much beefy, fatty flavor that they don't need much else.
- New York strip: Salt and pepper as a base. I sometimes throw in fresh thyme or rosemary sprigs during the pan sear, but I don't rub herbs on the steak itself before it goes into the oven - they burn.
- Filet mignon and other lean cuts: Salt and pepper are still the base, but filet is mild. A very light dusting of garlic powder can add a little savory depth without overpowering it. I rely more on butter basting in the pan to bring richness.
If I'm doing multiple steaks for guests, I'll salt them all on a rack the night before. It takes almost no extra effort and makes a noticeable difference in flavor and crust.
Do I Need Oil, Butter, or Is Marbling Enough?
I almost never rely on marbling alone for the sear, even on very fatty steaks.
The oil: Before the steak comes out of the oven, I heat a heavy skillet (cast iron or carbon steel) over high heat until it's ripping hot. Then I add a thin film of a high smoke point oil - avocado, canola, or another neutral oil - and let it just start to smoke. Even highly marbled ribeyes don't render fat fast enough in that first minute in the pan to prevent sticking or give me an even sear. That initial splash of oil creates a slick, even surface so the entire face of the steak contacts the pan and browns evenly.
The butter: Butter comes in after the steak goes into the pan. Once I've got one side of the steak in contact with the hot pan, I add a tablespoon or so of unsalted butter to the side of the pan. As it melts and foams, I tilt the pan and baste the top of the steak continuously. On lean cuts like filet or sirloin, that butter baste is non‑negotiable for me. On very fatty ribeyes, I sometimes use a little less butter and let the rendered beef fat do more of the work.
When marbling helps: The fat marbling inside the steak is still important. On ribeye or tomahawk, some of that fat will render out during both the oven phase and the sear. That rendered fat in the pan effectively turns into a self‑made beef tallow, which adds even more flavor to the crust.
Use tallow: If you happen to have actual beef tallow on hand, you can use that instead of oil for a very intense beef flavor. I still add a bit of butter for basting, but tallow takes the "steakhouse" profile up a notch.
Oven Temperature and How Long I Cook
I like to keep the oven relatively low for reverse sear. I usually work between 200°F and 250°F. Lower means more control and a smaller risk of overshooting my target, but it does mean a slightly longer cook time.
I always cook to temperature, not time. A leave‑in probe thermometer is my favorite tool here. I insert the probe into the center of the thickest part of the steak and set the alert for about 10-15°F below my final target temperature.
Here's how I aim my temps:
- Rare: pull from oven at 105-110°F, finish around 120-125°F
- Medium‑rare: pull at 115-120°F, finish around 130-135°F
- Medium: pull at 125-130°F, finish around 140-145°F
- Medium‑well: pull at 135-140°F, finish around 150-155°F
The sear in the hot pan will add that last 10-15°F very quickly.
But again, those are estimates. I treat them as a starting point and rely on the thermometer to tell me when it's really ready for the pan.
How I Handle Tricky Cuts Like Porterhouse
Porterhouse and T‑bone steaks are a little fussy because you're dealing with two different muscles on one bone: the strip and the tenderloin. The tenderloin is more delicate and cooks faster.
In the oven, I position the steak so the tenderloin side is a bit farther from the main heat source if I can. When I check temps, I check the tenderloin first and use that as my primary guide. Once the tenderloin is at my pull temperature, the strip is usually close enough that the final sear brings both sides where they need to be.
In the pan, I still sear each side the same way, but I'm careful not to overdo that tenderloin side. If I'm erring, I err on the side of slightly less time on the tenderloin and a bit more on the strip and fat edges.
The Actual Sear: Fast and Hot
Once the steak hits its pull temperature in the oven, I move quickly. Ideally, the pan is already hot and waiting so the steak goes straight from oven to skillet.
Here's my searing sequence:
- Preheat a cast iron or heavy skillet over high heat until it's very hot.
- Add a thin layer of high‑smoke‑point oil and heat until it just starts to smoke.
- Place the steak in the pan and press gently to ensure full contact.
- After about 15 seconds, add butter (and optional aromatics like crushed garlic cloves or thyme sprigs).
- Sear each side for about 45-90 seconds, basting continuously with the foaming butter and fat.
- Use tongs to hold the steak on its sides, especially the fat cap on a strip or ribeye, and render/brown those edges.
Because the interior is already nearly at its final temperature, I don't need more than a minute or so per side. I'm watching color here, not doneness. When the crust is the deep, rich brown I want, I'm done.
One nice perk of reverse sear: the steak doesn't really need a long resting period. The oven warmed it slowly and gently, so the juices are already more evenly distributed. I can slice almost right away without a flood of juice pouring out on the cutting board.
My Step‑by‑Step Reverse Sear Game Plan
Phase 1: Oven
- Pat steak dry and season generously with kosher salt and black pepper on all sides. Place on a wire rack over a baking sheet. Chill uncovered for at least 45 minutes, or up to overnight.
- When ready to cook, preheat the oven to 200-250°F. Keep the steak on the rack and transfer it to the oven.
- Cook in the oven until the internal temperature is 10-15°F below your desired final doneness (use a probe thermometer for accuracy). For medium‑rare, that's typically 115-120°F.
- While the steak is in the oven, preheat a cast iron or heavy skillet over high heat until very hot.
To give you a rough idea of timing at about 250°F:
- 1.5‑inch steak: roughly 20-30 minutes in the oven
- 2‑inch steak: roughly 40-55 minutes
- 2.5-3‑inch tomahawk: roughly 60-90 minutes

Phase 2: Searing
- Add a thin layer of neutral, high‑smoke‑point oil to the hot pan (I recommend high smoke point olive oil). When the oil is shimmering and just starting to smoke, remove the steak from the oven and immediately add it to the pan.
- Sear the steak for 45-90 seconds per side, adding butter and any aromatics (like smashed garlic and thyme) after the steak goes in. Tilt the pan and baste continuously with the foaming fat.
- Use tongs to sear the edges, especially any thick fat caps, until nicely browned and rendered.
- Double‑check the internal temperature. Once it hits your target (for medium‑rare, 130-135°F), transfer to a cutting board. You can slice almost immediately, or give it 5 minutes if you prefer.
- Slice against the grain and serve right away, spooning any leftover pan butter over the top.

Comments
No Comments