
It's the second week of October in New York, the first week I've wanted something in the oven all afternoon, so braised chicken thighs it is. I sear them hard, pour the beer around them (never over the skin), and keep the skin above the liquid. You get fork-tender chicken, a glossy beer-Dijon sauce, and mashed potatoes that are suddenly necessary.
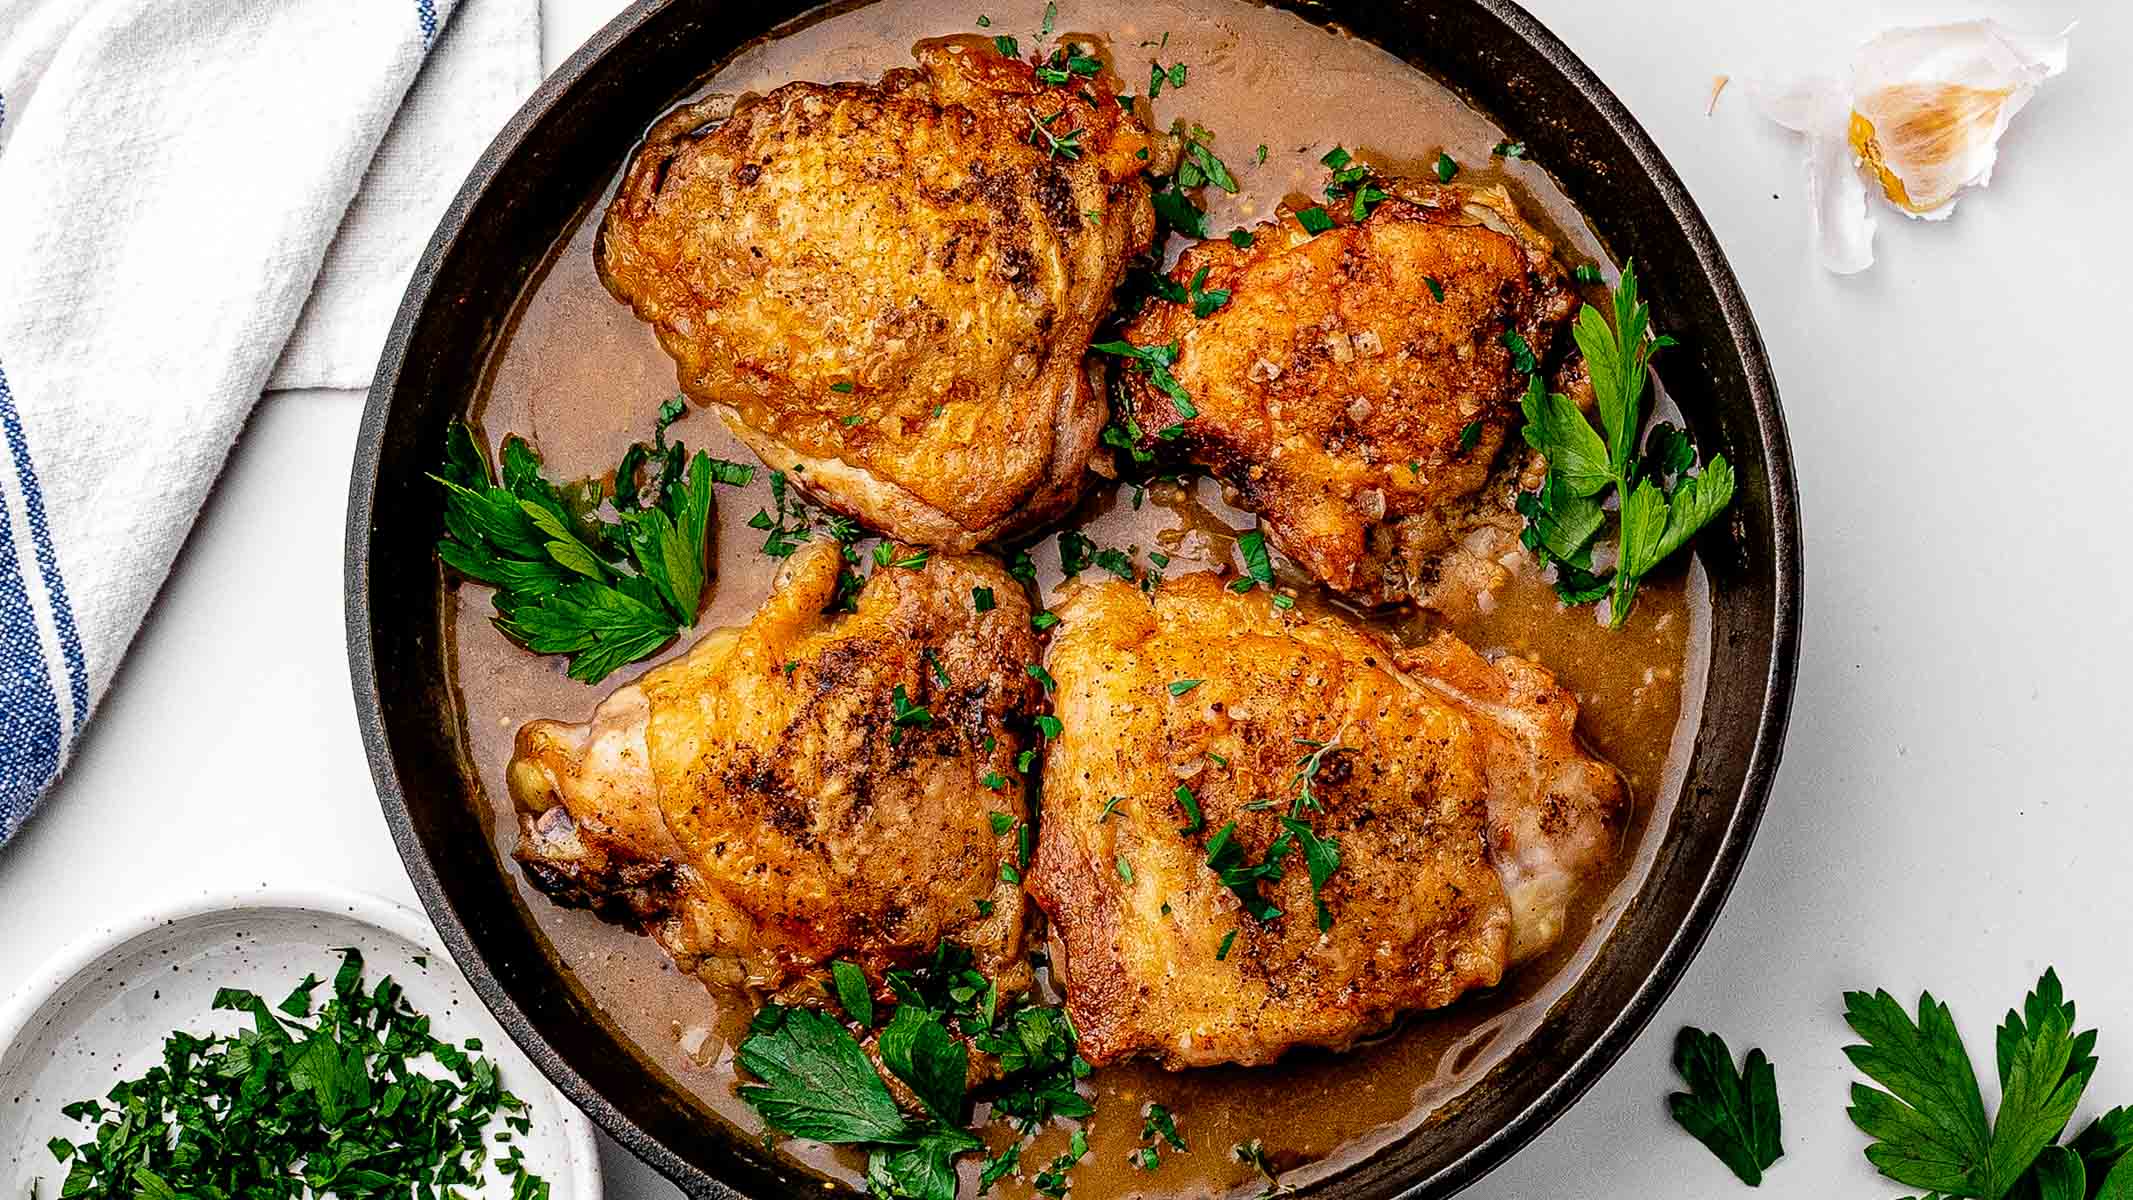
Welcome to my favorite way to cook chicken thighs on a chilly night! I started with a pack of bone-in thighs and a bottle of 7 Line Amber from Alewife Brewing in Queens that I had on hand. By the time the sauce was reducing, the whole apartment smelled like Sunday dinner.
The thighs get seared until golden, then braise in a mix of beer, Dijon, Worcestershire, onion, and garlic. A lager, amber ale, or pale ale works best, since a very hoppy beer can turn bitter as the sauce reduces.
It's an easy braised chicken recipe with one skillet and about an hour of cooking. A quick broil at the end gives the skin more color if it needs it. Serve it with mashed potatoes, buttered egg noodles, or crusty bread. You'll want something to soak up every last bit.
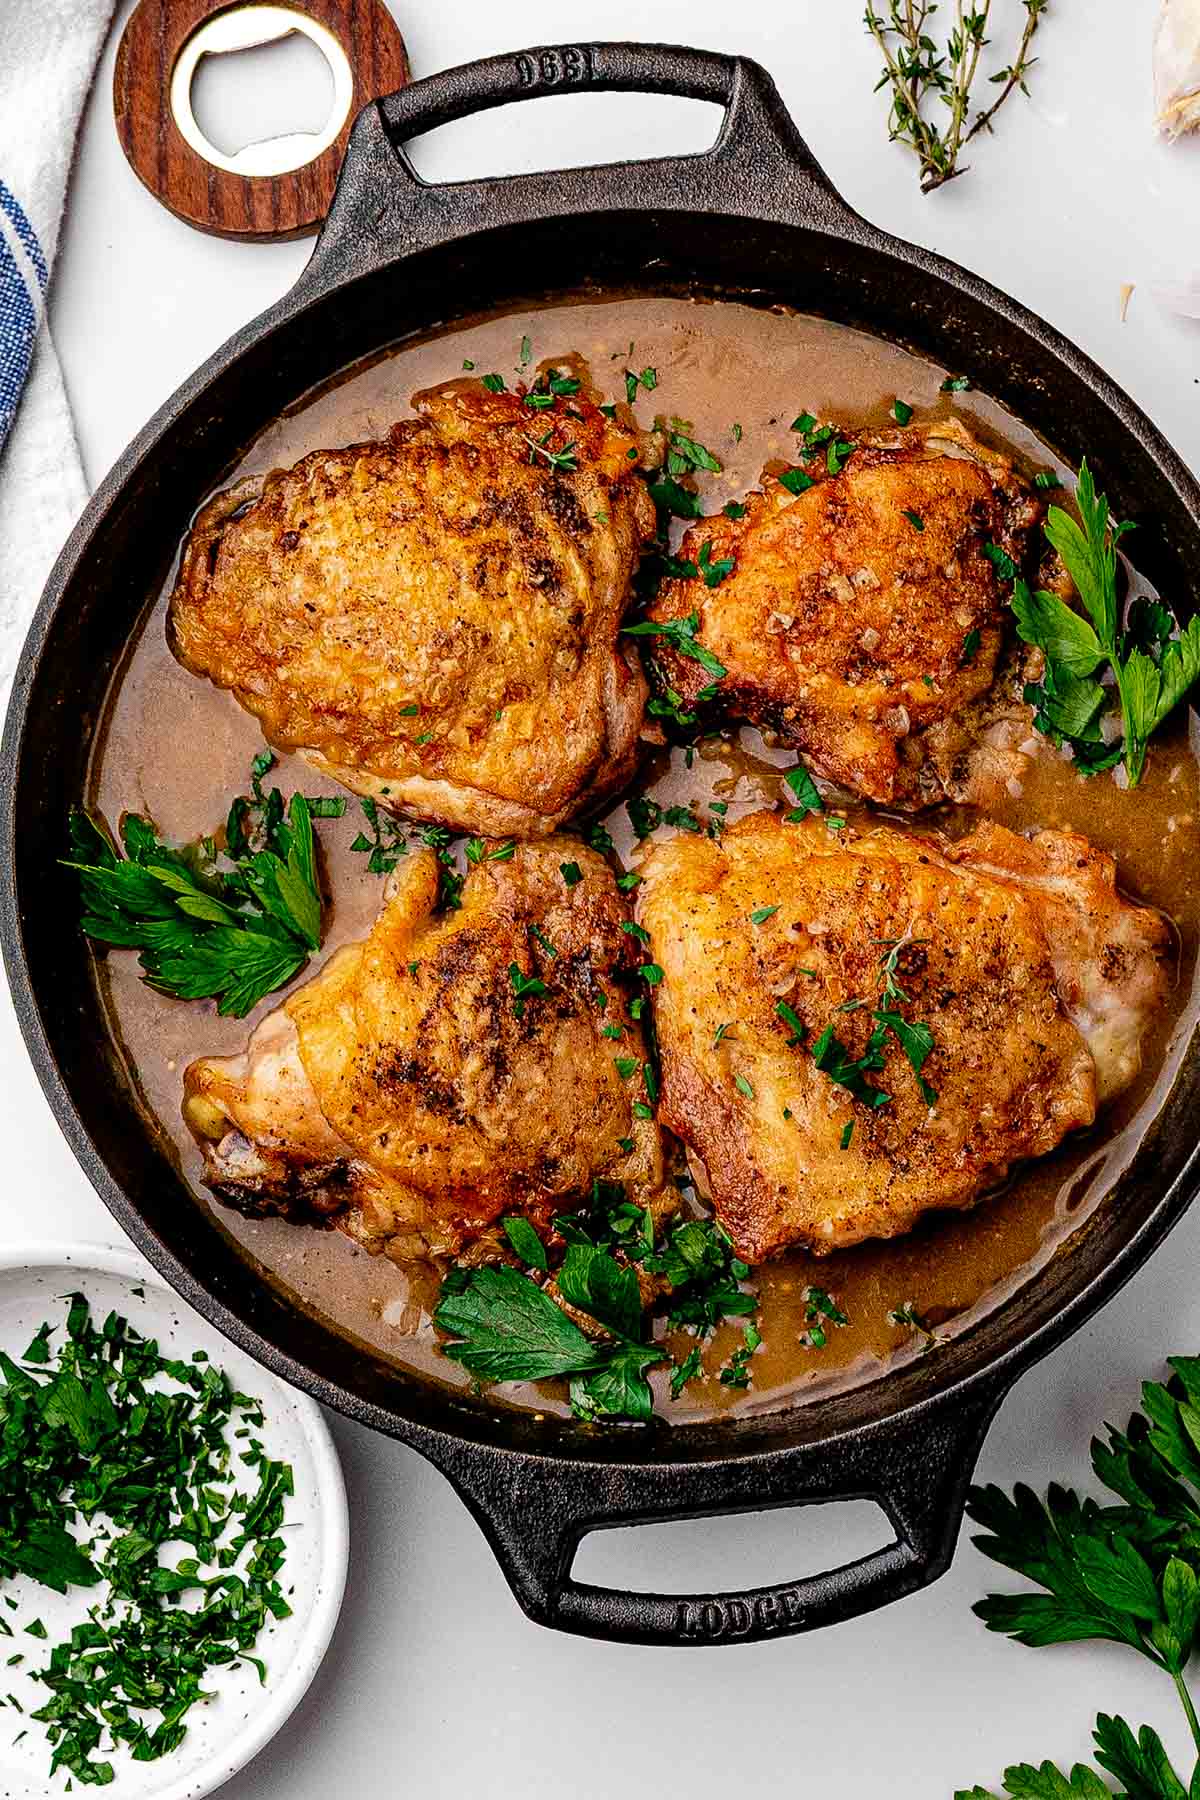
Why These Braised Chicken Thighs Keep Their Crispy Skin
Braising usually means chicken sitting in liquid, and liquid is the enemy of crisp skin. So the skin gets three separate rounds of attention in this recipe.
First, it gets a long, undisturbed sear. Six to seven minutes skin-side down in a hot skillet melts a good amount of fat out of the skin and leaves it deeply golden before any liquid shows up. Second, the thighs go back into the skillet skin-side up, so the skin spends the whole braise above the sauce. Third, a 1-2 minute broil at the end crisps the top again if it needs it.
The sear does one more job. It leaves browned bits stuck to the bottom of the pan, and those bits become the base of the sauce. That's why the thighs come out of the skillet before the onions go in.
Beer Around the Chicken, Not Over It
Pour the beer into the skillet itself, in the space between the thighs. I do it slowly while I scrape the pan, so the browned bits lift into the liquid and the skin never gets splashed. When I poured the beer straight over the skin, I ruined the exact surface I just spent 10 minutes crisping.
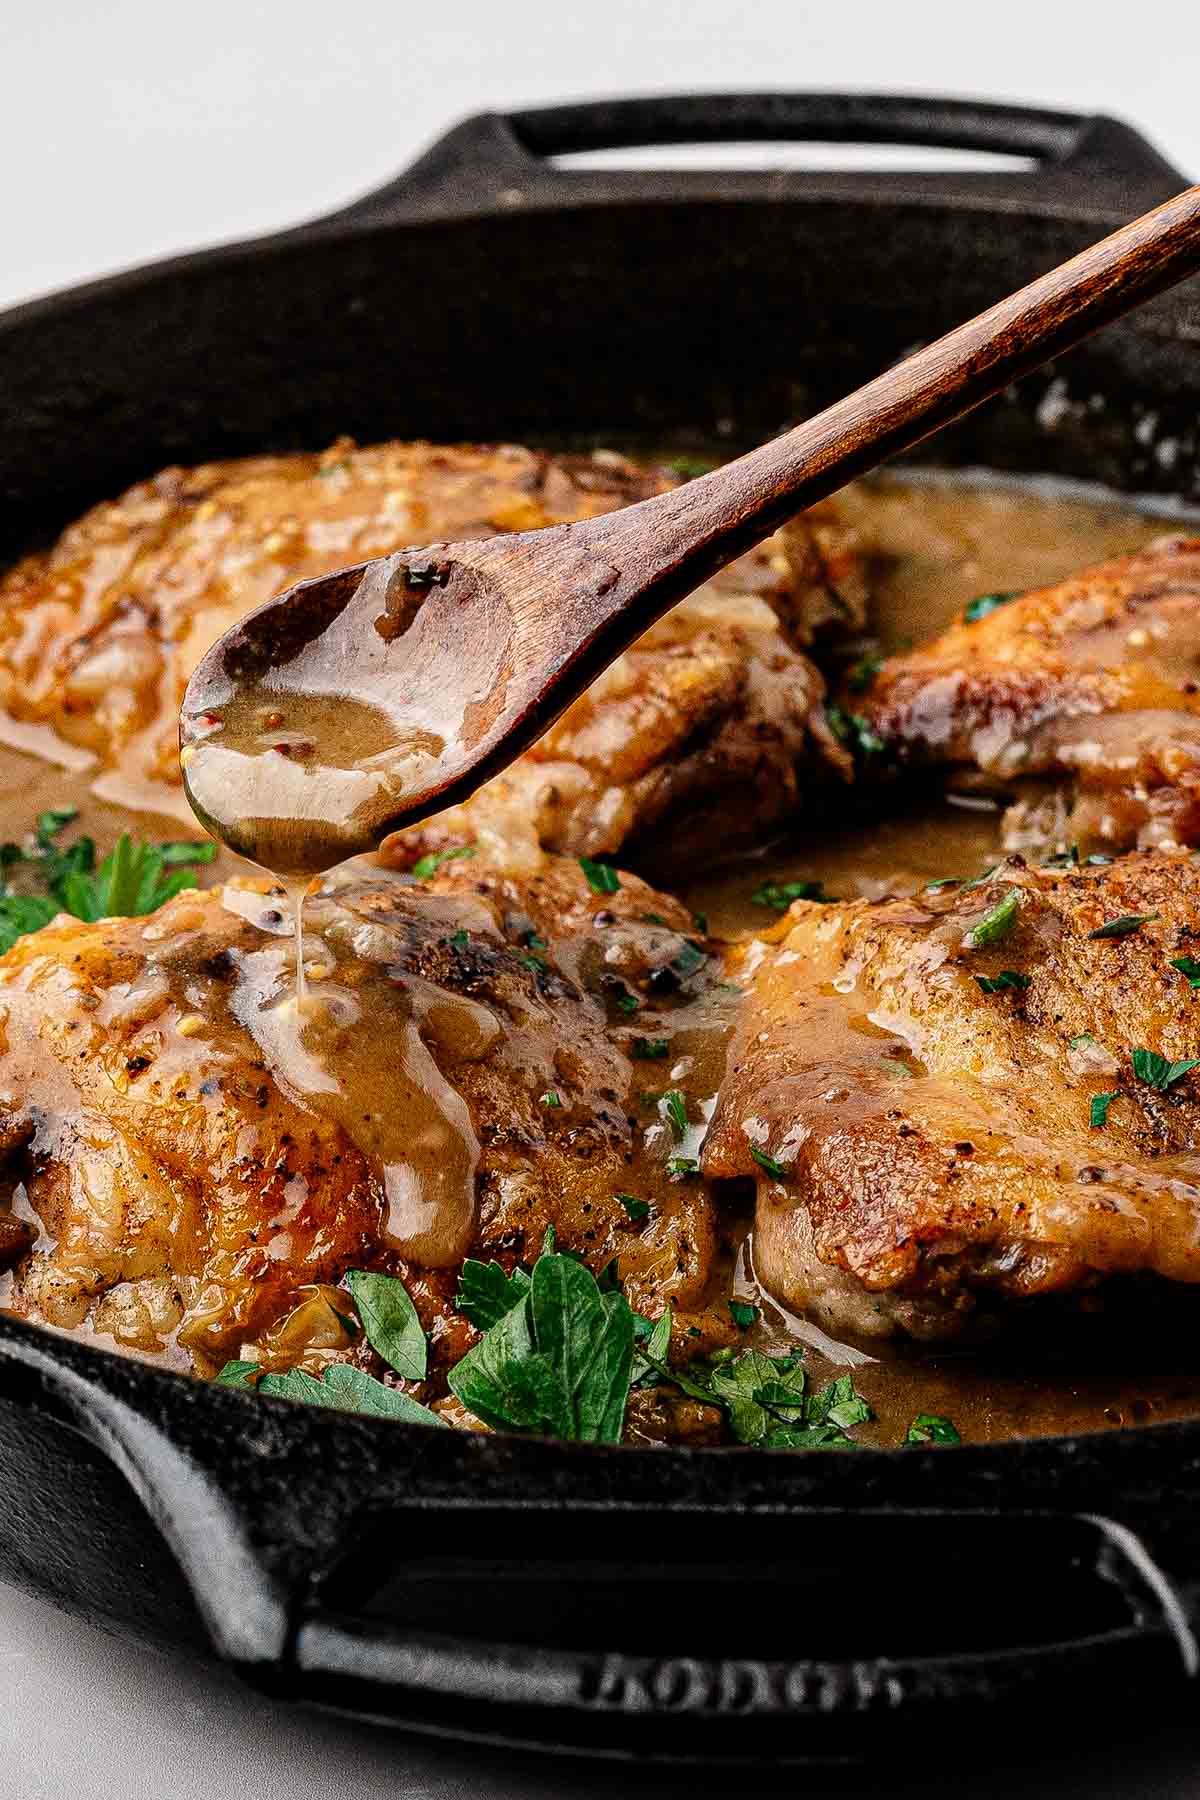
How High the Liquid Should Sit
Aim for about halfway up the thighs. The liquid will look like a lot in the pan, but that's the right amount. The bottom half braises and turns tender, and the top half roasts.
If the skin is touching the sauce, the pan is too full. Next time, use a wider skillet or a little less broth. If the sauce looks thin when you're done, it's fine. You simmer it down for about 5 minutes after the chicken comes out.
Ingredients for Beer Braised Chicken Thighs
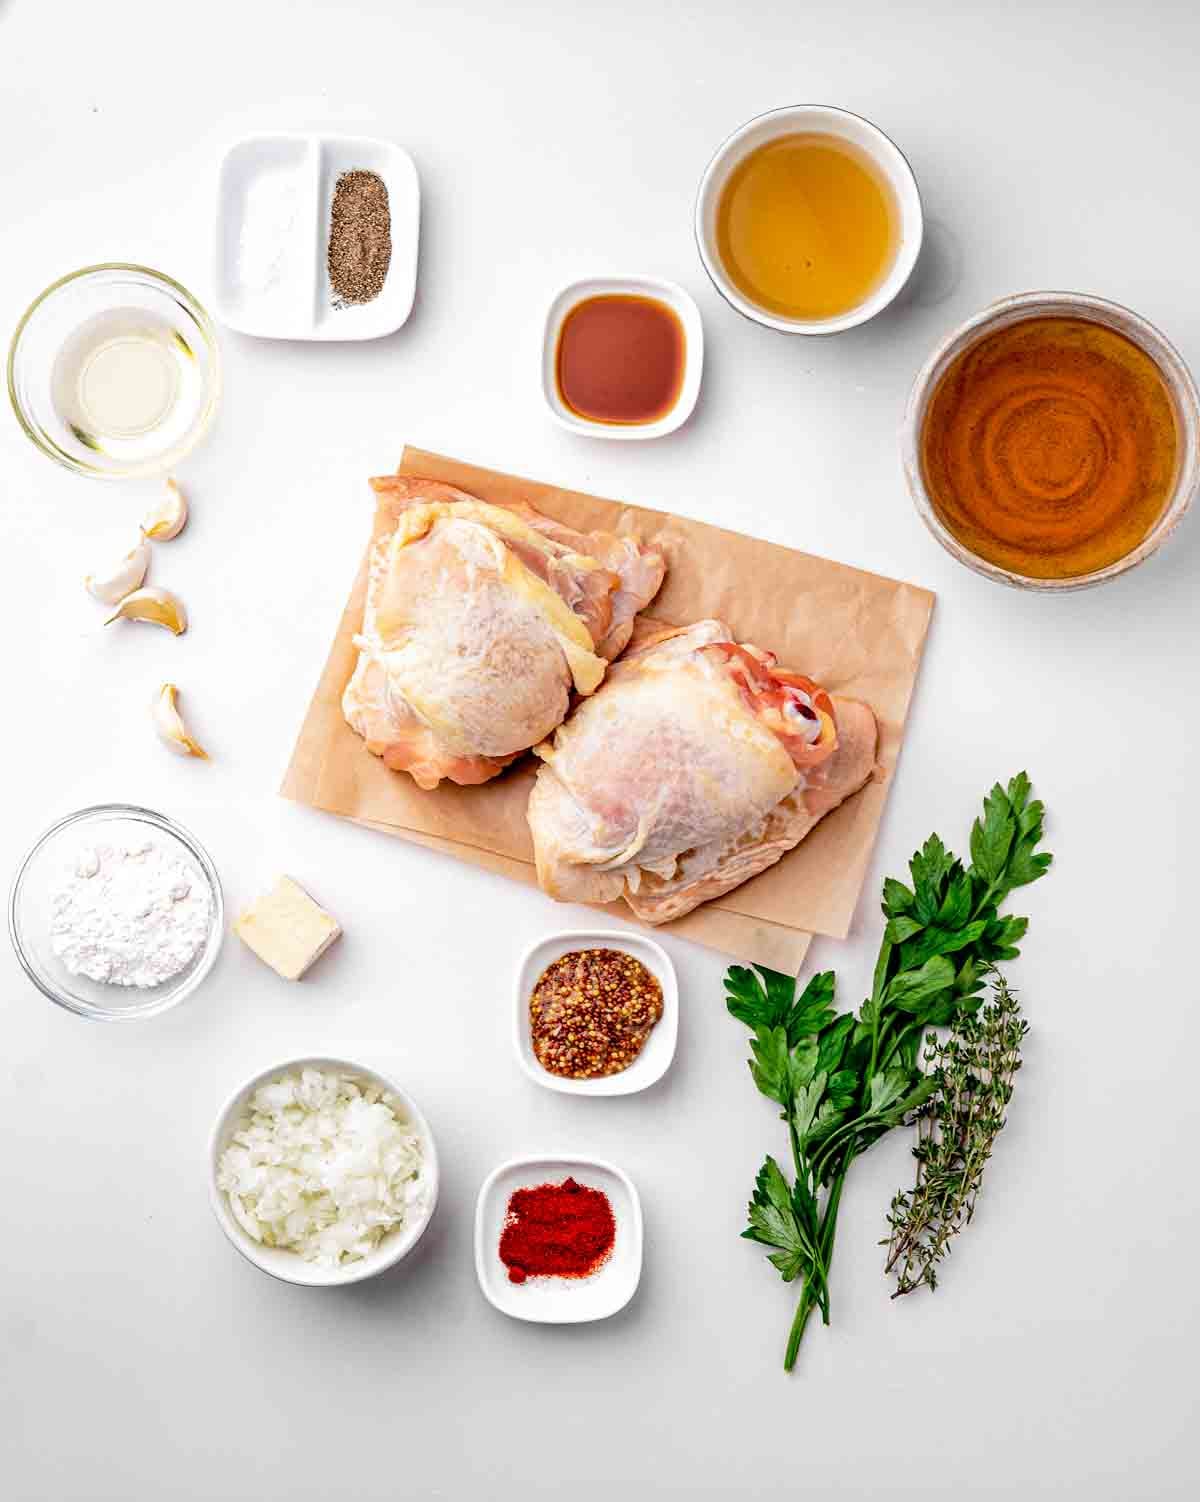
You only need basics for this one: bone-in, skin-on thighs, an onion, garlic, and a few pantry flavorings. Most of the flavor comes from what the chicken leaves in the skillet.
Each ingredient has a job. Dijon and Worcestershire give the sauce its savory edge. Smoked paprika adds a little warmth and color. A tablespoon of flour thickens the sauce slightly, and the butter at the end makes it glossy.
Which Beer to Use (and Which to Avoid)
Pick a lager, amber ale (I used 7 Line Amber), or pale ale. All three add a mild malty depth without taking over. Think of the beer as a background flavor, not the main one.
Avoid anything very hoppy, like a strong IPA. The sauce reduces before you serve it, and that concentrates bitterness as well as flavor. A beer you'd enjoy drinking while you cook is usually a safe bet.
If you'd rather leave out the alcohol, use more chicken broth instead. The sauce will taste a little different but still good. For a gluten-free version, remember that most beer contains gluten. Look for a gluten-free beer as well as a gluten-free flour blend.
How to Make Braised Chicken Thighs
Get everything ready before you turn on the heat. Slice the onion, mince the garlic, and measure the beer, broth, mustard, Worcestershire, paprika, and thyme into one bowl or a few small ones. Once the chicken is browned, the next steps move quickly.
1. Sear the Skin
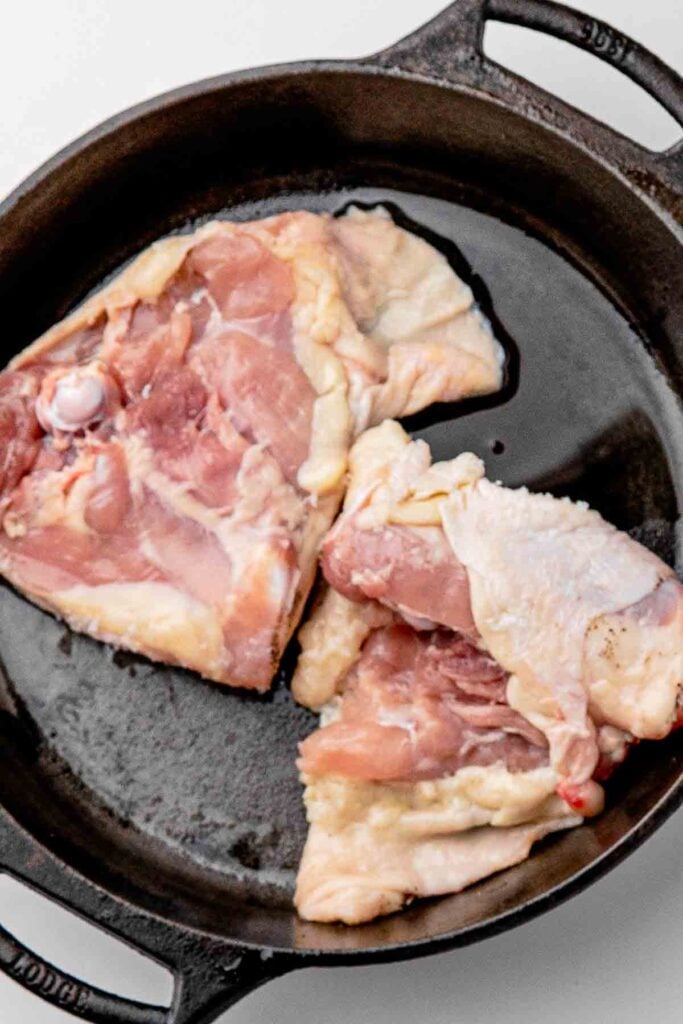
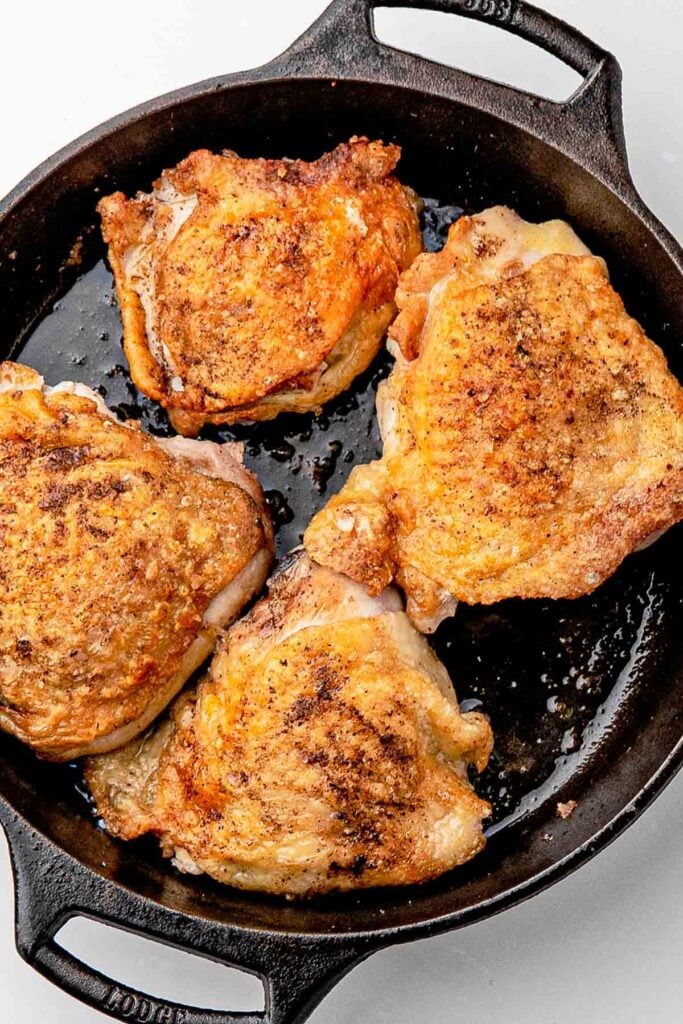
Start with the skillet properly hot, then lay the thighs in skin-side down and leave them alone. You'll hear a loud sizzle at first, and that's the sound you want. When the skin is deep golden and releases easily with tongs, it's ready. If it sticks, give it another minute.
The thighs won't be cooked through, and that's fine. They finish in the oven. Move them to a plate and leave the skillet as is, browned bits and all.
2. Build the Beer Sauce
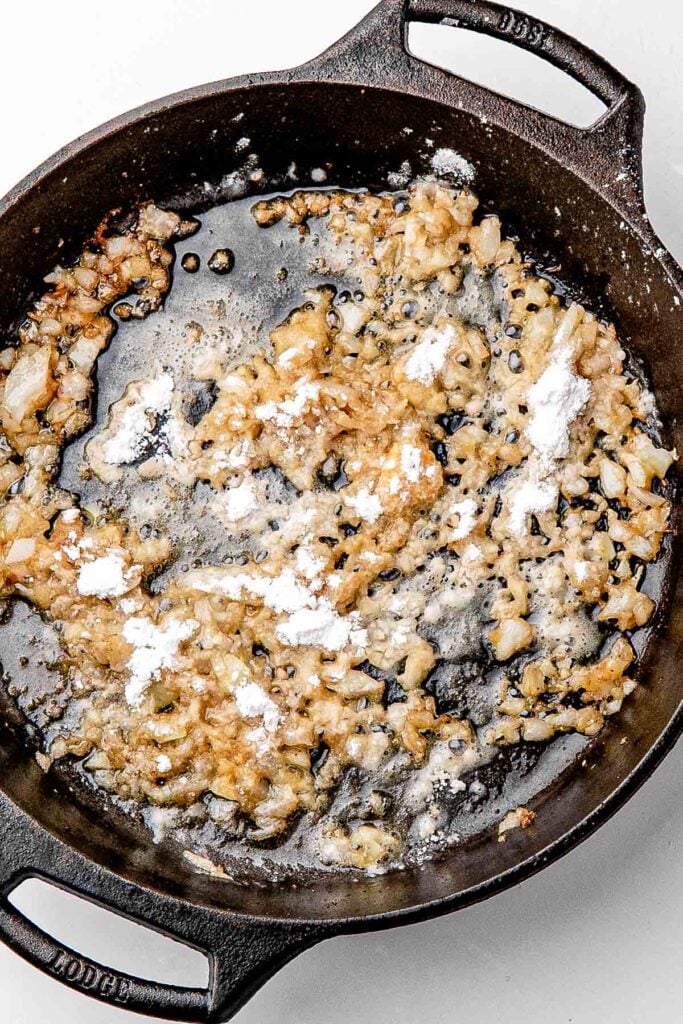
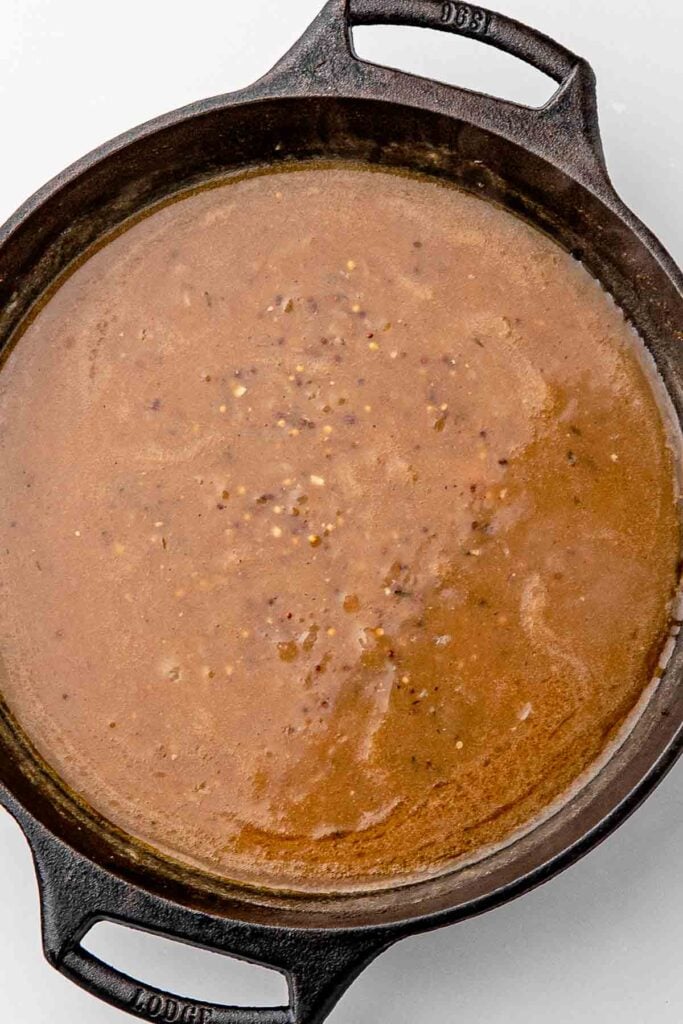
The onions go in next, and they pick up the browned bits on the bottom of the pan as they soften. Add the garlic last, for about 30 seconds, so it doesn't scorch. Sprinkle the flour over everything and stir until you can't see dry flour.
Then add the beer slowly, scraping as you go, followed by the broth, Dijon, Worcestershire, paprika, and thyme. Give it a taste before the chicken goes back in. It will be a little sharp at this point, and the oven time mellows it.
3. Braise, Then Broil
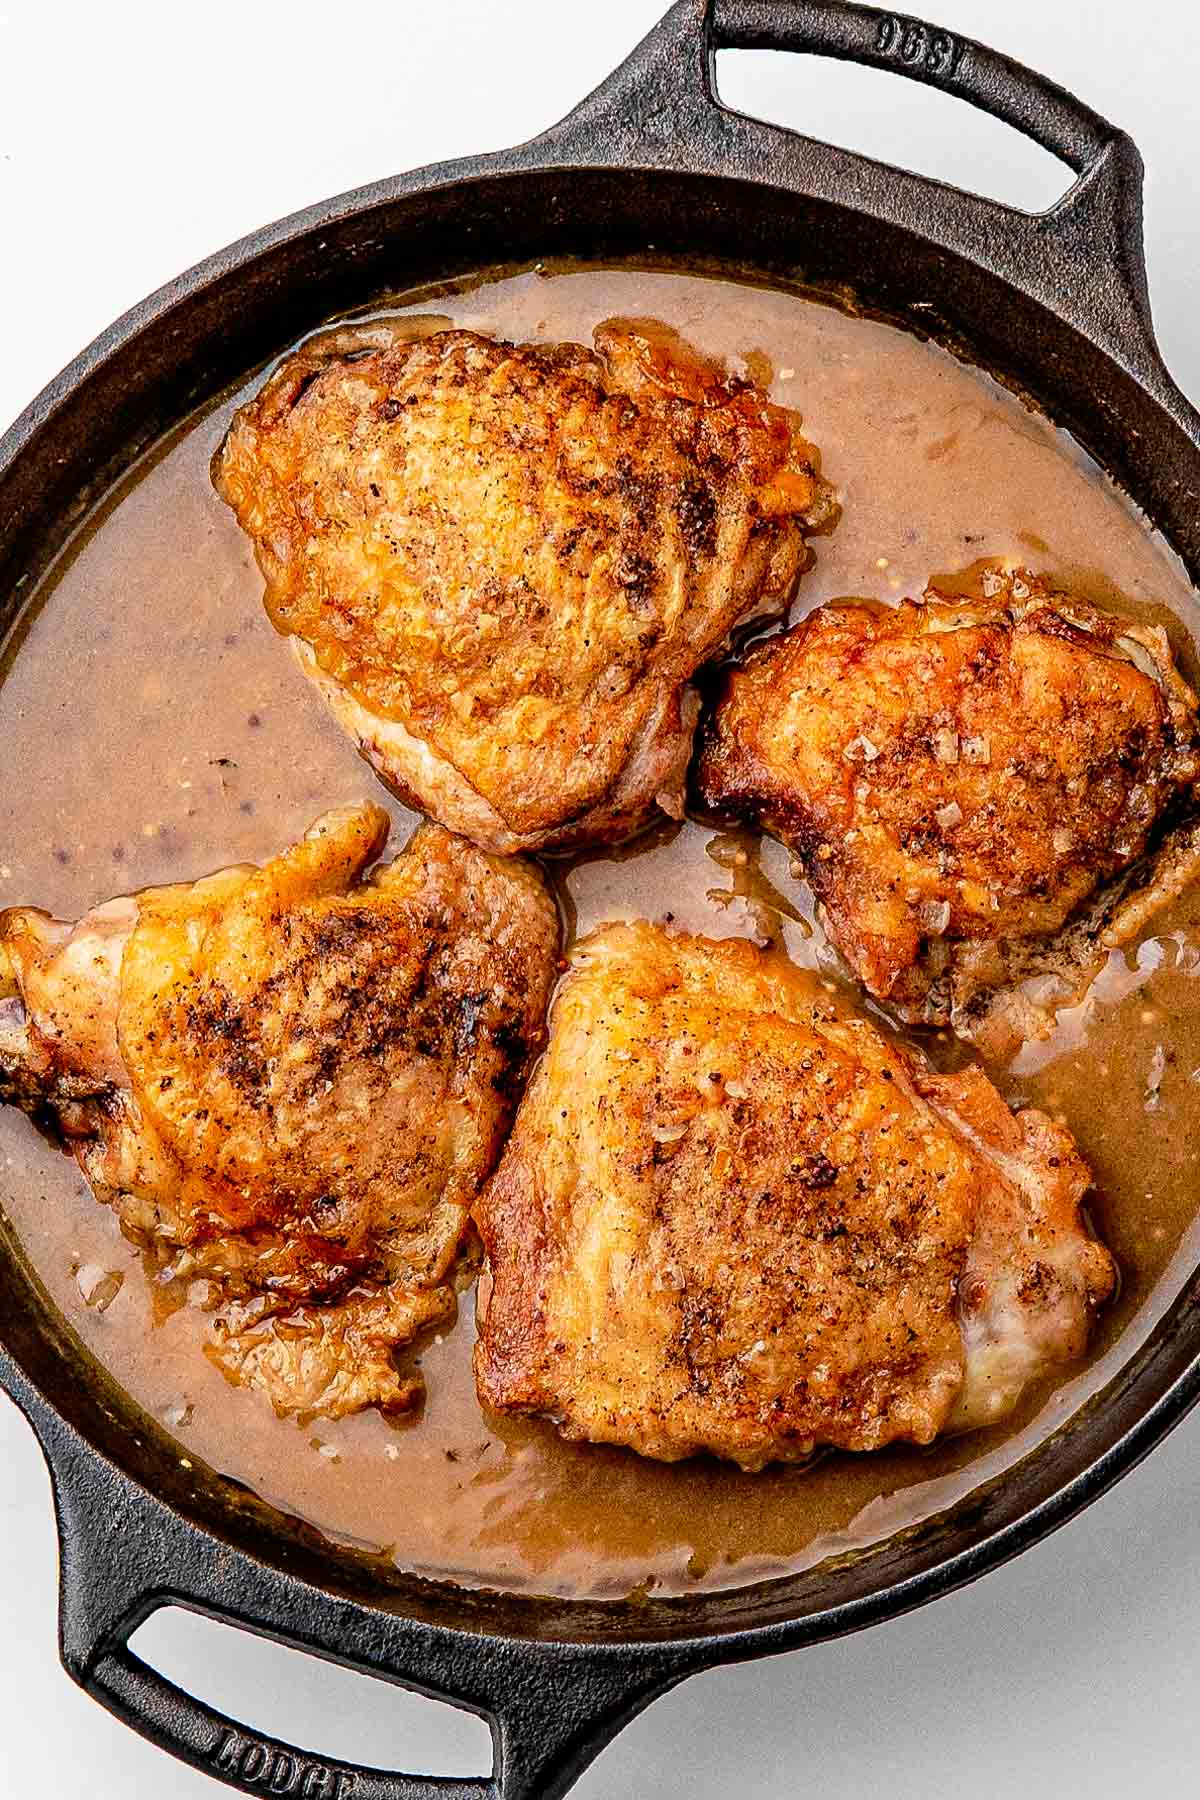
Slide the skillet into the oven and let it do its work. After 30 minutes, start checking the chicken with an instant-read thermometer, putting the probe in the thickest part of a thigh without touching the bone. Once it reads done, you can broil for 1-2 minutes if the skin needs more color.
Stay close to the oven when the broiler is on. Mine goes from golden to dark in about 2 minutes.
4. Reduce and Finish with Butter
Take the chicken out and put the skillet over medium heat. The sauce should bubble gently for about 5 minutes, until it clings to the back of a spoon. Drag your finger through the spoon, and if the line stays, it's ready.
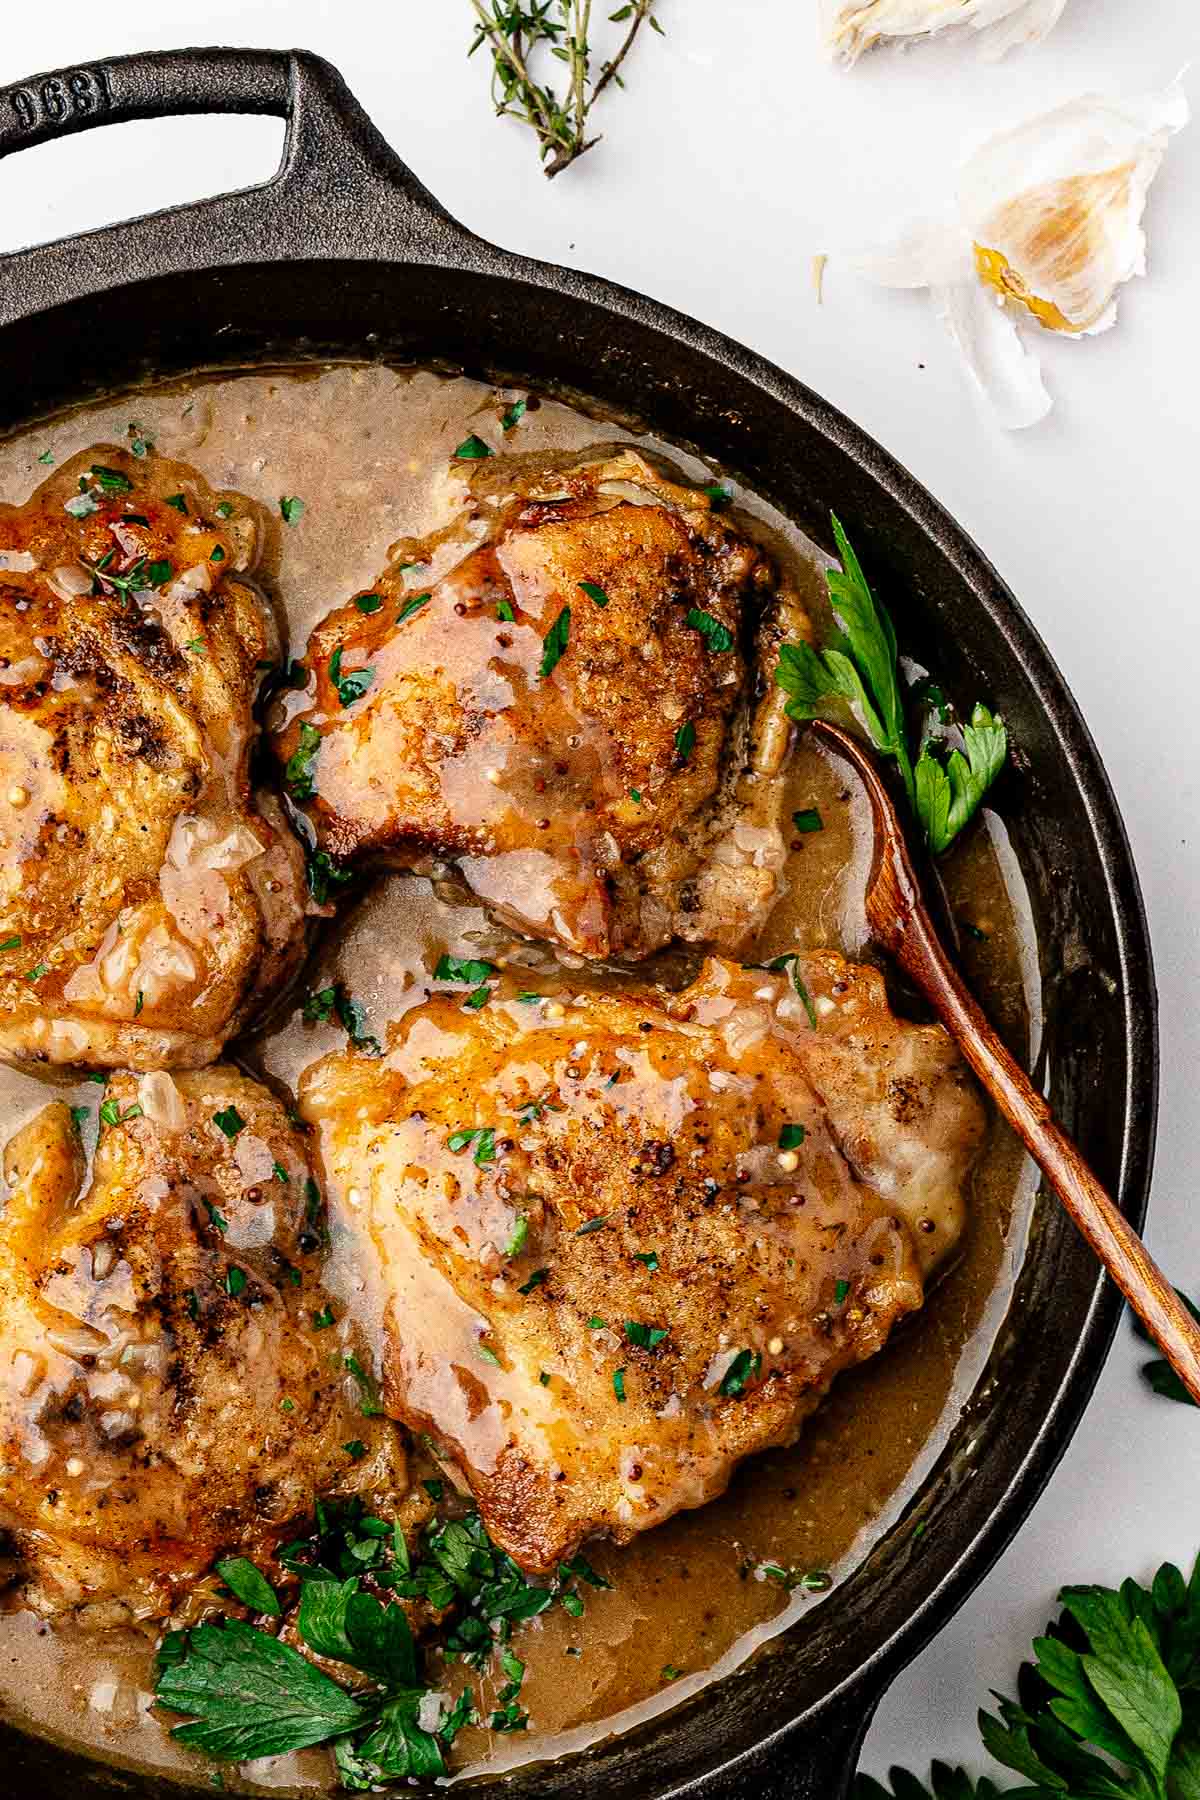
Take the pan off the heat or turn it to low before adding the butter, then stir until it melts. This is when the sauce goes from good to glossy. Taste it, add salt if it needs it, and put the chicken back in with the sauce spooned around it.

Braised Chicken Thighs (Crispy Skin, Beer Sauce)
Equipment
- Large oven-safe skillet or Dutch oven
- Tongs
- Wooden spoon
- Measuring spoons and cups
- Instant-read thermometer
Ingredients
For the Chicken
- 4 bone-in skin-on chicken thighs
- 1 ½ teaspoons kosher salt
- ½ teaspoon black pepper
- 1 tablespoon olive oil
For the Onion Base
- 1 medium yellow onion thinly sliced
- 4 garlic cloves minced
- 1 tablespoon all-purpose flour
For the Beer Braising Sauce
- 1 ½ cups beer
- Chicken broth 1 cup
- Dijon mustard 1 tablespoon
- 1 tablespoon Worcestershire sauce
- 1 teaspoon smoked paprika
- 1 teaspoon fresh thyme leaves
To Finish
- 1 tablespoon butter
- Fresh parsley for garnish
Instructions
Sear the Chicken
- Season the chicken: pat the chicken thighs really dry with paper towels. This is important if you want that gorgeous golden skin. Season both sides generously with salt and pepper.
- Brown the chicken: heat the olive oil in a large oven-safe skillet over medium-high heat. Place the chicken thighs skin side down and let it cook undisturbed about 6-7 minutes, until the skin is deeply golden and crispy. Flip the chicken and cook for another 2-3 minutes. Transfer the chicken to a plate. It won't be cooked through yet-that's what we want.
Build the Sauce
- Cook the garlic and onions: reduce the heat to medium and add the sliced onion to the same skillet. Cook for about 4-5 minutes, stirring occasionally, until the onions begin to soften and pick up all those delicious brown bits from the chicken. Add the garlic and cook for about 30 seconds.
- Build the sauce: sprinkle the flour over the onions and garlic and stir until everything is coated. Slowly pour in the beer, scraping the bottom of the skillet with a wooden spoon to loosen all those browned bits. Add the chicken broth, dijon mustard, Worcestershire sauce, smoked paprika, and thyme. Stir everything together.
Braise
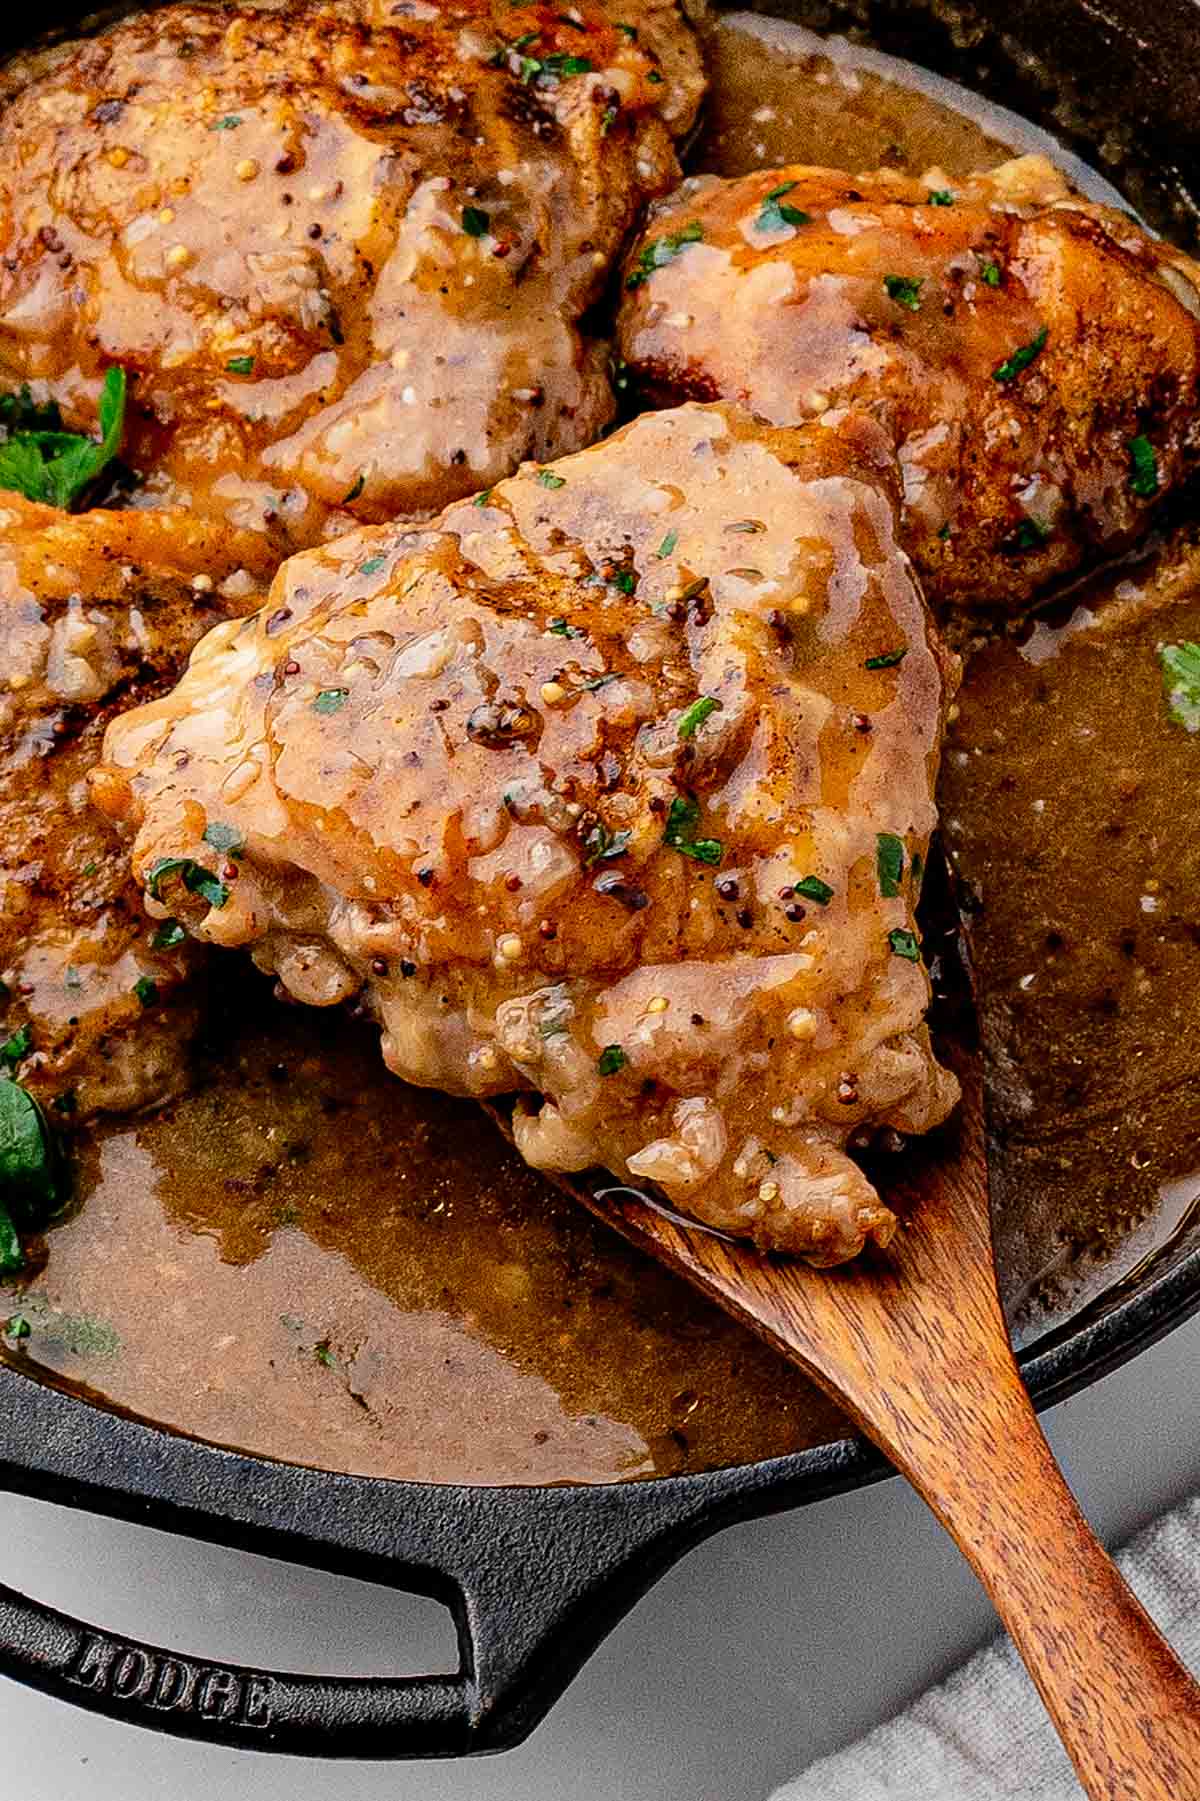
- Add the chicken back: nestle the chicken thighs back into the skillet skin-side up. The liquid should come about halfway up the chicken, but don't completely cover the skin. We want that beautiful crispy skin to stay exposed.
- Braise: Transfer the skillet to a 375°F oven and cook for about 30-35 minutes, or until the chicken reaches an internal temperature of 165°F. For even more golden, crispy skin, you can turn the broiler on for the final 1-2 minutes. Just watch it closely so that skin can go from gorgeous to oops very quickly.
Finish the Sauce
- Finish the sauce: carefully remove the chicken from the skillet and place it on a plate. Place the skillet over medium heat and let the sauce simmer for about 5 minutes, or until it has reduced slightly and coats the back of a spoon. Stir in the butter until melty and silky. Taste and adjust the seasoning if needed. Return the chicken to the skillet and spoon some of that gorgeous sauce around the thighs. Finish with fresh parsley and serve immediately.
Tips for Braised Chicken That Stays Crispy
Crisp skin depends on a handful of small decisions, mostly about how much moisture stays near the skin. These two sections cover the questions I think people will have most often.
Doneness: 165°F vs 175°F
The USDA minimum safe temperature for chicken is 165°F, and this recipe uses that as the baseline. Thigh meat is dark meat, though, and it has more connective tissue than breast. At 165°F it's safe and juicy, but at around 175°F it's usually more tender and easier to pull from the bone.
Because these thighs sit in hot sauce, they won't dry out the way breasts do. If yours reads 165°F and feels a little firm near the bone, give it another 5-10 minutes in the oven. In my case, all I had to do is put them back in the oven for the entire 10 minutes.
Fixing Thin, Thick, or Bitter Sauce
Thin sauce means it needs more time on the stove. Keep it at a gentle simmer, because a hard boil can make the butter separate later.
Thick sauce is easy: add chicken broth a spoonful at a time until it loosens. Stir between additions so you can see the texture change.
For bitter sauce, start by adding a splash of broth and simmering a few more minutes to dilute it. A little cream will also soften the edges. If it still tastes sharp, a tiny pinch of sugar or a drop of honey can balance it. I haven't made that adjustment in this recipe, so taste as you go and add it slowly.
Variations
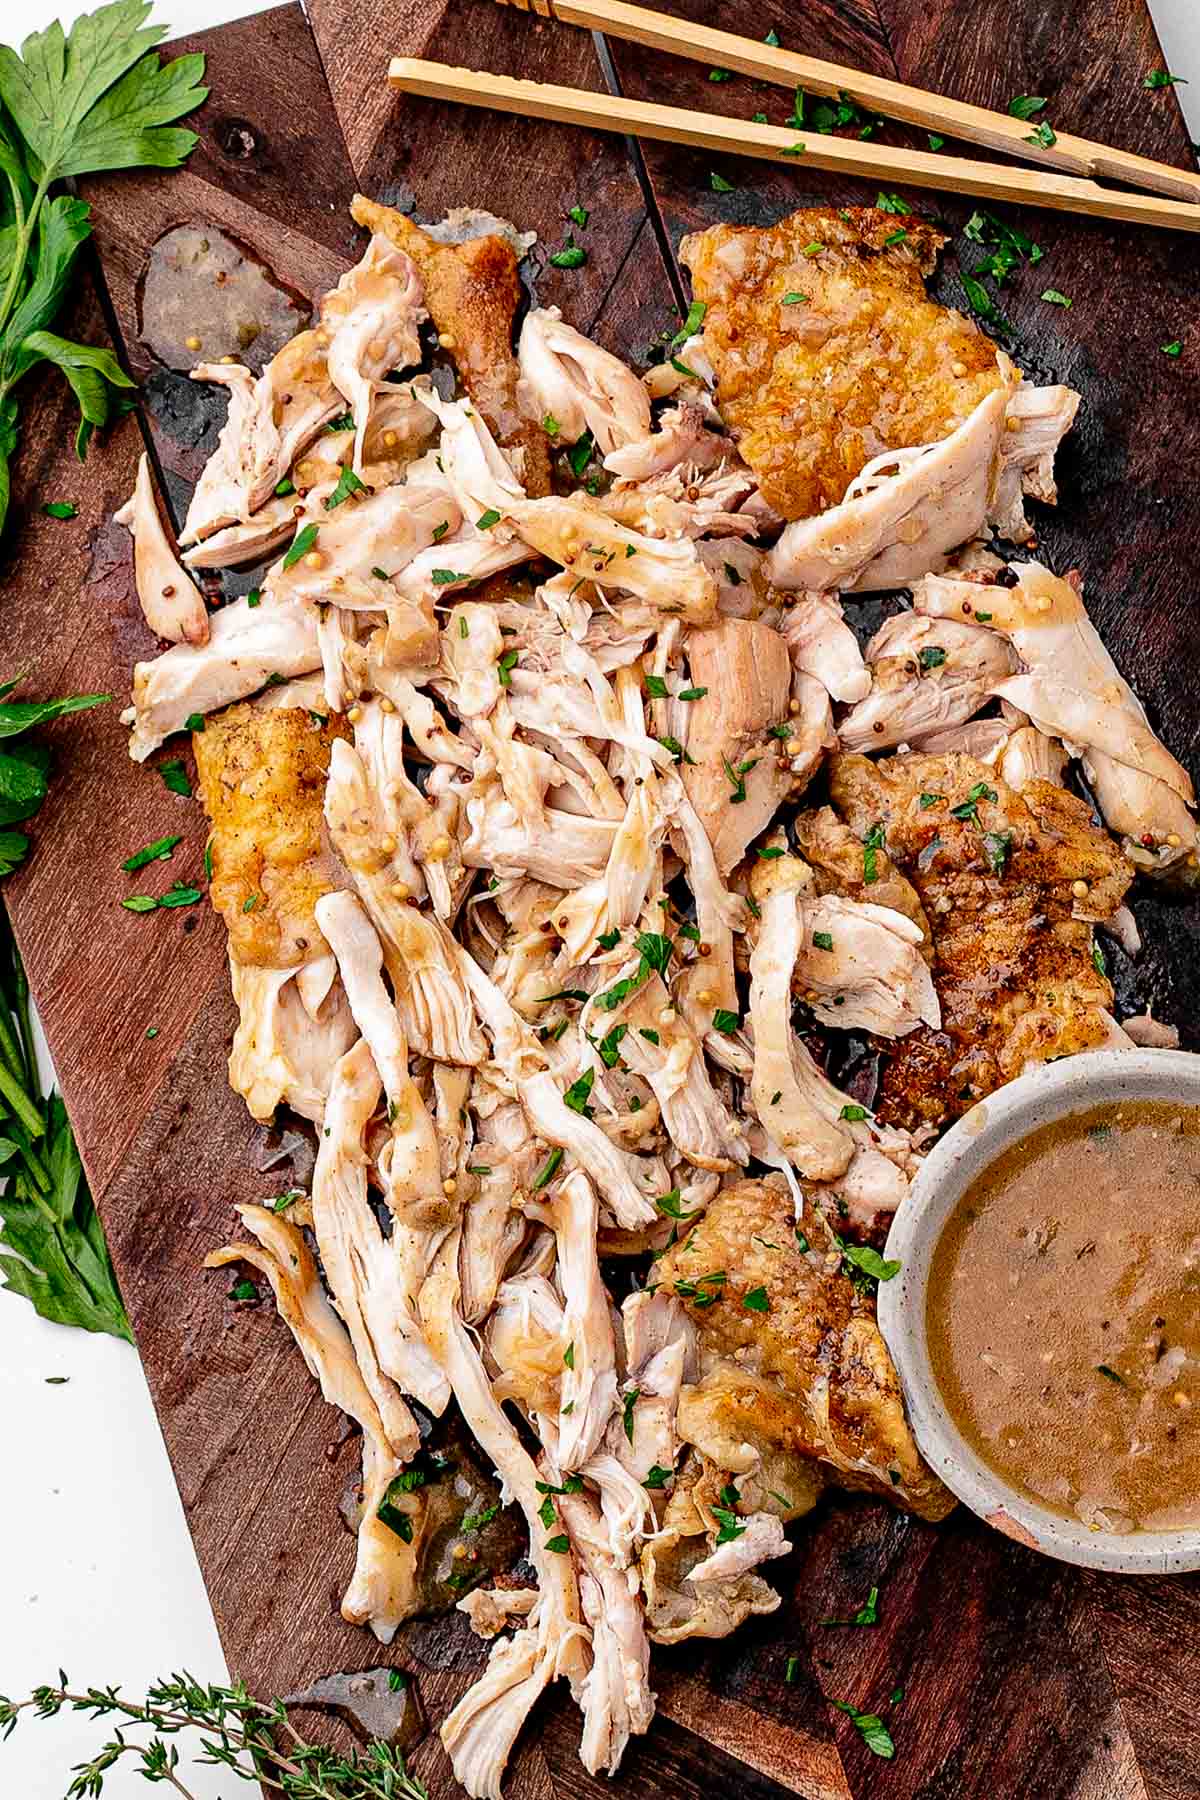
- Boneless, skinless thighs: reduce the cooking time since they cook faster.
- Vegetable broth can be used in a pinch.
- Whole grain mustard works too. Use ½ teaspoon dried thyme if that's all you have.
- Gluten-free: use a gluten-free all-purpose flour blend.
- Mushrooms: add 8 ounces of sliced cremini or baby bella mushrooms after cooking the onions. Let them brown before adding the garlic.
- Extra onion: use two large onions and cook them slowly until golden before adding the garlic.
- Herby: add extra fresh thyme, rosemary, and a little chopped fresh parsley to the sauce.
- Bacon: cook 4-6 slices of chopped bacon in the skillet before browning the chicken. Remove the bacon, brown the chicken in the rendered fat, then add the bacon back into the sauce.
- Apple cider: replace ½ cup of the chicken broth with apple cider and add a thinly sliced apple with the onions.
- Spicy: add ½ teaspoon crushed red pepper flakes or finely chopped jalapeno with the garlic, or a pinch of cayenne.
- Cream: stir ¼-⅓ cup heavy cream into the sauce after removing the chicken. Simmer gently a few minutes until slightly thickened. Don't let it boil aggressively.
- No alcohol: replace the beer with additional chicken broth.
Serving Ideas
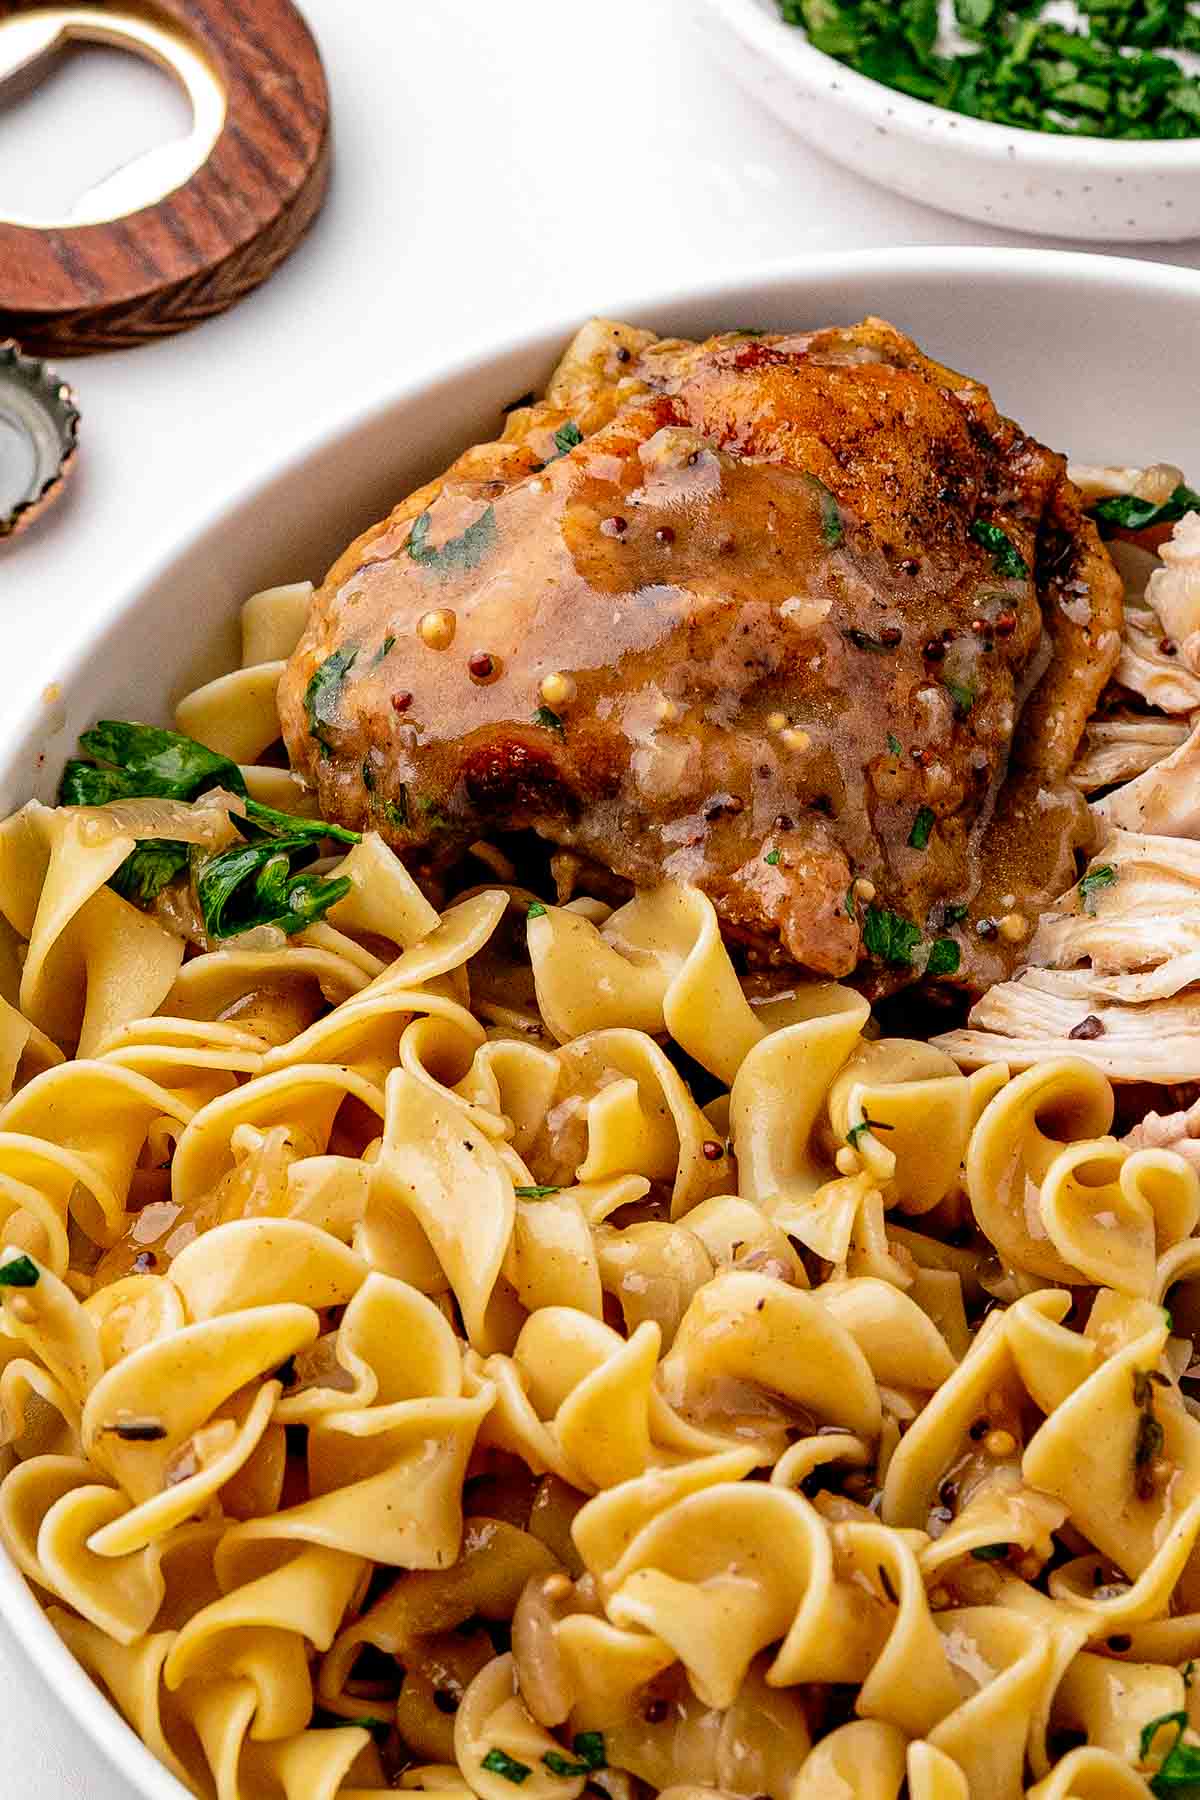
Instant pot mashed potatoes, buttered egg noodles, Creamy Garlic Potatoes, roasted baby potatoes, crusty Dutch oven bread, creamy polenta, honey roasted carrots, green beans, a simple arugula salad.
Tips for the Best Braised Chicken Thighs
For crispy skin
- Dry the chicken really, really well. Moisture is the enemy of crispy skin.
- Don't rinse it. Rinsing adds water to the skin, and I'd rather not fight that.
- Leave the thighs alone while they brown. I know it's tempting to poke them, but the skin needs time to build that gorgeous crust.
- Brown in two batches if the skillet looks crowded. Thighs packed edge to edge steam instead of sear.
- Keep the skin side up during braising, and never cover the skillet. A lid or foil traps steam and softens the skin.
- If the thighs leave more than a few tablespoons of fat in the pan, spoon off the extra before adding the onions.
For the sauce
- Let the beer foam settle for a few seconds before you add the broth. It makes the pan easier to scrape.
- Scrape gently and leave some browned bits behind. They flavor the sauce without making it gritty.
- If the sauce is too thin, simmer it a little longer after removing the chicken.
- If it's too thick, add a splash of chicken broth.
For doneness and safety
- An instant-read thermometer is the easiest way to know the chicken is done.
- 165°F is the safe minimum, but I like thighs at about 175°F. If yours hit 165°F and still feel firm, give them another 5-10 minutes.
- The skillet handle will be very hot coming out of the oven. Drape a towel over it so nobody grabs it by mistake.
Make Ahead and Storage
- Freezer: Cool completely and freeze for up to 3 months. Thaw overnight in the refrigerator and reheat gently on the stovetop or in the oven. The skin won't be as crisp, but the chicken and sauce will still be delicious.
- Make ahead: Make the whole recipe up to 1 day ahead, cool it, and refrigerate in an airtight container. Reheat gently in a covered skillet over medium-low heat.
- Re-crisp: Move the chicken to a baking sheet and heat it uncovered in a 400°F oven for several minutes.
- Fridge: Leftovers keep in an airtight container for up to 4 days.
More Chicken Thigh Recipes
If you're in a chicken thigh mood, these are good next stops:


Comments
No Comments